Venkon XL
Beschreibung
Assembly, installation and operating instructions
56
Fig. 52: Inserting the service hatch
Assemble the service hatch in reverse order. When inserting the service hatch,
make sure that the ball studs are inserter properly into the housing.
10.3.2 Replacing the filter.
CAUTION!
Risk of injury from sharp metal housing!
The inner metal of the casing can have sharp edges.
Wear suitable protective gloves.
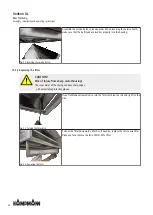
Fig. 53: Turning the filter latch
Use a flat-bladed screwdriver to turn the filter latch (on the left and right) to the
side.
Fig. 54: Removing the filter
Pull out the filter downwards. Wash or, if need be, replace the ISO Coarse filter.
Dispose of and replace the ISO ePM10>50% filter.
Содержание Venkon XL
Страница 2: ......
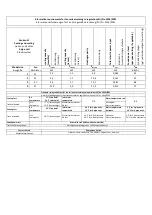
Страница 5: ...5 13 2 ERP Datenblatt Venkon XL 70...
Страница 67: ...Venkon XL Beschreibung Assembly installation and operating instructions 67 13 Certificates...
Страница 73: ......
Страница 74: ......
Страница 75: ......
Страница 76: ...www kampmanngroup com hvac products fan coils venkon xl 02 20 ENSAP Nr 1374732...

