16
4. Elevate the latch until the PXIe-63935 is fully seated in the chassis backplane.
5. Fasten the four mounting screws on the front panel of PXIe-63935, and connect all
peripheral devices.
2�2�4 Replacing the Hard Drive or Solid State Drive
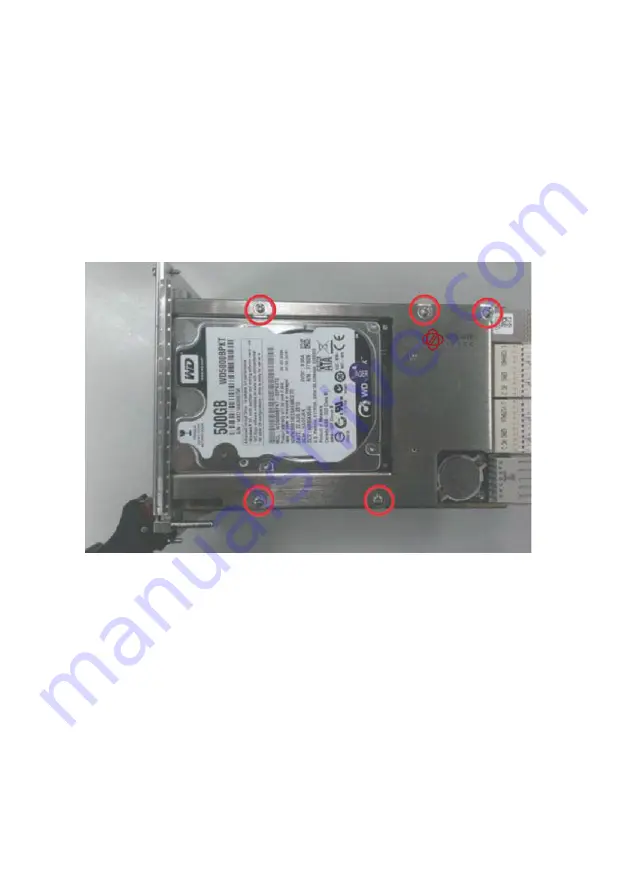
The PXIe-63935 provides a SATA 2.0 port with a pre-installed 2.5” SATA hard drive or solid
state drive. Replacing the HDD or SSD is accomplished as follows.
1. Locate the five screws attaching the drive to the bracket on the side of the PXIe-63935.
2.Remove the screws, as shown.
3. Gently lift and remove the SATA HDD or SSD
4. To install a HDD or SSD or other compatible SATA harddrive, reverse the steps and
reinstall the PXIe-63935 into the PXIe system.
2�2�5 Replacing the Battery Backup
The PXIe-63935 is provided with a 3.0 V “coin cell” lithium battery, replacement of which
is as follows.
1. Turn off the PXIe chassis.
2. Remove the PXIe-63935 embedded controller from the chassis. Observe all anti-
static precautions.
3. To remove the battery, gently insert a small (approx. 5 mm) flathead screwdriver
under the battery at the negative retaining clip. Gently pry up and the battery should
easily pop out.


