background image

     1.   


    2.*   


 3. 

GETTING STARTED 


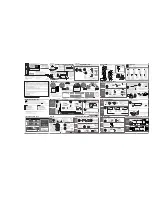
Installing the Batteries 

1. 

Remove the battery cover on the back of the unit. 

2. 

Install two (2) R03/AAA batteries (not included).* 

3. 

Replace the battery cover.  


Notes:

 Make sure the polarity (+/-) 

of the batteries matches the marks 
inside the battery compartment. Do 
not mix old and new batteries, carbon 
and alkaline. Remove batteries when 
the product is not in use for extended 
periods of time. 


Power ON 

Note:

 The JD-VR200/400 enters the date setting mode immediately upon powering ON for the 

first time. See instructions for Setting the Date elsewhere in the manual. 

 Press 

PLAY

   to turn on the unit. 


Power OFF 

1. 

Press and hold 

STOP


to power OFF the unit 

2. 

The unit will also power OFF automatically if left idle for three (3) minutes. 

3. 

The time will continue to display on the screen even when the power is turned OFF. 
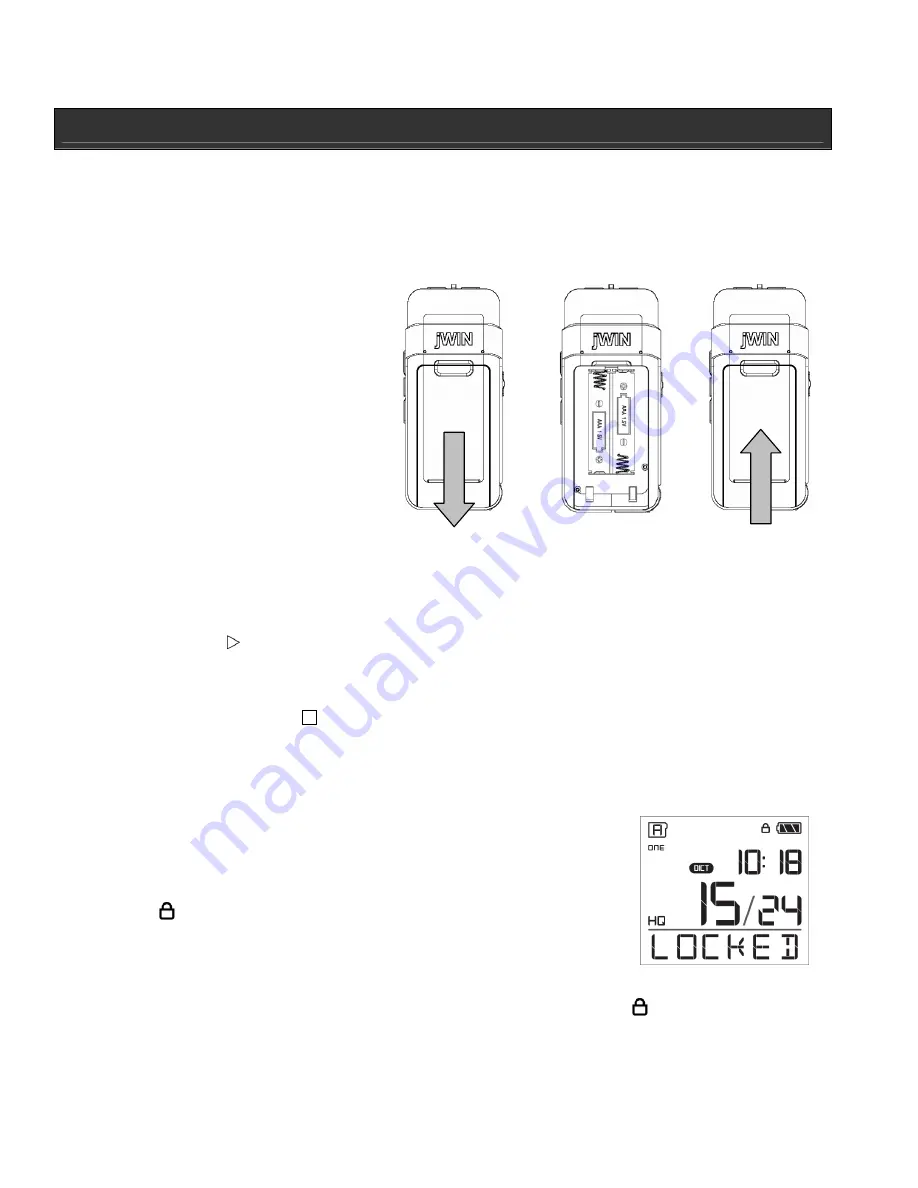
 

Key Lock Function 


To disable the controls, slide the 

HOLD

 switch and the word 

“LOCKED” will flash briefly on the LCD screen. This is the key 
lock function. 

 The 

 icon will appear in the top right corner of the LCD 

screen. 


While the key lock function in enabled, the word “LOCKED” will 
blink briefly on the screen each time a button is pressed. 


To disable the key lock function, slide the 

HOLD

 switch and the 

 icon disappears. 


All buttons will return to their normal function. 

Содержание JD-VR200

Страница 1: ...Digital Voice Recorder JD VR200 400 Instruction Manual Please read this manual carefully before operating and save it for future reference Have a question Please visit http www jWIN com...

Страница 2: ...in high quality microphone for clear recording Three different recording options HQ SP LP Four voice folders let you save up to 99 messages per folder VAR Voice Activated Recording Fast and slow play...

Страница 3: ...OLDER BOOKMARK 11 REC 16 OK MENU 2 Microphone jack 7 ERASE 12 STOP 17 VOL 3 Speaker 8 RECORDING QUALITY 13 PLAY 18 4 LCD screen 9 USB plug 14 VOL 19 Battery compartment 5 HOLD switch 10 Built in Micro...

Страница 4: ...e Date elsewhere in the manual Press PLAY to turn on the unit Power OFF 1 Press and hold STOP to power OFF the unit 2 The unit will also power OFF automatically if left idle for three 3 minutes 3 The...

Страница 5: ...menu 6 Press STOP to exit menu Recording Condition CONF conference is used in more open areas where the recording source is far from the recorder DICT dictation is used is a more closed setting when t...

Страница 6: ...begins with slight sound while LOW Recording requires louder sound Note When no sound triggers the VAR for three 3 seconds recording will stop until sound triggers activation again Using VAR 1 Press...

Страница 7: ...s STOP to exit menu Backlight To light backlight for seven 7 seconds each time a button is pressed the Backlight function must be activated 1 Press and hold OK MENU for two 2 seconds to enter menu 2 R...

Страница 8: ...o to next menu or press STOP to exit menu Setting the Time 1 Press and hold OK MENU for two 2 seconds to enter menu 2 Repeatedly press or until TIME displays on LCD press OK MENU 24HOUR or 12 HOUR wil...

Страница 9: ...s OK MENU 3 If no button is pressed for 3 minutes the unit will enter power OFF mode Recording Mode Setting Recording Mode Choose from two 2 recording modes manual recording and VAR 1 In stop mode sel...

Страница 10: ...file 3 Press PLAY to begin playback 4 Press STOP once to pause playback and press PLAY to resume 5 File information can be shown by pressing OK MENU while playing such as Date and Time of Recording B...

Страница 11: ...o stop Intro Scan and play current track or press STOP to stop intro scan Bookmarks Creating a Bookmarks This feature allows you to create a quick reference point in a recorded message PL ONE mode onl...

Страница 12: ...inking Cut Mode Erase unwanted parts from a recording available in PL ONE mode only 1 Start playback of the file with the unwanted part 2 Press ERASE once to mark the beginning of the unwanted part CU...

Страница 13: ...m and erase all files in a selected folder 4 All files in a selected folder will be deleted Pressing STOP or pressing no button for five 5 seconds will also cancel erasing Format You can format the in...

Страница 14: ...PC SYNC In this mode unit will not turn on Notes The USB connection will not charge the unit It serves as data transfer only Be sure the unit is turned OFF before connecting to your PC When uploading...

Страница 15: ...sh Connectivity 3 5mm mic jack 3 5mm headphone jack USB built in plug Power Requirement Battery 3V 2 x AAA not included System Requirements MS windows 98 ME 2000 XP Vista Unit Dimensions W x H x D 1 8...

Страница 16: ...a person The exclamation point within an equilateral triangle is intended to alert the user to the presence of important operating maintenance and servicing instructions in the literature accompanyin...

Страница 17: ...appliance and in the operating instructions should be observed 4 FOLLOW INSTRUCTIONS All operating and use instructions should be followed 5 WATER AND MOISTURE The appliance should not be used near wa...

Страница 18: ...es may cause the appliance and cart combination to overturn 16 WALL OR CEILING MOUNTING If the appliance is mounted to a wall or ceiling it should be mounted only as recommended by the manufacturer 17...

Страница 19: ...e unit Always refer servicing to a qualified technician IC NOTICE CANADA This digital apparatus does not exceed the Class B limits for radio noise emissions from digital apparatus as set out in the Ra...

Отзывы: