background image

Filename [XV48EK_03Safety.fm]

Masterpage:Left0

2

Page 2

November 18, 2004 10:44 pm

SAFETY FIRST

Safety Precautions

The rating plate and the safety caution are on the rear of the unit.

WARNING: DANGEROUS VOLTAGE INSIDE
WARNING: TO PREVENT FIRE OR SHOCK HAZARD, DO NOT 

EXPOSE THIS UNIT TO RAIN OR MOISTURE.

CLASS 1 LASER PRODUCT
REPRODUCTION OF LABELS

WARNING LABEL INSIDE OF THE UNIT

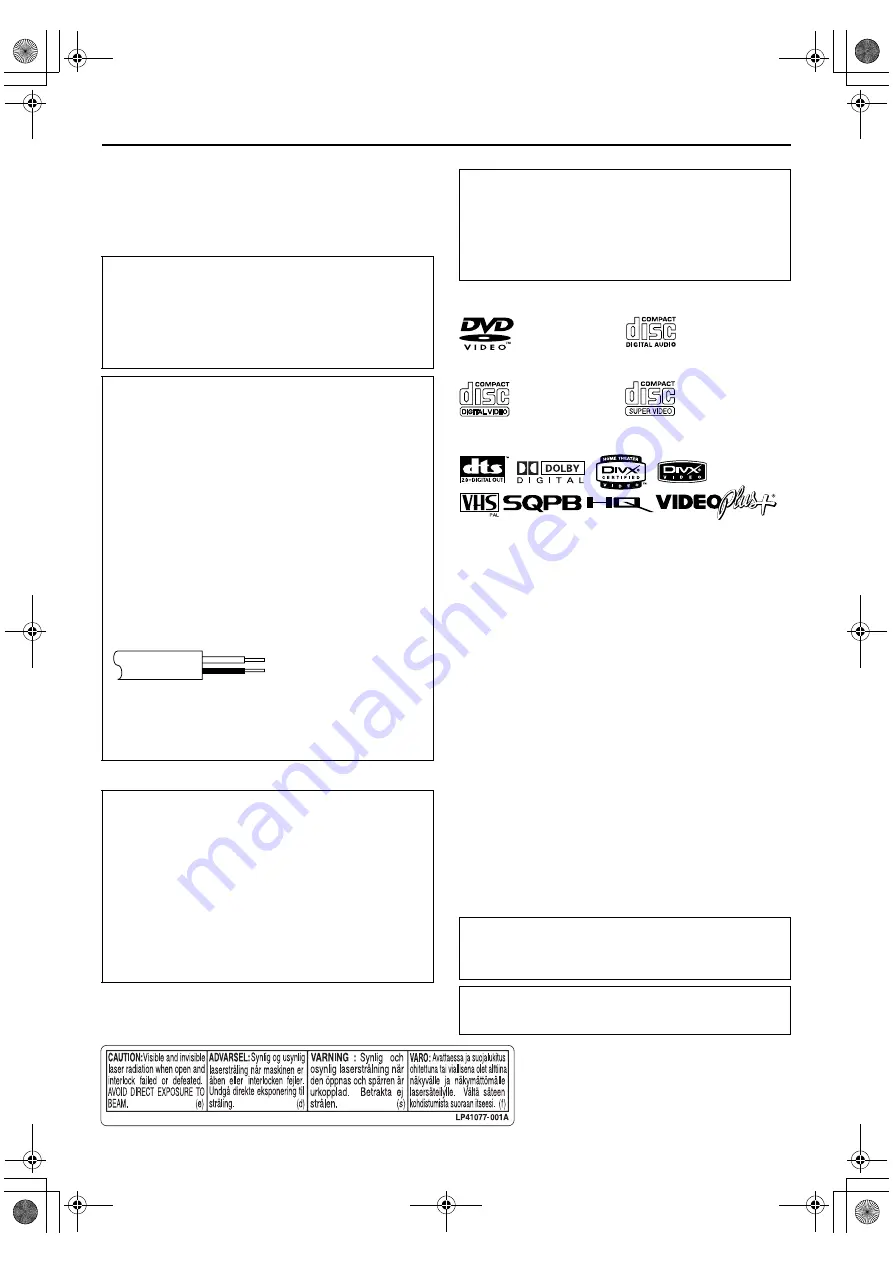
Use only discs marked with the following.

Manufactured under license from Dolby Laboratories. “Dolby” 
and the double-D symbol are trademarks of Dolby 
Laboratories.

“DTS”and “DTS 2.0+ Digital Out” are trademarks of Digital 
Theater Systems, Inc.

Cassettes marked “VHS” (or “S-VHS”) can be used with this 
video cassette recorder. However, S-VHS recording is not 
possible with this model.

This model is equipped with SQPB (S-VHS QUASI PLAYBACK) 
that makes it possible to play back S-VHS recordings in the SP 
mode with regular VHS resolution.

HQ VHS is compatible with existing VHS equipment.

VIDEO Plus+ and PlusCode are registered trademarks of 
Gemstar Development Corporation. The VIDEO Plus+ system 
is manufactured under license from Gemstar Development 
Corporation.

This product incorporates copyright protection technology that 
is protected by U.S. patents and other intellectual property 
rights. Use of this copyright protection technology must be 
authorized by Macrovision Corporation, and is intended for 
home and other limited viewing uses only unless otherwise 
authorized by Macrovision. Reverse engineering or 
disassembly is prohibited.

“Official DivX Certified™ product”
“Plays DivX

®

 5, DivX

®

 4, DivX

®

 3, and DivX

®

 VOD video 

content (in compliance with DivX Certified™ technical 
requirements)”
“DivX, DivX Certified, and associated logos are trademarks of 
DivXNetworks, Inc. and are used under license.”

CAUTION

8

When you are not using the unit for a long period of time, it 
is recommended that you disconnect the power cord from 
the mains outlet.

8

Dangerous voltage inside. Refer internal servicing to 
qualified service personnel. To prevent electric shock or fire 
hazard, remove the power cord from the mains outlet prior 
to connecting or disconnecting any signal lead or aerial.

IMPORTANT

Connection to the mains supply in the United Kingdom.
DO NOT cut off the mains plug from this equipment. 

If the 

plug fitted is not suitable for the power points in your home or 
the cable is too short to reach a power point, then obtain a 
proper safety approved extension lead/adapter or consult your 
dealer.

In the unlikely event of the plug fuse failing be sure to replace 
the fuse only with an identical approved type, as originally 
fitted, and to replace the fuse cover. If the fuse fails again 
consult your nearest JVC dealer.

If nonetheless the mains plug is cut off remove the fuse and 
dispose of the plug immediately, to avoid a possible shock 
hazard by inadvertent connection to the mains supply. 
If this product is not supplied fitted with a mains plug then 
follow the instructions given below:

DO NOT

 make any connection to the Larger Terminal coded E 

or Green. 
The wires in the mains lead are coloured  in accordance with 
the following code:

If these colours do not correspond with the terminal 
identifications of your plug, connect as follows:
Blue wire to terminal coded N (Neutral) or coloured Black.
Brown wire to terminal coded L (Live) or coloured Red.

If in doubt — consult a competent electrician.

CAUTION

A DVD/VCR IS A CLASS 1 LASER PRODUCT. HOWEVER THIS 

DVD/VCR USES A VISIBLE LASER BEAM WHICH COULD 

CAUSE HAZARDOUS RADIATION EXPOSURE IF DIRECTED. 

BE SURE TO OPERATE THE UNIT CORRECTLY AS 

INSTRUCTED.

WHEN THIS DVD/VCR IS PLUGGED INTO THE WALL 

OUTLET, DO NOT PLACE YOUR EYES CLOSE TO THE 

OPENING OF THE DISC TRAY AND OTHER OPENINGS TO 

LOOK INTO THE INSIDE OF THIS DVD/VCR.

USE OF CONTROLS OR ADJUSTMENTS OR PERFORMANCE 

OF PROCEDURES OTHER THAN THOSE SPECIFIED HEREIN 

MAY RESULT IN HAZARDOUS RADIATION EXPOSURE.

DO NOT OPEN COVERS AND DO NOT REPAIR YOURSELF. 

REFER SERVICING TO QUALIFIED PERSONNEL.

Blue to N (Neutral) or Black
Brown to L (Live) or Red

IMPORTANT

8

Please read the various precautions on pages 2 and 3 before 

installing or operating the unit.

8

It should be noted that it may be unlawful to re-record pre-
recorded tapes, DVDs, or discs without the consent of the 
owner of copyright in the sound or video recording, 
broadcast or cable programme and in any literary, dramatic, 
musical, or artistic work embodied therein.

DVD VIDEO

(8 cm /12 cm disc)

Audio CD

(8 cm /12 cm disc)

Video CD

(8 cm /12 cm disc)

Super Video CD

(8 cm /12 cm disc)

The STANDBY/ON 

1

 button does not completely shut off 

mains power from the unit, but switches operating current on 
and off. “

`

” shows electrical power standby and “

!

” shows 

ON.

Video tapes recorded with this unit in the LP (Long Play) mode 
cannot be played back on a single-speed video recorder. (VHS 
deck only)

XV48EK_01.book  Page 2  Thursday, November 18, 2004  10:45 PM

Содержание HR-XV48EF

Страница 1: ...Filename XV48EK_02Cov1 fm DVD PLAYER VIDEO CASSETTE RECORDER INSTRUCTIONS LPT0991 001A HR XV48EK XV48EK_01 book Page 1 Thursday November 18 2004 10 45 PM ...

Страница 2: ...he cable is too short to reach a power point then obtain a proper safety approved extension lead adapter or consult your dealer In the unlikely event of the plug fuse failing be sure to replace the fuse only with an identical approved type as originally fitted and to replace the fuse cover If the fuse fails again consult your nearest JVC dealer If nonetheless the mains plug is cut off remove the f...

Страница 3: ...to be assured DO read the operating instructions before you attempt to use the equipment DO ensure that all electrical connections including the mains plug extension leads and interconnections between pieces of equipment are properly made and in accordance with the manufacturer s instructions Switch off and withdraw the mains plug when making or changing connections DO consult your dealer if you a...

Страница 4: ...ng 26 Automatic Satellite Programme Recording 28 OPERATIONS ON DVD DECK 30 Basic Playback 30 Playback Features 31 Using the On Screen Bar 38 Audio Video Files Playback 40 EDITING VHS DECK 44 Editing from a Camcorder 44 Editing to or from Another Video Recorder 45 Dubbing from DVD to VHS 46 EDITING DVD DECK 47 Digital Audio Dubbing 47 REMOTE CONTROL 48 Remote Control Functions 48 SYSTEM CONNECTIONS...

Страница 5: ...it is 2 Only discs whose region number includes 2 can be played back such as shown below Examples of DVD VIDEO labels which can be played back using this unit DVD VIDEO Marks Sometimes marks are printed on a DVD disc and or on its packaging to indicate information regarding the contents and functions of a disc Check marks indicating the contents and functions of a disc Note however that in some ca...

Страница 6: ...is not in its groove it may be scratched or otherwise damaged To insert an 8 cm disc place it according to the inner groove 3 Press x on the DVD deck to close the disc tray Pressing 4 also closes the disc tray Playback begins automatically if an auto playback DVD disc is loaded Although the VHS deck is selected the DVD deck is selected automatically except when the VHS deck is in the timer mode or...

Страница 7: ... 21 22 O Rewind Button 3 墌 pg 18 19 32 P Fast Forward Button 5 墌 pg 18 19 32 Q Programme Button PR 墌 pg 21 R Automatic Satellite Programming Button SAT 墌 pg 28 Rear View A Region Number Label 墌 pg 5 B Mains Power Cord 墌 pg 11 C L 1 Input Output Connector L 1 IN OUT 墌 pg 11 45 50 D Audio Output Connectors AUDIO OUT L R E Antenna Input Connector ANTENNA IN 墌 pg 11 50 F Digital Audio Output Connector...

Страница 8: ...Mark B Operation Mode Indicators C Channel Position Number and Station Name Auxiliary Input Indicator L 1 L 2 F 1 or SAT When L 2 SELECT is set to SAT 墌 pg 54 SAT appears instead of L 2 D Clock Display E Current Day Month Year F Type of Broadcast 墌 pg 23 G PDC Indicator 墌 pg 24 26 VPS Video Programme System recording is not currently available in the U K and not possible with this unit H Tape Posi...

Страница 9: ...X Standby On Button 1 墌 pg 12 18 40 Y TV Muting Button 墌 pg 49 Audio Monitor Button A MONITOR 墌 pg 20 23 35 Z TV VCR Button 墌 pg 22 a TV Volume Button TV 墌 pg 49 b Weekly Button WEEKLY 墌 pg 25 27 c TV Programme Button TV PR 墌 pg 49 d Programme Button PR 墌 pg 21 26 e Date Button DATE 墌 pg 26 Subtitle Button SUBTITLE 墌 pg 34 Angle Button ANGLE 墌 pg 35 f Timer Button 墌 pg 25 26 27 g Menu Button MENU ...

Страница 10: ... pm INSTALLING YOUR NEW UNIT Check Contents CHECK ALL THE CONTENTS SHOWN BELOW 4 You are now ready to install your unit 墌 pg 11 DVD Player and Video Cassette Recorder RF Cable AA Batteries x 2 Infrared Remote Control Unit XV48EK_01 book Page 10 Thursday November 18 2004 10 45 PM ...

Страница 11: ...unit and the TV s aerial connector AV Connection 8To connect to a TV with AV input connectors If your TV is equipped with a 21 pin SCART connector perform AV connection to improve picture quality during tape playback A Connect the aerial unit and TV as per RF Connection B Connect an optional 21 pin SCART cable between the L 1 IN OUT connector on the rear panel of the unit and the TV s 21 pin SCART...

Страница 12: ... the unit the Auto Set Up function sets the tuner channels clock and Guide Program numbers automatically Before starting make sure of the following The TV aerial cable should be connected to the unit The unit s mains power cord should be connected to a mains outlet The TV should be set to its AV mode with AV connection 墌 pg 11 or UHF channel 52 with RF connection 墌 pg 11 Slide the TV VCR DVD switc...

Страница 13: ...rol B Perform Preset Download The AUTO SET T V LINK display appears on the TV screen C Set the video channel Set the video channel to off manually 墌 pg 64 ATTENTION You can use this function only with a TV offering T V Link etc Be sure to use a fully wired 21 pin SCART cable Compatible with TVs offering T V Link EasyLink Megalogic SMARTLINK Q Link or DATA LOGIC via fully wired 21 pin SCART cable T...

Страница 14: ... conditions station names may not be stored correctly and auto Guide Program Number Set may not work properly If the Guide Program numbers are not set properly when you timer record a TV programme using the VIDEO Plus system the unit will record a TV programme of a different station When programming the timer using the VIDEO Plus system be sure to check the desired channel is selected correctly 墌 ...

Страница 15: ...t and right edges of the pictures will not be shown on the screen E Select the signal type of the digital audio output Set this item correctly according to the logo on your amplifier or decoder Press rt to select the desired setting then press ENTER If you do not connect the unit to such a device press ENTER to finish the initial setting PCM ONLY Select this when connecting to an amplifier a decod...

Страница 16: ...Set Up menu screen D Select the mode E Select the mode setting Press rt to select the desired setting then press ENTER See Language Code List 墌 pg 17 F Return to the normal screen Press SET UP NOTE When the selected language is not available on the disc the disc s default menu language is played back Turn on the TV and select the video channel or AV mode Slide the TV VCR DVD switch on the remote c...

Страница 17: ...S PT QU RM Inupiak Indonesian Icelandic Hebrew Yiddish Javanese Georgian Kazakh Greenlandic Cambodian Kannada Korean KOR Kashmiri Kurdish Kirghiz Latin Lingala Laothian Lithuanian Latvian Lettish Malagasy Maori Macedonian Malayalam Mongolian Moldavian Marathi Malay MAY Maltese Burmese Nauru Nepali Dutch Norwegian Occitan Afan Oromo Oriya Panjabi Polish Pashto Pushto Portuguese Quechua Rhaeto Roman...

Страница 18: ...n on the TV and select the video channel or AV mode Slide the TV VCR DVD switch on the remote control to the right Clean the video heads using a dry cleaning cassette ECL 3F when Rough poor picture appears while a tape is played back The picture is unclear or no picture appears USE CLEANING CASSETTE appears on the screen only with O S D set to ON 墌 pg 53 NOTE The heads get dirty in the following c...

Страница 19: ...ing make sure the unit is in the Stop mode Activate Index Search Press 2 or 6 2 1 or 6 1 is displayed on the TV screen and search begins in the corresponding direction To access index codes 2 through 9 press 2 or 6 repeatedly until the correct index number is displayed Example To locate the beginning of B from the current position press 2 twice To locate the beginning of D from the current positio...

Страница 20: ...tracking NOTE When a new tape is inserted the unit enters the automatic tracking mode automatically Soundtrack Selection Your unit is capable of recording three soundtracks HI FI L HI FI R and NORM and will play back the one you select During Playback Pressing A MONITOR changes the soundtrack as follows NOTES HIFI L j h R should normally be selected In this mode Hi Fi stereo tapes are played back ...

Страница 21: ...e remote control the unit may not function properly F Pause Resume recording Press 9 Press 4 to resume recording You can select channel during the Record Pause mode G Stop recording Press 8 Then press x on the VHS deck to remove the cassette NOTE When the end of the tape is reached during recording the unit stops and 䡬 and blink on the front display panel Turn on the TV and select the video channe...

Страница 22: ...ing Instant Timer Recording or timer recording the unit is turned off and 䡬 and blink on the front display panel During Instant Timer Recording any other timer programmed recording won t start even if their start time has come In such a case the timer programmed recording starts if the end time of the timer programmed recording is set after the end of Instant Timer Recording after the Instant Time...

Страница 23: ...ng playback and recording and compensates to provide the highest possible playback and recording pictures You can set B E S T to ON or OFF to your preference 墌 pg 53 Playback The unit assesses the quality of the tape once you initiate playback The unit adjusts the playback picture quality based on the quality of the tape in use B E S T is active during automatic tracking bESt appears blinking on t...

Страница 24: ... OFF is displayed on the TV screen PDC is set to OFF 墌 PDC Recording on page 25 VPS Video Programme System recording is not currently available in the U K and not possible with this unit Before performing the VIDEO Plus Timer Programming Make sure that the unit s built in clock is set properly Insert a cassette with the safety tab in place The unit will come on automatically Turn on the TV and sel...

Страница 25: ... Perform steps A H C Set the satellite receiver to the appropriate channel before the selected programme begins D Leave the satellite receiver s power on PDC Recording Now available from some TV stations PDC Programme Delivery Control is a service designed to assure safe accurate timer recording With this system special code signals are transmitted together with the audio video signals These code ...

Страница 26: ... PDC number key 7 to select ON or OFF If VPS PDC ON is displayed on the TV screen PDC is set to ON If VPS PDC OFF is displayed on the TV screen PDC is set to OFF 墌 PDC Recording on page 25 VPS Video Programme System recording is not currently available in the U K and not possible with this unit J Return to the normal screen Press PROG or ENTER PROGRAM COMPLETED appears on the TV screen for about 5...

Страница 27: ...mme number will be recorded Check Cancel and Change Programmes A Disengage the timer mode Press then press 1 B Access the Programme Check screen C Access the Programme screen To cancel or change a programme D Cancel or change a programme Press to cancel a programme To change programme settings press the appropriate button START STOP DATE PR PDC number key 7 DAILY number key 8 WEEKLY number key 9 a...

Страница 28: ...ch you want to make changes is shown then press ENTER PROGRAM COMPLETED appears on the TV screen for about 5 seconds then the normal screen appears NOTE If the overlap is not yet solved or another overlap occurs with the timer programme setting after making the last correction on a programme the conflicting programmes will be shown on the Programme Check screen again Repeat the above steps again u...

Страница 29: ...ording is in progress For timer programming of the satellite receiver refer to the instruction manual of the satellite receiver Automatic Satellite Programme Recording is not possible if your satellite receiver does not have a timer Pressing the unit s 1 button while Automatic Satellite Programme Recording is in progress turns off the unit s power and disengages the Automatic Satellite Programme R...

Страница 30: ...of a Video CD SVCD with Playback Control PBC Function 墌 pg 31 D Pause playback Press 9 To resume normal playback press 4 E Stop playback Press 8 When RESUME 墌 pg 57 is ON or DISC RESUME the unit memorizes the position on the disc where you have interrupted playback To resume playback press 4 To stop playback completely press 8 again Press x on the DVD deck to open the disc tray then remove the dis...

Страница 31: ... the front display panel During playback Press RETURN 2 Start playback Press the appropriate number keys The unit starts playback of the selected item When NEXT or PREVIOUS appears on the TV screen Pressing 6 advances to the next page Pressing 2 returns to the previous page The method of the operation is different depending on the disc To cancel PBC Start playback by using the number keys instead ...

Страница 32: ...the same title Still Picture Frame By Frame Playback 1 Pause during playback Press 9 2 Activate frame by frame playback Press 9 to advance a still picture To resume normal playback press 4 Slow Motion During playback press 9 then press 3 for reverse slow motion playback or 5 for forward slow motion playback Each press of 5 changes the playback speed as follows 1 32 1 16 1 4 1 2 Each press of 3 cha...

Страница 33: ...o CD SVCD during playback with PBC disactivated A Access the on screen bar Press ON SCREEN twice The on screen bar appears on the TV screen B Select the menu item Press w e to move H to then press ENTER The following pop up window appears under the selected item C Select the repeat mode Press rt repeatedly to select A B D Select the start point Press ENTER at the beginning of the part you want to ...

Страница 34: ...ress ON SCREEN NOTES Some DVD VIDEO discs do not contain time information and it is not possible to use the Time Search function Time Search cannot be used during Programme and Random Playback Subtitle Selection You can select subtitle language During playback A Access the menu Press SUBTITLE The following pop up window appears on the TV screen Example DVD ENGLISH is selected out of 3 subtitle lan...

Страница 35: ...During playback A Access the menu Press A MONITOR The following pop up window appears on the TV screen Example ENGLISH is selected out of 3 audio languages recorded during DVD VIDEO playback B Select the audio language Press rt or A MONITOR repeatedly to select the desired audio language then press ENTER Each time you press the button the audio language changes The pop up window disappears if no o...

Страница 36: ... information remains To check the programme contents During playback press 8 Playback stops and the programme table appears on the TV screen You can also check the programme contents through the on screen bar during playback To clear the programme Press 8 while playback is stopped and the programme table appears on the TV screen To exit from Programme Playback After clearing the programme press ON...

Страница 37: ...lect the parameter Press rt repeatedly to select a parameter you want to adjust then press ENTER Adjust gradually and confirm picture appearance results are as preferred VFP menu disappears and the following pop up window appears on the TV screen E Adjust the parameter Press rt repeatedly to change the setting then press ENTER The current VFP settings appear again Repeat steps D and E to adjust ot...

Страница 38: ... bar Press ON SCREEN Basic Operation on the Menu Bar A Access the menu bar Press ON SCREEN twice The menu bar appears on the TV screen The currently selected item is highlighted B Select the menu item Press w e to move H to the item you want to work with then press ENTER After pressing ENTER When a pull down menu appears press rt to select the setting you want then press ENTER When a number entry ...

Страница 39: ...e language 8 Angle selection See also page 35 During playback selects a desired scene angle in a multi angle part Menu Bar Functions for SVCD Video CD Audio CD 8 Time mode selection Selects the time mode shown in the status bar and on the front display TIME Current track elapsed time REM Current track remaining time while in stop mode current track total time TOTAL Disc elapsed time T REM Disc rem...

Страница 40: ...nnot play back a picture of more than 5120 x 3413 pixels baseline JPEG or 2048 x 1536 pixels progressive JPEG For DivX files The unit supports DivX 5 x 4 x and 3 11 The unit supports the DivX files whose resolution is 720 x 480 pixels or less 30 fps and 720 x 576 pixels or less 25 fps Audio stream should conform to MPEG 1 Audio Layer 2 or MPEG Audio Layer 3 MP3 The unit does not support GMC Global...

Страница 41: ...M the magnification changes 2 times for DivX files available only during playback 1 5 and 2 times for JPEG files This function is not available for some JPEG files depending on their resolution size and JPEG format Rotating Reflecting a Still Picture While a still picture is played back Pressing w e rotates the picture by 90 Pressing r reflects the picture vertically Pressing t reflects the pictur...

Страница 42: ... Random Playback Select NORMAL in step B above Programme Playback A Change the playback mode Press w e to select the current playback mode on the Control display B Select the programme playback mode Press ENTER repeatedly to select PROGRAM C Select files Press rtw e to select the desired file then press ENTER Repeat step 3 until all the desired files are programmed To erase the last programmed fil...

Страница 43: ...display to your favorite image A Play back a JPEG file of your favorite image B Access the PICTURE menu screen Press SET UP then press w e to show the PICUTRE menu screen C Select BACKGROUND Press rt to select BACKGROUND then press ENTER D Select SAVE AS BACKGROUND Press rt to select SAVE AS BACKGROUND then press ENTER E Register your image Press rt to select YES then press ENTER The player starts...

Страница 44: ...ss VCR so that the VCR indicator lights up C Set the unit s input mode Press AUX number key 0 and or PR to select F 1 D Set the edit mode See PICTURE CONTROL on page 53 E Engage the Record Pause mode Use 4 3 or 5 to locate the point where you start recording then press and hold 9 and press 7 to engage the Record Pause mode F Start the camcorder Engage the Play mode of the camcorder G Start the uni...

Страница 45: ...L 2 IN DECODER connector depending on the connector being used When using another recorder as the recording deck refer to its instruction manual When using the L 2 IN DECODER connector set L 2 SELECT to A V 墌 pg 54 D Set the edit mode See PICTURE CONTROL on page 53 E Engage the Record Pause mode of the recording deck Locate the point where you start recording then engage the Record Pause mode F St...

Страница 46: ... the point where you want to start dubbing by pressing 4 5 or 3 D Start dubbing A little before the dubbing start point press and hold 7 then press 4 on the remote control dub lights on the front display panel E End dubbing Press 8 Be sure to press 8 while the VCR indicator lights up on the unit If you press 8 or x with the DVD deck selected the dubbing stopped but the opening screen is also recor...

Страница 47: ... Press 3 a little then press 4 to start playback D Press 9 to pause playback a little before the start point D Prepare the audio device for dubbing Select the input mode E Start dubbing A Press 4 to start playback on the DVD deck B Start recording on the audio device F End dubbing Stop recording on the audio device Then press 8 to stop playback on the DVD deck NOTES There may be a discrepancy of s...

Страница 48: ...er key 1 for A 2 for B 3 for C or 4 for D B Set the remote control code Press ENTER to set the code On the unit C Turn off the unit Press 1 D Display the code Press 4 on the unit for over 5 seconds while the unit is turned off The code currently set appears on the front display panel If the code displayed on the front display panel is different from the code set on the remote control go to step E ...

Страница 49: ...esponding button TV 1 TV VCR TV Volume TV PR TV Muting number keys For some JVC TVs you must press ENTER after having pressed the number keys Slide to the left Control Your JVC TV Using Additional Buttons Use the number keys and the p button or button to select the TV s channel The p button corresponds to the 1 digit 2 digit entry switching button often labelled of your TV s remote control With so...

Страница 50: ...o the instruction manual of the satellite receiver IMPORTANT When you set L 2 SELECT to SAT 墌 pg 54 it is possible to view a satellite broadcast with the TV set to its AV mode even if the unit is turned off When the unit is in Stop mode or recording press TV VCR on the remote control to turn off the VCR indicator on the front display panel If you turn on the unit when the satellite receiver s powe...

Страница 51: ... a dynamic range of more than 80 dB with regards to its Hi Fi audio capability It is recommended that you check the maximum level if you are going to listen to the Hi Fi audio signals through a stereo amplifier A sudden surge in the input level to the speakers may damage them Some speakers and televisions are specially shielded to prevent television interference If both are of the non shielded typ...

Страница 52: ... On the remote control Press VCR so that the VCR indicator lights up C Access the Main Menu screen Press SET UP D Access the Mode Set screen E Select the mode Press rt to move the highlight bar pointer to the item you want to change F Select the mode setting Press ENTER or e G Return to the normal screen Press SET UP Turn on the TV and select the video channel or AV mode Slide the TV VCR DVD switc...

Страница 53: ...on mode indicators may be disturbed depending on the type of tape being used 8 DIRECT REC ON OFF When this function is set to ON you can easily start recording the programme that you are watching on your TV Press and hold 7 and press 4 on the remote control or press 7 on the unit NOTES When you use the Direct Rec function be sure to use a TV offering T V LINK etc and connect a fully wired 21 pin S...

Страница 54: ...n this function is set to ON To watch recordings with close caption set this function to OFF 8 L 2 SELECT A V DECODER SAT Set L 2 SELECT to the appropriate mode depending on the type of appliance connected to the unit s L 2 IN DECODER connector A V To use this unit as the recording deck with the player connected to the L 2 IN DECODER connector or to use the satellite receiver connected to the L 2 ...

Страница 55: ...etting Press rt to select ON then press ENTER F Return to the normal screen Press SET UP LANGUAGE MENU LANGUAGE 墌 pg 16 AUDIO LANGUAGE 墌 pg 16 SUBTITLE 墌 pg 16 ON SCREEN LANGUAGE 墌 pg 15 PICTURE MONITOR TYPE 墌 pg 15 PICTURE SOURCE 墌 pg 56 SCREEN SAVER 墌 pg 56 BACKGROUND 墌 pg 56 AUDIO DIGITAL AUDIO OUTPUT 墌 pg 15 ANALOG DOWNMIX 墌 pg 56 D RANGE CONTROL 墌 pg 56 OUTPUT LEVEL 墌 pg 56 OTHERS RESUME 墌 pg...

Страница 56: ...splayed on the TV screen Audio Settings 8 DIGITAL AUDIO OUTPUT PCM ONLY DOLBY DIGITAL PCM STREAM PCM Set to the appropriate mode according to the type of the device connected to DIGITAL AUDIO OUT connector on the rear of unit It is not necessary to set this mode when you connect no device to the DIGITAL AUDIO OUT connector For more details refer to Initial Set Up for DVD Deck 墌 pg 15 8 ANALOG DOWN...

Страница 57: ... code is overwritten by a totally different new one for copyright protection purpose 8 PARENTAL LOCK Select this then press ENTER to show the PARENTAL LOCK menu screen for limiting playback by children Parental Lock This function restricts playback of DVD VIDEO discs which contains violent and other scenes according to the level set by the user Scenes which are limited by this function are not pla...

Страница 58: ...mbodia Kiribati Comoros Saint Kitts and Nevis Korea Democratic People s Republic of Korea Republic of Kuwait Cayman Islands Kazakhstan Lao People s Democratic Republic Lebanon LC LI LK LR LS LT LU LV LY MA MC MD MG MH ML MM MN MO MP MQ MR MS MT MU MV MW MX MY MZ NA NC NE NF NG NI NL NO NP NR NU NZ OM PA PE PF PG PH PK PL PM PN PR PT PW PY QA RE RO RU RW Saint Lucia Liechtenstein Sri Lanka Liberia ...

Страница 59: ... appear alternately for 8 seconds each To view the next page use the rt w e button on the remote control The Guide Program numbers will also be set automatically during Auto Channel Set F Return to the normal screen Press SET UP Using the Confirmation screen you can skip or add channel positions enter station names and perform other operations Refer to pages 60 61 for the procedures Depending on r...

Страница 60: ...e tuning or appears When L 2 SELECT is set to A V or SAT the DECODER setting cannot be changed 墌 pg 54 F Enter new channel information Press ENTER and the Confirmation screen appears Repeat steps C F as necessary G Close the Confirmation screen Press SET UP To change positions see Changing Station Channel Position 墌 pg 61 If you wish to set station names other than the ones registered in your unit...

Страница 61: ...e Confirmation screen appears If you make a mistake press w until the incorrect character begins blinking Then enter the correct character by pressing rt C Close the Confirmation screen Press SET UP NOTE The characters available for the station name ID are A Z 0 9 f I space maximum of 4 Fine Tuning a Stored Channel A Select the channel to fine tune Press rt w e until the channel you want to tune b...

Страница 62: ...isutvarpid S RTBF 1 RTBF 2 RTE 1 RTL RTL 2 RTP ANGL ARD ARTE BBC BBC1 BBC2 BLN1 BLN2 BORD BR1 BR3 BRT1 BRT2 CHLD CH CNN CHNL CNTR CH 4 CH 5 DRS DRTV DSF EURN EURO EURS FR1 FR2 FR3 GRNA GRMP HR1 HR3 HRT HTV ITV KABL LNDN MDR MTV N3 NDR1 NDR3 NED1 NED2 NED3 NET2 NRK N TV OKAN ORF1 ORF2 ORF3 OWL3 PRMI PR07 RAI1 RAI2 RAI3 RB1 RB3 RKPS RTB1 RTB2 RTE1 RTL RTL2 RTP STATION NAME ID SAT SAT 1 Scottish TV S...

Страница 63: ...olneston 62 55 59 65 52 Midlands Ridge Hill 22 28 25 32 35 Sutton Coldfield 46 40 43 50 37 The Wrekin 26 33 23 29 35 Waltham 58 64 61 54 35 North Belmont 22 28 25 32 56 Emley Moor 44 51 47 41 37 BBC1 BBC2 ITV CH4 CH5 North West Caldbeck 30 34 28 32 56 Winter Hill 55 62 59 65 48 North East Bilsdale West Moor 33 26 29 23 35 Chatton 39 45 49 42 Pontop Pike 58 64 61 54 68 Scotland Angus 57 63 60 53 Bl...

Страница 64: ...OTES If you set the unit to a channel which is occupied by a local station or has neighbouring channels that are occupied by local stations the picture reception quality will be affected and some interference noise will appear on the TV screen Be sure to select a vacant channel which has no broadcast on neighbouring channels If you cannot obtain the two vertical white bars clearly with any channel...

Страница 65: ... VHS deck only a difference of more than 3 minutes exists between the built in clock s time and the actual time the unit is in the Automatic Satellite Programme Recording mode 墌 pg 28 VHS deck only the unit is in the Power Save mode 墌 pg 54 VHS deck only L 2 SELECT is set to SAT 墌 pg 54 VHS deck only If Just Clock is set to ON the unit s clock is automatically adjusted at the start end of Summer T...

Страница 66: ...ears on the front display panel To release the child lock press and hold 1 on the remote control until the unit turns on NOTES When the child lock function is in use keep the remote control out of the children s reach Timer recording programmes will be performed even if the child lock function is activated Turn on the TV and select the video channel or AV mode Slide the TV VCR DVD switch on the re...

Страница 67: ...operation is prohibited on the placed disc The DVD deck is not selected On the unit Press VCR DVD repeatedly so that the DVD indicator lights up On the remote control Press DVD so that the DVD indicator lights up The operation is prohibited on the placed disc The disc s region number does not match that of the unit Use the discs whose region number includes ALL or 2 墌 pg 5 The disc s region number...

Страница 68: ...re the tab was removed L 1 L 2 or F 1 has been selected as the input mode Set to the desired channel The source another video recorder camcorder has not been properly connected Confirm that the source is properly connected All necessary power switches have not been turned on Confirm that all units power switches are turned on The input mode is not correct Set the input mode to L 1 L 2 or F 1 The c...

Страница 69: ... VHS deck then press TV VCR so that the VCR indicator disappears from the front display panel The camcorder s microphone is too close to the TV Position the camcorder so its microphone is away from the TV The TV s volume is too high Turn the TV s volume down Those channels have been designated to be skipped If you need the skipped channels restore them 墌 pg 60 Recording is in progress Press 9 to p...

Страница 70: ...ectors IN OUT x 1 IN DECODER x 1 RCA connectors VIDEO IN x 1 AUDIO IN x 1 AUDIO OUT x 1 VIDEO AUDIO DVD deck Signal system PAL Applicable disc DVD VIDEO DVD R Video format DVD RW Video format Video CD SVCD Audio CD CD DA CD R RW CD DA Video CD SVCD MP3 format JPEG DivX Frequency responce DVD 4 Hz 22 KHz CD 4 Hz 20 KHz S N Ratio 90 dB Wow and flutter Below Measurable Level Dynamic range 90 dB Outpu...

Страница 71: ...ACKGROUND 56 D RANGE CONTROL 56 DIGITAL AUDIO OUTPUT 15 56 DivX REGISTRATION 57 MENU LANGUAGE 16 MONITOR TYPE 15 56 ON SCREEN GUIDE 57 ON SCREEN LANGUAGE 15 OUTPUT LEVEL 56 PARENTAL LOCK 57 PICTURE SOURCE 56 RESUME 57 SCREEN SAVER 56 SUBTITLE 16 Mode Set VHS deck AUTO POWER OFF 54 AUTO SP LP TIMER 53 B E S T 53 DIRECT REC 53 L 2 SELECT 54 O S D 53 PICTURE CONTROL 53 POWER SAVE 54 VIDEO STABILIZER ...

Страница 72: ...Filename XV48EK_13Cov4 fm EN Page 72 November 23 2004 1 09 pm HR XV48EK Printed in China 1104STC MW BJ XV48EK_13Cov4 fm Page 72 Tuesday November 23 2004 1 09 PM ...

Отзывы: