EN
57
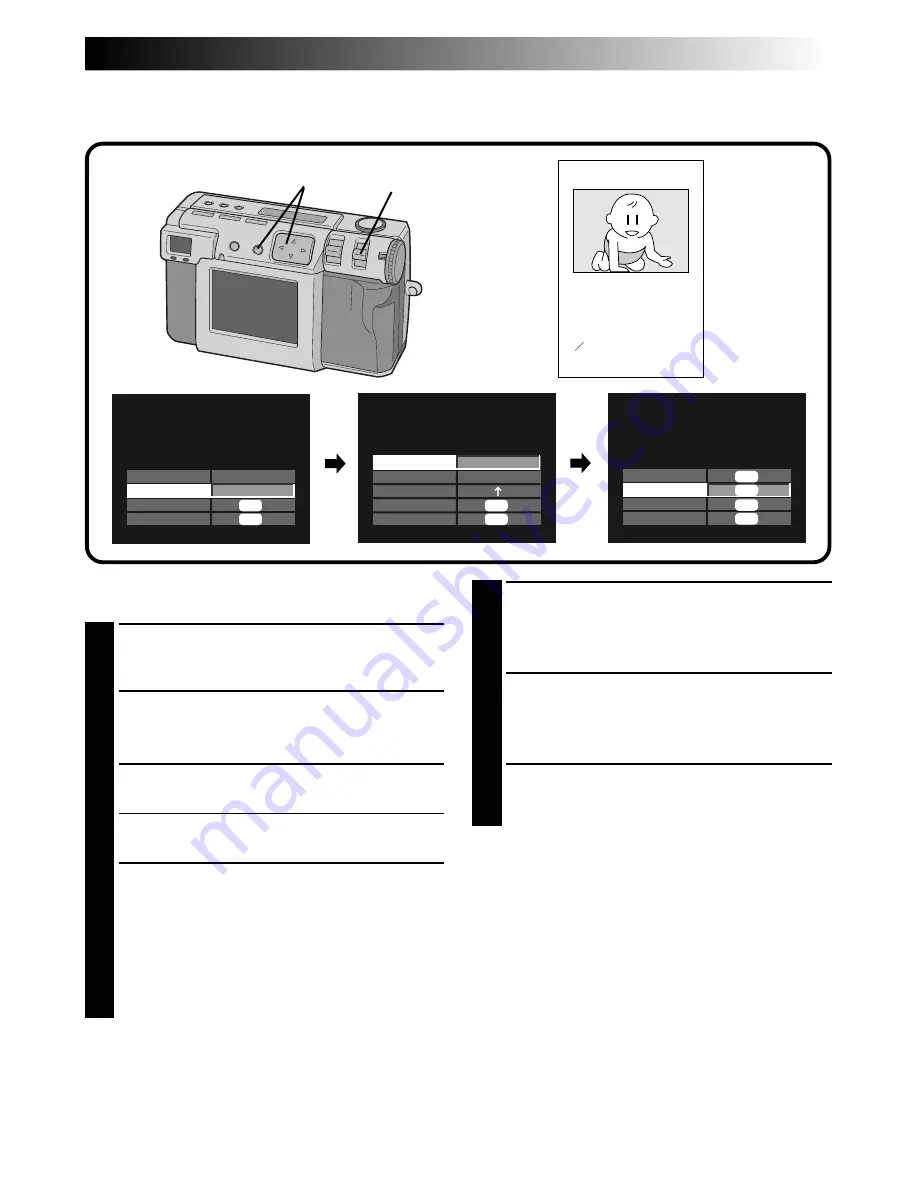
Inputting the Calendar
You can display the calendar when playing back or printing pictures on the optional printer.
1–7
Perform steps 1 – 3 on the page 54 before the
following procedures.
1
Press the
r
t
button to select “DATE”, and
then press the
w
e
button to select “CALEN-
DAR”.
2
Press the
r
t
button to select “NEXT”, and
then press the EXE button.
•The CALENDAR screen appears.
3
Press the
r
t
button to select “YEAR”, and
then press the
w
e
button to select the year.
4
Press the
r
t
button to select “MONTH”, and
then press the
w
e
button to select the month.
5
Press the
r
t
button to select “DIRECTION”,
and then press the
w
e
button to select the
direction of the picture.
•Press the
w
e
button repeatedly to cycle
through
↑
(up),
→
(right),
↓
(down) or
←
(left).
•Select the up side of the picture. (Refer to the
illustration in step 3 on page 56)
6
Press the
r
t
button to select “END”, and
then press the EXE button.
•“NOW EDITING” appears, then FILE screen
will appear.
7
Press the
r
t
button to select “OVERWRITE”
or “SAVE”, and then press the EXE button.
•You can print the file that you have added
special effects. (
Z
pg. 60)
8
Select “STILL PB” with the MODE switch, and
then confirm that the file has been saved.
(
Z
pg. 31)
NOTE:
●
Even if a part of the calendar cannot be seen on
the LCD screen, the edited image is saved
normally.
EDIT
EFFECT
DATE
NEXT
RETURN
OFF
CALENDAR
EXE
EXE
CALENDAR
YEAR
MONTH
DIRECTION
END
RETURN
2000
1
EXE
EXE
FILE
OVERWRITE
SAVE
CANCEL
EXE
EXE
EXE
EXE
8
4 2000
TUE
4
11
18
25
WED
5
12
19
26
THU
6
13
20
27
FRI
7
14
21
28
SAT
1
8
15
22
29
SUN
2
9
16
23
30
MON
3
10
17
24
Содержание GC X 1
Страница 1: ...GC X1 DIGITAL STILL CAMERA INSTRUCTIONS ENGLISH STILL CAMERA LYT0544 001C EN ...
Страница 10: ...10EN CONTROLS CONNECTORS AND INDICATORS 1 2 4 5 6 7 8 9 0 3 Front View Top View 1 4 2 3 ...
Страница 12: ...12EN 1 2 3 CONTROLS CONNECTORS AND INDICATORS cont 6 8 9 7 0 2 3 1 4 5 Rear View Bottom View ...
Страница 91: ...MEMO ...


