v
Precautions to be taken so as to use the ML-111 more safely
1. Keep your hands away from needle when you turn ON the power switch or while the
machine is in operation.
2. Do not put your
fi
ngers into the thread take-up cover while the machine is operat-
ing.
3. Turn OFF the power switch when tilting the machine head, or removing the belt
cover or the V belts.
4. During operation, be careful not to allow your or any other person’s head, hands or
clothes to come close to the handwheel and thread take-up lever. Also, do not place
anything close to them.
5. Do not operate your machine with the belt cover and
fi
nger guard removed.
6. When tilting the machine head, be sure to con
fi
rm that the head support bar is
properly attached to your machine head, and be careful not to allow your
fi
ngers or
the like to be pinched in the machine head.
1. To ensure safety, never operate the machine with the ground wire for the power
supply removed.
2. When inserting/removing the power plug, the power switch has to be turned OFF in
advance.
3. In time of thunder and lightening, stop your work and disconnect the power plug
from the receptacle so as to ensure safety.
4. If the machine is suddenly moved from a cold place to a warm place, dew conden-
sation may be observed. In this case, turn ON the power to the machine after you
have con
fi
rmed that there is no danger of water drops in the machine.
5. To
prevent
fi
res, periodically draw out the power plug from the plug socket and
clean the root of the pins and the space between pins.
6. The loopers oscillate at a high speed during operation.
Be sure to keep your hands away from the vicinity of the loopers to protect hands
from possible injury during operation. Turn the power OFF before threading the
machine head.
7. To avoid possible accidents due to abrupt start of the machine, be sure to turn OFF
the power to the machine.
8. Be careful of handling this product so as not to pour water or oil, shock by drop-
ping, and the like since this product is a precision instrument.
9. When tilting or returning the sewing machine to the home position, hold the upper
side of the machine head with both hands and perform the work quietly so that
fi
n-
gers or the like are not caught in the machine.
– 6 –
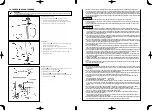
9. THREAD TENSION
Thread tension is adjusted by the tension nut.
1. Turn the tension nut clockwise for increasing the tension.
2. Turn the tension nut counterclockwise for reducing the tension.
* Reduce the tension of the tension spring No. 1 to the lowest to the
extent that it allows the thread to stably run. (0.01 to 0.02 N)
The tension spring No. 2 mainly controls the tension of the stitch for-
mation.
The tension spring No. 3 prevents stitches from forming irregular seam
on the bottom face of fabrics. If any irregular stitches are formed on
the bottom face of fabric, increase its tension to the extent not to from
puckering stitches instead.


