
69
67
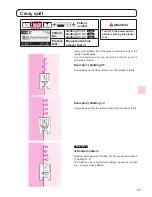
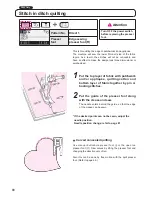
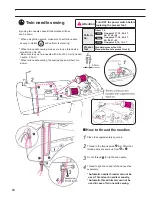
Stitch in ditch quilting
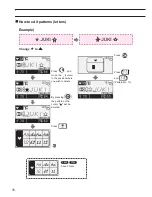
Pattern No. Direct 1
Presser
foot
Edge sewing
presser foot (R)
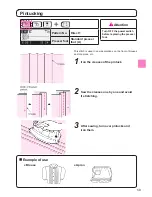
This is for quilting the edge of patchworks and appliqués.
The machine will sew the lower (thinner) side of the fabric
layers. As a result, the stitches will not be noticeable and
have an effect to make the design look three dimensional or
emphasized.
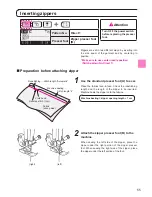
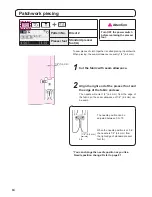
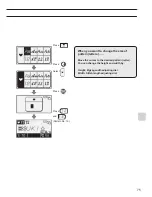
2
Put the guide of the presser foot along
with the crease and sew.
The needle enters behind the guide, so that the edge
of the crease can be sewn.
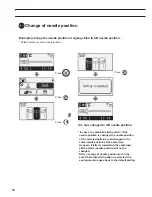
1
Put the top layer of fabric with patchwork
and/or appliqués, quilting cotton and
bottom layer of fabric together by pin or
basting stitches.
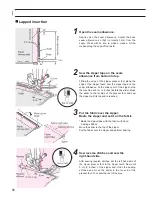
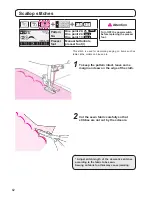
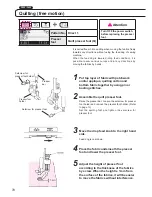
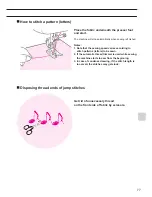
Curved concealed quilting
Use manual buttonhole presser foot (I) or the open toe
presser foot (O). Sew curves by lifting the presser foot and
changing the direction very often.
Also this can be done by free motion with the quilt presser
foot. (Refer to page 69.)
* If the desired points can not be sewn, adjust the
needle position.
Needle position change: refer to page 81
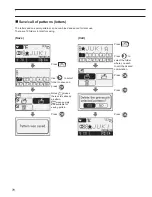
F600 Only
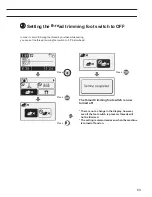
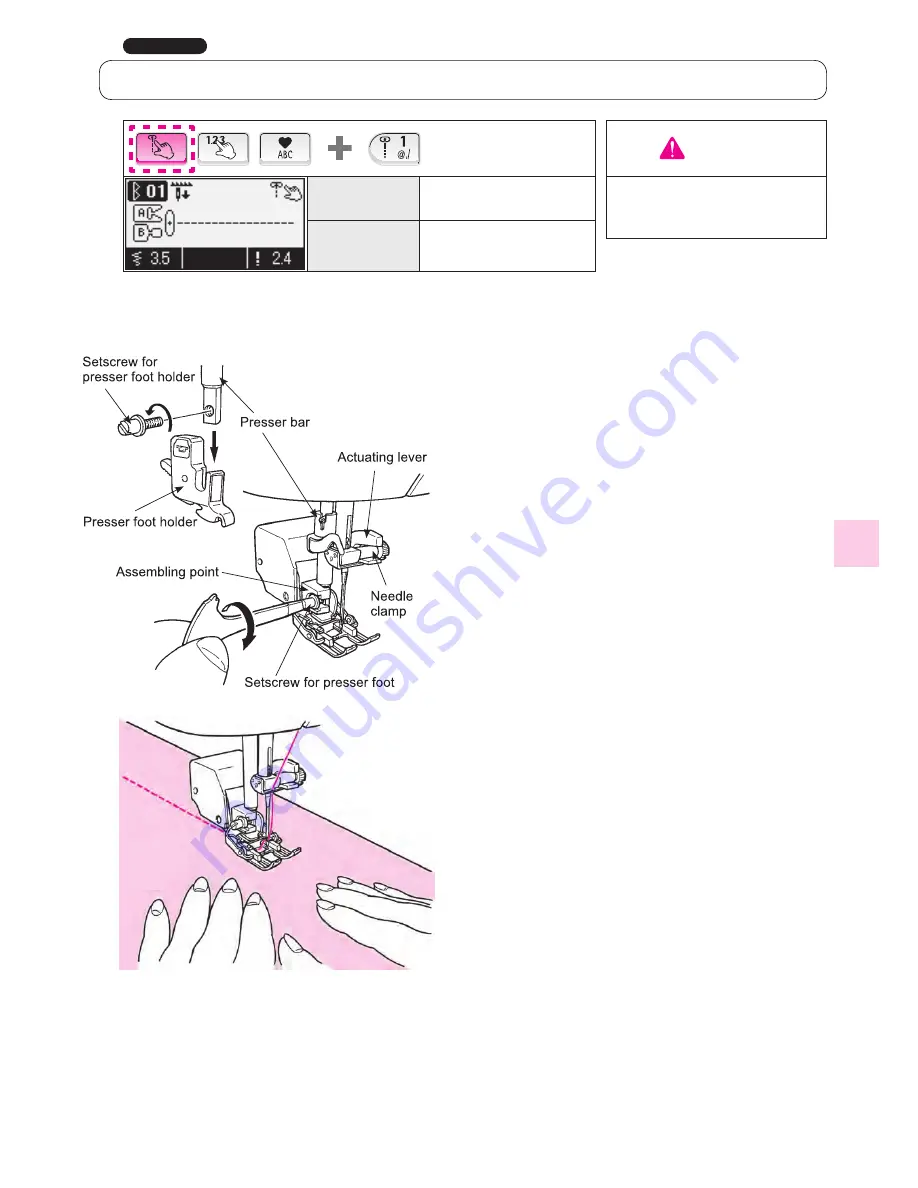
Attention
Turn OFF the power switch
before replacing the presser
foot.
68
Setscrew for presser foot
Actuating lever
Needle
clamp
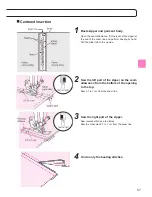
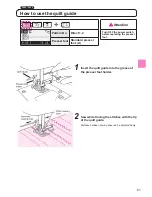
1
Put top layer of fabric with patchwork and/or
appliqué, quilting cotton and bottom fabric
together by using pin or basting stitches.
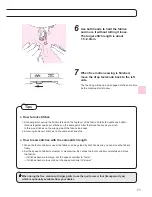
3
Place your hands to both sides of the
presser foot and sew by pulling the
fabrics apart.
* Sew with slow to medium sewing speed.
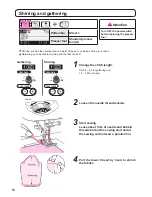
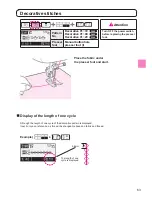
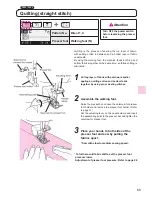
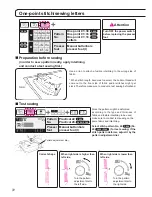
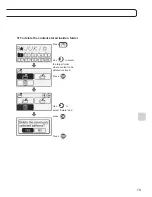
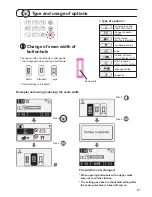
Quilting (straight stitch)
Quilting is the process of sewing the top layer of fabric,
with quilting cotton in between and a bottom layer of fabric
underneath.
By using the walking foot, the machine feeds both top and
bottom fabrics together at the same time, so fabric shifting is
eliminated.
Pattern No. Direct 1, 4
Presser foot Walking foot (N)
Setscrew for
presser foot holder
Presser bar
Presser foot holder
2
Assemble the walking foot.
Raise the presser bar. Loosen the setscrew for presser
foot holder and remove the presser foot holder. (Refer
to page 13)
Set the actuating lever on the needle clamp and insert
the assembling point to the presser bar and tighten the
setscrew for presser foot.
* To further avoid fabric shifts, set the presser foot
pressure lower.
Adjustment of presser foot pressure: Refer to page 26
* If it is necessary to sew with the same distance, use
quilt guide.
Quilt guide: Refer to page 60
Assembling point
F600 / F400
Attention
Turn OFF the power switch
before replacing the presser
foot.
Содержание HZL-600
Страница 2: ......
Страница 12: ...10 ...
Страница 75: ...73 ...
Страница 100: ...List of stitch patterns 97 F600 Patterns for crazy quilt 98 ...
Страница 101: ...Pattern for elongation 98 Letters numbers signs One point 99 ...
Страница 102: ...List of stitch patterns 99 F400 100 ...
Страница 103: ...100 One point Pattern for elongation Letters numbers signs 101 ...
Страница 104: ...List of stitch patterns 101 F300 102 ...
Страница 105: ...102 One point Pattern for elongation Letters numbers signs 103 ...
Страница 107: ......