DEPARTURE
WARNING
Connect the battery to the drone, the front LEDs will continue to flash. Turn the transmitter on,
move the left joystick up, and then push it down to synchronise the drone.
When you hear a beep, it means the transmitter has been correctly synchronised with the
drone, and the LEDs will stop blinking.
1. If the transmitter's LED stays on but the drone LED is flashing slowly, synchronisation has
not been performed correctly. Turn off both the transmitter and the drone, and start the
procedure again from the beginning.
2. If once in the air the drone does not remain stable, land it and turn off both the transmitter
and the drone. Then, resynchronise it, making sure the drone is placed on a flat and
horizontal surface while you do so.
3. If the drone LED blinks slowly, the battery is running low. Land it and charge the drone battery
with the supplied USB charger.
When the drone is flying uncontrollably and it becomes impossible to make a trim that corrects
these errors (see p. 9 for more information on trimming), it is best to perform a factory reset so
that the drone returns to its default settings.
Posición
horizontal
TIP:
Make sure your Brick Drone is on a flat horizontal surface during
the synchronisation procedure, so the flight is stable.
Land the drone on a flat surface. Then move
the left joystick to the lower right corner and
the right joystick to the lower left corner (move
them both at the same time). The two front
LEDs will stop blinking and remain fixed.
Another option is to press and hold the reset
button for 3 seconds. When the transmitter
emits a beep, the calibration has been
completed.
CALIBRATION
DRONE SYNCHRONIZATION
Содержание BRICK DRONE
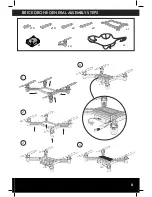
Страница 5: ...5 BRICK DRONE GENERAL ASSEMBLY STEPS 1 3 2 4 x2 x2 x10 x16 x1 x1 x1 x4 5...
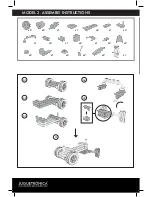
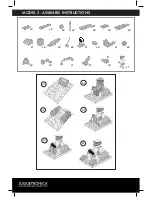
Страница 16: ...MODEL 2 ASSEMBLY INSTRUCTIONS x1 x2 x1 x1 x2 x1 x1 x2 x2 x2 x3 x1 x2 x2 x1 x2 x2 x2 x1 x2 A1 A4 A5 A2 A3 A 45...
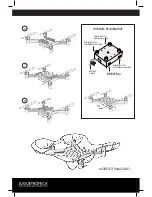
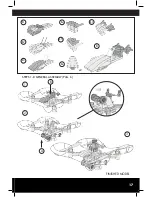
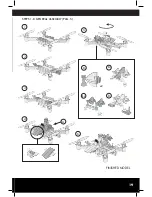
Страница 17: ...17 FINISHED MODEL B4 B1 B2 B3 B5 B6 B7 B B A 180 1 2 3 STEPS 1 8 GENERAL ASSEMBLY PAG 6 x2...
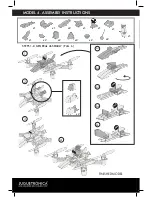
Страница 18: ...MODEL 3 ASSEMBLY INSTRUCTIONS x2 x5 x2 x2 x2 x2 x2 x2 x1 x1 x1 x1 x6 x2 x1 x2 x2 x2 x1 A1 A2 A3 A4 A5 A x2 x2...
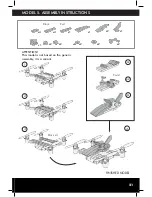
Страница 19: ...19 FINISHED MODEL 1 5 6 2 3 STEPS 1 8 GENERAL ASSEMBLY PAG 5 4 A B1 B2 B3 B x2...
Страница 23: ...23 DESING YOUR OWN DRONE...


