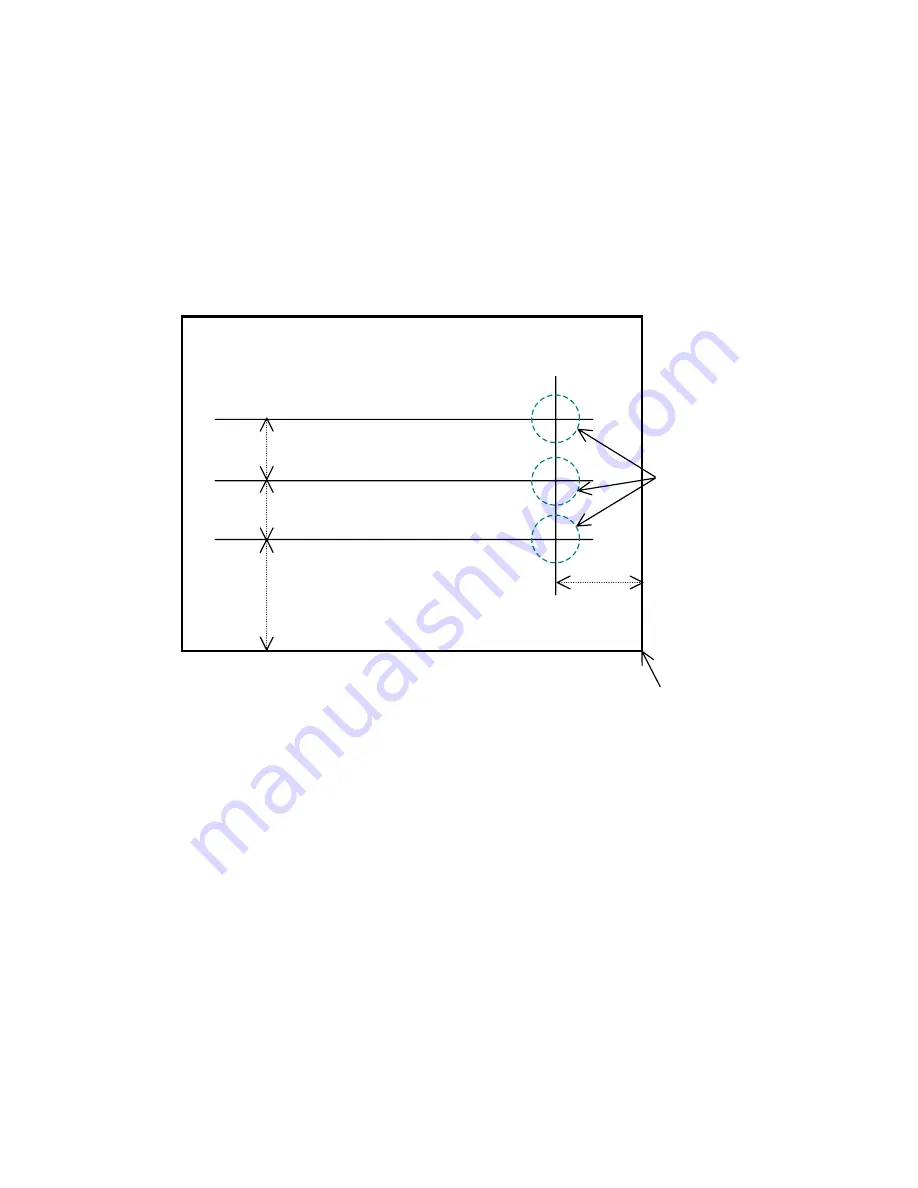
(4) Target Preparation for Scanning
Using chalk (or similar) make markings on the concrete surface to indicate where to start
testing (starting line) and where to scan (scan test line).
Make
sure the start line and the scan test line are orthogonal.
(As necessary, in order to perform a retest, use and endpoint of the wall as a standard
for the start line and scan test line)
A scan test applicable set up example is shown in Fig. 3-6.
1m
(Wall Surface)
Object to be sense
tested
(Concrete etc.)
These should be
orthogonal
2m 1m
Start line
1m
Scan test line 3
Scan test line 2
Scan test line 1
Fig. 3-6 Scan
test applicable setup example
Origin
(End of wall, power outlet etc.)
‑ 35 ‑
Содержание Handy Search NJJ-95B
Страница 1: ...Handy Search Instruction Manual...
Страница 8: ...Appearance of the NJJ 95B vii...
Страница 21: ...Rear view Units in trigonometry mm 9...
Страница 24: ...8 14 15 Figure 2 2 Side View 16 17 14 18 Figure 2 3 Rear View 12...
Страница 73: ...Display of thumbnails Figure 3 17 CF Control Screen 61...
Страница 83: ...B Terminals ACharge confirmation mark Figure 3 22 Battery Pack 71...
Страница 85: ...Shutter Charge lamp Figure 3 23 Battery Charger 73...
Страница 96: ...Concrete Rebar D 75mm L 75mm D 75mm Difficult to implement 84...
Страница 103: ...Dimensions Weight About 149 W x 147 H x 216 D mm Approximately 1 1kg 91...


