background image

3-22 

SM-18003

TROUBLESHOOTING

Correctly connect wires.

Check continuity

and looseness of

connection screws.

Check terminal Nos.

Incorrect Wiring

Disconnected Wire

Contact Failure

Incorrect Wiring

Replace or repair 

wires, or tighten screws.

O.U. PCB:  Outdoor Unit PCB

I.U. PCB:  Indoor Unit PCB

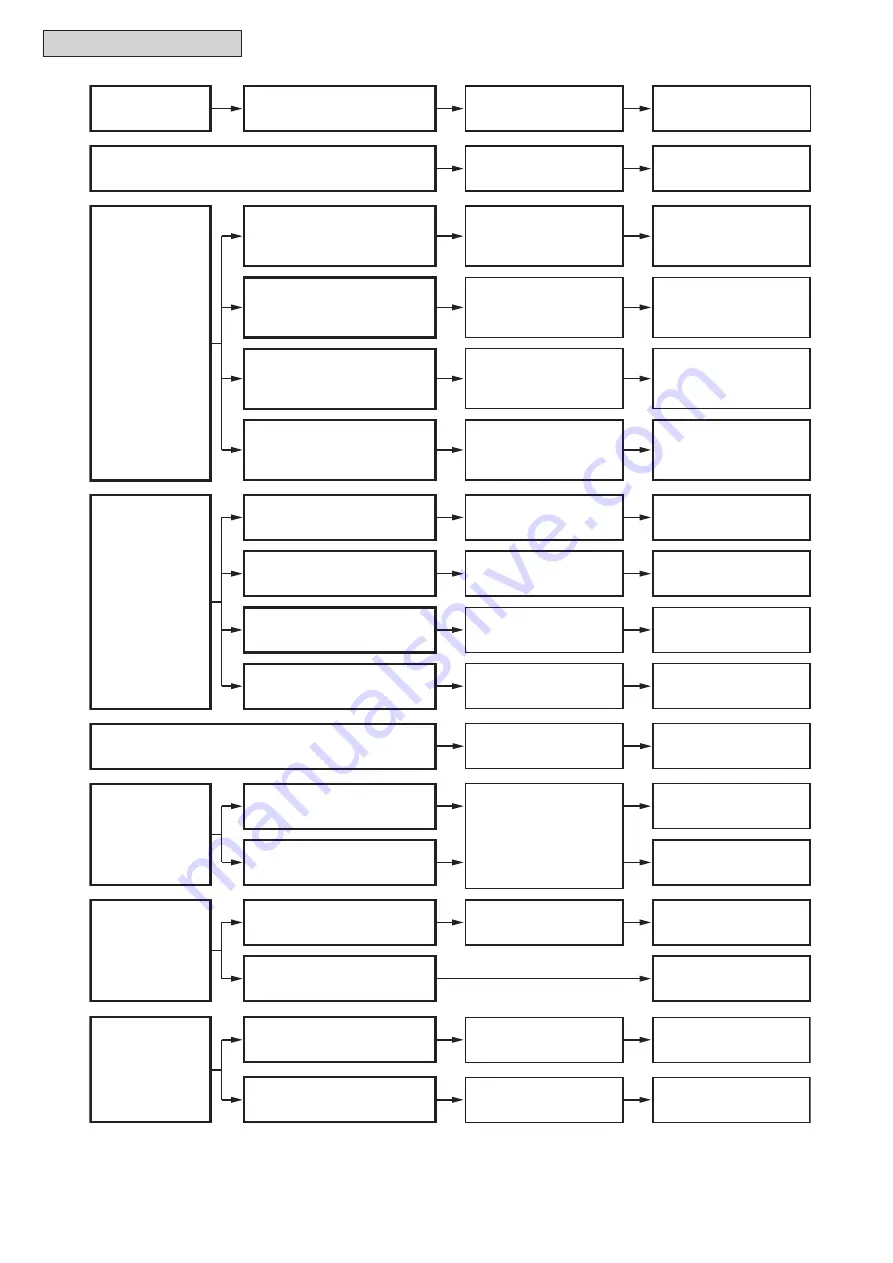
Cause

Check Item

Action

(Turn OFF Main Switch)

Event

Blown Fuse for

Power Source

or Activation of

Breaker

Check for breakage

of insulation.

Short Circuit between Wires

Measure insulation

resistance.

Short Circuit to Ground

Measure voltage with

tester.

Supply power.

Power Failure or No Power Supply

Measure resistance

between wires and

insulation resistance.

Faulty Comp. Motor

Measure resistance

between wires and

insulation resistance.

Replace outdoor unit

fan motor and fuse.

Replace O.U. PCB

if faulty.

Faulty Outdoor Unit

Fan Motor

Blown Fuse

on PCB

(Outdoor Unit)

Check for breakage

of wire insulation.

Remove cause of

short circuit and

replace fuse.

Short Circuit between Wires

Measure insulation

resistance.

Remove cause of

short circuit and

replace fuse.

Short Circuit to Ground

Disconnected

Wires,

Contact Failure or

Incorrect

Connection

Check continuity of 

wires.

Check for looseness

of connection screws.

Check terminal Nos.

Replace and repair 

wires, tighten screws 

or correct wires.

Between Outdoor Unit

and Indoor Unit

Power Source Wiring

for Outdoor Unit

Measure resistance

of coil.

Replace magnetic

switch (CMC) and fuse.

Faulty Solenoid Coil for

Magnetic Switch (CMC)

for Comp. Motor

Measure resistance

between wires and

insulation resistance.

Replace fan motor

and fuse.

Faulty Outdoor Unit

Fan Motor

Correctly connect wires.

Replace it if faulty.

PCB Failure

(Outdoor Unit,

 Indoor Unit)

Check connection.

Disconnected Wires to

I.U./O.U. PCB

Faulty I.U./O.U.PCB

Remove cause of

short circuit.

Replace fuse and/or 

I.U./O.U. PCB if faulty.

Remove cause of

short circuit to ground.

Replace fuse and/or

I.U./O.U. PCB if faulty.

Replace comp. and

fuse. (O.U.)  Replace

inverter PCB and/or

PCB if faulty. (O.U.)

Correctly connect wires.

Measure O.U. PCB

output. 

2

Replace O.U. PCB.

Incorrect Power Supply Circuit of O.U. PCB

(Outdoor Unit and

 Change-Over Box)

Содержание CICM008B21S

Страница 1: ...SM 18003 SERVICE MANUAL INVERTER DRIVEN MULTI SPLIT SYSTEM HEAT PUMP AIR CONDITIONERS Service Manual Indoor Units Mini Cassette H Y C ICM008B21S H Y C ICM012B21S H Y C ICM015B21S H Y C ICM018B21S ...

Страница 2: ......

Страница 3: ...ternational Organization for Standardization ISO 5149 or European Standard EN 378 No part of this manual may be reproduced in any way without the expressed written consent of Johnson Controls Inc This heat pump air conditioning unit will be operated and serviced in the United States of America and comes with a full complement of the appropriate Safety Danger and Caution warnings If you have questi...

Страница 4: ...hase order 3 The standard utilization for this unit is explained in these instructions Use of this equipment for purposes other than what it designed for is not recommended 4 Please contact your local agent or contractor as any issues involving installation performance or maintenance arise Liability does not cover defects originating from unauthorized modifications performed by a customer without ...

Страница 5: ...ccur in an earthquake if the unit is not installed correctly injuries may occur due to a falling unit Use appropriate Personal Protective Equipment PPE such as gloves and protective goggles and where appropriate have a gas mask nearby Also use electrical protection equipment and tools suited for electrical operation purposes Keep a wet cloth and a fire extinguisher nearby during brazing Use care i...

Страница 6: ...it in any location where animals and plants can come into direct contact with the outlet air stream Exposure could adversely affect the animals and plants Do not install the unit with any downward slope to the side of the condensate pipe If you do you may have drain water flowing back which may cause leaks Be sure the condensate hose discharges water properly If connected incorrectly it may cause ...

Страница 7: ...ases can be generated from decomposition Do not position the condensate pipe for the indoor unit near any sanitary sewers where corrosive gases may be present If you do toxic gases can seep into breathable air spaces and can cause respiratory injuries If the condensate pipe is installed incorrectly water leakage and damage to the ceiling floor furniture or other possessions may result If condensat...

Страница 8: ... refrigerant oil being introduced into the cycle the sizes of the charging connections have been changed from R407C type and R22 type It is necessary to prepare the appropriate tools before performing installation work Use refrigerant pipes and joints which are approved for use with R410A A compressor unit comprises a pressurized system Never loosen threaded joints while the system is under pressu...

Страница 9: ... of AWG18 0 82mm2 2 Conductor Stranded Copper Shielded cable must be considered for applications and routing in areas of high EMI and other sources of potentially excessive electrical noise to reduce the potential for communication errors When shielded cabling is applied proper bonding and termination of the cable shield is required as per Johnson Controls guidelines Plenum and riser ratings for c...

Страница 10: ...viii SM 18003 ...

Страница 11: ...ed Central Controller Adapter CCCA01 1 3 1 4 9 Infrared IR Receiver Kit CMIRK01 1 3 1 4 10 Motion Sensor Kit SOR NEC 1 3 1 5 Optional Parts 1 4 1 5 1 Duct Adapter PD 75C 1 4 1 5 2 Relay and 3 Pin Connector Kit PSC 5RA 1 4 1 5 3 Remote Sensor THM R2A 1 4 1 5 4 3P Connector Cable PCC 1A 1 4 2 Operation 2 1 2 1 Indoor Unit 2 2 2 2 Control Device 2 3 2 2 1 Wired Controller CIW01 2 3 2 2 2 Simplified W...

Страница 12: ... 1 7 Emergency Operation 3 15 3 2 Troubleshooting Procedures 3 16 3 2 1 Alarm Code Table 3 17 3 2 2 Troubleshooting Using Alarm Codes 3 18 3 2 3 Abnormalities of Devices 3 33 3 3 Procedures for Checking 3 45 3 3 1 Self Checking of PCBs using Wired Controller 3 45 3 3 2 Self Checking of Wired Controller 3 45 3 4 Test Run 3 46 3 4 1 Test Run Using Wired Controller 3 47 3 4 2 Test Run from Outdoor Un...

Страница 13: ... 8 Removing Float Switch 4 11 4 2 9 Removing Outlet Air Thermistor 4 12 4 2 10 Removing Liquid Pipe Thermistor Gas Pipe Thermistor and Expansion Valve Coil 4 13 4 2 11 Removing Inlet Air Thermistor 4 15 4 2 12 Removing Auto Louver Motors and Louver 4 16 4 3 Cleaning Indoor Unit Heat Exchanger 4 17 4 3 1 Required Tools for Cleaning Field Supplied 4 17 4 3 2 Cleaning Procedure 4 18 4 4 Main Parts 4 ...

Страница 14: ...12 5 4 1 5 Remote Cooling Heating Change Input Setting Code 07 5 13 5 4 1 6 Picking Up Operation Signal 5 14 5 4 2 Function Setting 5 17 5 4 2 1 Function Selection Item 5 17 5 4 2 2 Description of Function Selection Item 5 23 5 5 Functions from Wired Controller 5 36 5 5 1 Power Saving Function 5 36 5 5 2 Schedule Function 5 38 5 5 3 Indication Function 5 38 5 5 4 Comfort Function 5 39 6 Field Work...

Страница 15: ...SM 18003 1 1 INSTALLATION 1 Installation ...

Страница 16: ...1 1 Outdoor Unit Refer to the Installation Manual for Outdoor Unit 1 2 Change Over Box Refer to the Installation Manual for Change Over Box 1 3 Indoor Unit Refer to the Installation Manual for Mini Cassette and Decorative Panel ...

Страница 17: ...fied Wired Controller CIS01 1 4 3 Wireless Controller CIR01 1 4 4 Mini Central Controller CCM01 1 4 5 Large Central Controller CCL01 1 4 6 Computerized Central Controller Management Software CCCS01 1 4 7 Computerized Central Controller Software Operation Ratio for CCCS01 1 4 8 Computerized Central Controller Adapter CCCA01 1 4 9 Infrared IR Receiver Kit CMIRK01 1 4 10 Motion Sensor Kit SOR NEC ...

Страница 18: ...arts 1 5 1 Duct Adapter PD 75C 1 5 2 Relay and 3 Pin Connector Kit PSC 5RA 1 5 3 Remote Sensor THM R2A 1 5 4 3P Connector Cable PCC 1A For more information of the above Optional Parts please refer to the Installation Manuals for each product ...

Страница 19: ...SM 18003 2 1 OPERATION 2 Operation ...

Страница 20: ...2 2 SM 18003 OPERATION 2 1 Indoor Unit Refer to the Operation Manual for Mini Cassette ...

Страница 21: ...Control Device 2 2 1 Wired Controller CIW01 2 2 2 Simplified Wired Controller CIS01 2 2 3 Mini Central Controller CCM01 2 2 4 Large Central Controller CCL01 2 2 5 Computerized Central Controller Management Software CCCS01 2 2 6 Computerized Central Controller Software Operation Ratio for CCCS01 2 2 7 Infrared IR Receiver Kit CMIRK01 ...

Страница 22: ......

Страница 23: ...SM 18003 3 1 TROUBLESHOOTING 3 Troubleshooting ...

Страница 24: ...g wiring connection on O U I U printed circuit boards PCBs is not loose The connection for thermistors The connection for the wired controller cable The connection for communication cabling Each connection for power source line Check that the wiring connection on O U I U PCBs is not loose or misconnected on the site according to the Electrical Wiring Diagram of the Engineering Manual NOTE If the f...

Страница 25: ...ystem The electrical wiring capacity of the outdoor unit is according to the Installation and Maintenance Manual of the outdoor unit Setting DIP switches may be required depending on the combinations with the outdoor unit Outdoor Unit Indoor Unit Switchbox Outdoor Unit Power Supply Indoor Unit Power Supply Indoor Unit Indoor Unit GFCI Main Switch GFCI Main Switch Refer to the Installation and Main...

Страница 26: ...t is less than 30mA The motion time should be within 0 1 second Between indoor and outdoor units use dual conductor AWG18 0 82mm2 stranded copper cable for communication cable Do not use any cable with more than two conductors Twisted pair or shielded cable can be used in environments with excessive electrical noise to reduce the possibility of communication errors between system components Total ...

Страница 27: ...ndoor Unit Indoor Unit Indoor Unit A B A B A B Individual Simultaneous Thermo ON OFF individually Individual Wired Controller Wired Controller Wired Controller Indoor Unit Indoor Unit A B Outdoor Unit A B Wired Controller Wired Controller Outdoor Unit Indoor Unit A B The communication cabling for the wired controller is necessary Indoor Unit A B Wired Controller NOTE Thermo ON The outdoor unit and...

Страница 28: ...3 6 SM 18003 TROUBLESHOOTING 3 1 2 Location of Printed Circuit Boards PCBs 1 Outdoor Unit Refer to the Service Manual for Outdoor Unit 2 Indoor Unit Mini Cassette PCB1 TB2 TB1 ...

Страница 29: ...g Not doing so makes the setting invalid 2 Factory settings for DSW6 and RSW1 are set to 0 If connecting the indoor unit to H LINK II supporting the outdoor unit without setting any DIP switches auto address setting will be performed by the wired controller 3 Auto Address Setting by Wired Controller The address numbering is started from 0 by the auto address function when the wired controller is c...

Страница 30: ...del code of the indoor unit Factory Setting 1 2 ON OFF 1 2 ON OFF 1 2 ON OFF 6 Refrigerant Cycle Number Settings RSW2 and DSW5 This setting is required The unit arrives with all settings in the OFF position 3 4 1 0 8 9 2 5 6 7 3 4 1 0 8 9 2 5 6 7 1 2 3 4 5 6 ON OFF 1 2 3 4 5 6 ON OFF DSW5 Tens Digit Refrigerant Cycle Number Setting RSW2 Units Digit Setting Position Set by inserting slotted screwdr...

Страница 31: ...n Sensor ON Avoid Press and hold Menu and ECO simultaneously for three seconds during the normal mode Normal Mode Display Check Menu Display 1 Press and hold Menu and ECO simultaneously for three seconds during the normal mode The Check Menu is displayed Check Menu Function 5 Model Display Alarm History Display Check 2 01 02 Check 1 Entr Sel OK Rtrn Back 2 Select Check 1 or Check 2 from the Check ...

Страница 32: ... 1 18 E3 Times of Abnormal Transmitting 39 q5 Motion Sensor 3 Reaction Rate 1 19 E4 Times of Inverter Tripping 40 q6 Motion Sensor 4 Reaction Rate 1 20 F1 Louver Sensor State 41 q7 Setting Temp Collected Value 21 H1 Discharge Pressure Features of Check Mode 1 No Item Data Name No Item Data Name 1 q1 Inlet Air Temp 9 q9 Discharge Pressure 2 q2 Discharge Air Temp 10 qA Suction Pressure 3 q3 Liquid P...

Страница 33: ...ry 01 03 Next Page Delete Rtrn Back 2008 10 28 PM02 10 01 01 22 2008 10 29 PM03 45 01 03 11 2008 11 06 AM11 37 01 02 14 2008 11 07 PM07 15 01 03 13 2008 11 07 PM11 55 01 01 29 Date Time I U ERR OK 4 To delete the alarm history press OK The confirmation screen will be displayed Select Yes and press OK The alarm history is deleted and the screen will return to 3 above If No is pressed the screen wil...

Страница 34: ...enu and ECO simultaneously for three seconds during the normal mode Check Menu is displayed Check Menu Self Checking 02 02 I U O U PCB Check Entr Sel Rtrn Back OK 2 Select I U O U PCB Check from the Check Menu and press OK 3 Select the indoor unit to be set by pressing and press OK This screen is NOT displayed when there is only one indoor unit connected with the wired controller In this case 4 be...

Страница 35: ...12 34 Self Checking 4 LCD Test Press OK and the screen will change as shown at the right 0 2 0 0 0 Self Checking 5 Backlight Test LCD brightness is changed gradually by pressing OK 0 3 0 0 0 Self Checking 6 Contrast Test Contrast of the LCD gradually changes by pressing OK 7 Run Indicator Test Press OK and the run indicator will flash in red and green twice for each 8 Button Input Test Press the n...

Страница 36: ...e Test The date and time is changed from 2012 03 04 12 34 to 2008 01 01 00 00 1 0 0 0 0 2008 01 01 00 00 Self Checking 13 EEPROM Test EEPROM Clearing Cancel Press help EEPROM Clear Press OK or wait 15 seconds EEPROM data will be cleared During the process the numbers will indicate the location with A If A has a value of 999 EEPROM is in a faulty condition If A has 999 the process does not proceed ...

Страница 37: ... Menu 4 Press to select letters 5 Press OK to confirm the letters Max 28 letters 6 Select Fin and press OK or simply press Menu 7 will be displayed 7 Repeat 3 through 5 to register contact information and continue Select Fin and press OK the confirmation screen will be displayed Also press Menu and the confirmation screen will be displayed 8 Select Yes and press OK The Test Run Menu will be displa...

Страница 38: ...t X C2 Nine or more indoor units are connected to change over box X X C3 The indoor units of different systems are connected to change over box LED7 LED4 LED5 LED6 PCB of Change Over Box 1 Refrigerant Cycle No 1 2 Indoor Unit No 1 3 Alarm Code 4 Unit Model Code 5 Total Number of Indoor Units in the Same System as the Indoor Unit Having Trouble 6 Indoor Unit Model 2 3 7 Outdoor Unit Model 2 3 1 If ...

Страница 39: ...isconnecting Wiring Breaking Wire Short Circuit 12 Outlet Air Thermistor 13 Freeze Protection Thermistor 14 Gas Piping Thermistor 19 Fan Motor Activation of Protection Device for Indoor Fan Fan Motor Overheat Lockup 31 System Incorrect Capacity Setting of Outdoor Unit and Indoor Unit Incorrect Capacity Code Setting of Combination Excessive or Insufficient Indoor Unit Total Capacity Code 35 Incorre...

Страница 40: ...ooling dry fan or heating operation I U PCB Indoor Unit PCB Turn OFF power supply and remove connectors CN36 and CN14 on I U PCB Then turn ON power supply Is DC12 5 13 5V applied between CN36 terminals Turn OFF power supply and connect connector CN14 on I U PCB Then turn ON power supply Is voltage applied between CN36 terminals less than 12 5V Failure of I U PCB Failure of Drain Pump Activation of...

Страница 41: ... Check continuity when drain level is low Measure resistance with a tester Measure resistance with a tester Measure voltage between CN36 terminals with a tester Check connection Check connection High Drain Level Clogging of Drainage Up Slope Drain Piping Remove foreign particles clogging drain pipe Replace float switch if faulty Replace drain pump if faulty Replace and tighten connector Replace an...

Страница 42: ...fter 30 seconds from start up When fuses are blown or the circuit breakers are activated check the cause of overcurrent and take necessary action Is LED3 yellow on O U PCB ON No No Yes Yes Yes Is DSW10 1P Terminating Resistance on O U PCB ON Is LED1 red on O U PCB ON Set it correctly No Disconnect connector CN2 on O U PCB 1 Yes Reconnect connector CN2 on O U PCB Replace fuse No Check the fuses of ...

Страница 43: ... CN2 on I U PCB is removed Yes Yes Indoor Unit Does refrigerant system No setting between O U and I U correspond O U DSW4 and RSW1 I U DSW5 and RSW2 Is LED1 red on Change Over Box PCB ON Is LED3 green on Change Over Box PCB ON Yes No No Check Change Over Box wiring Check wiring between outdoor unit and indoor units No Is LED2 yellow on Change Over Box PCB flashing more than once in 10 seconds No R...

Страница 44: ...een Wires Measure insulation resistance Remove cause of short circuit and replace fuse Short Circuit to Ground Disconnected Wires Contact Failure or Incorrect Connection Check continuity of wires Check for looseness of connection screws Check terminal Nos Replace and repair wires tighten screws or correct wires Between Outdoor Unit and Indoor Unit Power Source Wiring for Outdoor Unit Measure resis...

Страница 45: ...istance to ON when CN2 is disconnected Set the end terminal resistance to OFF when CN2 is reconnected 2 12VDC between VCC12 and GND2 5VDC between VCC05 and GND1 12VDC between VCC12 and GND1 15VDC between VCC15 and GND1 24VDC between VCC24 and GND1 12VDC between VCC12T and GND1 Refer to the Service Manual of connected outdoor unit ...

Страница 46: ...en sensor 840kΩ or more is detected during a heating or cooling operation The operation automatically restarts when the malfunction is removed Yes Yes Connect them No Failure of Thermistor Failure of I U PCB No Is thermistor THM1 for inlet air temp connected to THM1 of I U PCB Is resistance of THM1 between 0 24kΩ and 840kΩ Cause Check Item Action Turn OFF Main Switch Event Failure of Inlet Air The...

Страница 47: ...short 0 24kΩ or less or open sensor 840kΩ or more is detected during a heating or cooling operation The operation automatically restarts when the malfunction is removed Yes Connect them No Refer to Alarm Code 11 for thermistor resistance Failure of I U PCB Is thermistor THM2 for outlet air temp connected to THM2 of I U PCB Yes Failure of Thermistor No Is resistance of THM2 between 0 24kΩ and 840kΩ...

Страница 48: ...en a short 0 24kΩ or less or open sensor 840kΩ or more is detected during a heating or cooling operation The operation automatically restarts when the malfunction is removed Yes Connect them No Refer to Alarm Code 11 for thermistor resistance Is thermistor THM3 for freeze protection connected to THM3 of I U PCB Yes No Is resistance of THM3 between 0 24kΩ and 840kΩ Failure of I U PCB Failure of The...

Страница 49: ...ensor 840kΩ or more is detected during a heating or cooling operation The operation automatically restarts when the malfunction is removed Refer to Alarm Code 11 for thermistor resistance Yes Yes Connect them No Failure of Thermistor Failure of I U PCB No Is thermistor THM5 for gas pipe connected to THM5 of I U PCB Is resistance of THM5 between 0 24kΩ and 840kΩ Cause Check Item Action Turn OFF Mai...

Страница 50: ...s No Occurrence of Alarm Code 19 4 Measure the voltage of the following check points with a tester Between VCC05 and GND 5V 4 Between VCC13 and GND 13 1V 10 Normal Voltage DC280V No Failure of Fan Motor Replace Fan Motor Yes Failure of I U PCB Failure of Fan Motor Is speed pulse signal to I U PCB sent correctly 6 Replace I U PCB Replace Fan Motor No Does Fan Motor run Yes 5 6 6 Start the operation...

Страница 51: ...leads Check whether the resistance value is over or not according to the table shown below When performing the second measuring make sure to switch leads Red Black 1st 2nd Decision Basis Tester Resistance Value Tester Resistance Value Resistance values of both 1st and 2nd measurings are over 10 Red Black W Red Black W FG GND GND FG Vsp GND GND Vsp Vcc GND GND Vcc Vdc GND GND Vdc VCC13 LED5 GND CN1...

Страница 52: ...ct Capacity Setting of Outdoor Unit and Indoor Unit Cause Check Item Action Turn OFF Main Switch Event Check combination of indoor units and capacity setting of I U PCB Correctly set DIP switch DSW3 Incorrect Capacity Setting of Indoor Unit Check outdoor unit model by calculating total indoor units capacity Ensure that total indoor unit capacity is within permissible range 1 Total Indoor Unit Capa...

Страница 53: ... connected indoor units are displayed on the LCD The indoor unit number and the alarm code are displayed on the 7 segment display of the outdoor unit PCB Note 1 Except for some models This alarm code is displayed five minutes after power on of the outdoor unit if the indoor unit number set by DSW6 and RSW1 duplicates in the same refrigerant group Alarm Code Incorrect Indoor Unit No Setting ...

Страница 54: ...t and Refrigerant Cycle Number l The RUN indicator red flashes l The indoor unit number refrigerant cycle number address number the alarm code the model code1 the model name1 and the number of connected indoor units are displayed on the LCD The indoor unit number and the alarm code are displayed on the 7 segment display of the outdoor unit PCB Note 1 Except for some models This alarm code is displ...

Страница 55: ... Coil RUN Indicator and LCD are ON However the system does not operate ex Indoor outdoor fans or compressor does not operate The Comp does not Stop or Start even if the Setting temperature on LCD is Changed 3 Measure insulation resistance Burnt Out Coil Measure coil resistance with tester Replace outdoor unit fan motor Failure of Outdoor Unit Fan Motor Disconnected Coil Measure insulation resistan...

Страница 56: ...ition of Thermistor of Wired Zone Controller with Optional Setting Setting and Control 00 Control by Indoor Thermistor for Suction Air 01 Control by Thermistor of Wired Zone Controller 02 Control by Average Value of Indoor Thermistor for Suction Air and Thermistor of Wired Zone Controller If the thermistor of wired zone controller is not used set it at 00 Incorrect Input Output Setting Check Setti...

Страница 57: ... if faulty Replace PCB if faulty Disconnected Wire of Thermistor Measure resistance of coil Failure of Reversing Valve Disconnected Reversing Valve Coil Supply power forcibly Replace reversing valve Incorrect Activation of Reversing Valve Check connectors Failure of Outdoor Unit PCB Disconnected Wire to PCB Correctly connect wires Replace it when check mode is not available Failure of PCB Check PC...

Страница 58: ... to Indoor Unit Heat Exchanger Check temp difference at inlet and outlet of strainer Replace strainer in indoor unit Clogged Strainer in Indoor Unit Clogging at Low Pressure Piping Check for any clogging Remove clogging Check connection cord and connector Replace connector Check for clogged air filter Clean air filter Check for obstacle at inlet or outlet Remove obstacles Excessively Low Air Temp ...

Страница 59: ... Secure sufficient service space Correct fan speed Replace fan motor Insufficient Airflow to Outdoor Unit Heat Exchanger Check for clogging Remove clogging Check for connecting wire and connector Replace connector Is there operation sound from coil Replace coil Is thermistor on compressor normal Replace thermistor Is thermistor installed correctly on compressor Correctly install it Failure or Malf...

Страница 60: ...k indoor unit indicating alarm code 03 on wired controller Repair it according to alarm code 03 Check wired controller LCD or RUN indicator is turned OFF Check indoor unit according to Troubleshooting of this manual Failure of Indoor Unit PCB Check that indoor unit capacity is 0 in check mode of outdoor unit PCB Replace indoor unit PCB Check that damper of EconoFresh Kit opens and closes Failure o...

Страница 61: ... of short circuit Excessively Low Air Temp to Outdoor Unit Heat Exchanger Measure field supplied pipes Use specified pipes Excessively Small Diameter or Long Piping Is outdoor unit heat exchanger clogged Remove clogging Are there any obstacles at inlet or outlet of outdoor unit Remove obstacles Is service space for outdoor unit sufficient Secure sufficient service space Check outdoor fan speed Rep...

Страница 62: ...ck indoor unit indicating alarm code 03 on wired controller Repair it according to alarm code 03 Failure of Indoor Unit PCB Check that indoor unit capacity is 0 in check mode of outdoor unit PCB Replace indoor unit PCB Check wired controller LCD or RUN indicator is turned OFF Check indoor unit according to Troubleshooting of this manual Check that damper of EconoFresh Kit open and closes Failure o...

Страница 63: ...ient Airflow to Indoor Unit Heat Exchanger Check temp difference between inlet and outlet of reversing valve Check for refrigerant leakage from solenoid valve Excessively High Suction Pressure Failure of Solenoid Valve for Bypass Replace solenoid valve Replace failed expansion valve of indoor unit Replace reversing valve Malfunction or Internal Leakage from Reversing Valve Check temp difference be...

Страница 64: ...sition of propeller fan Outdoor Unit Propeller Fan Comes in Contact with Fan Shroud Check surface of contacts Replace magnetic switch Humming Sound from Magnetic Contactor Check each fixing screws Tightly fix it Abnormal Vibration of Cabinets Check obstacles Remove obstacles Obstacle at Outdoor Fan Check wiring Correctly connect wires Disconnected Wire for Indoor Fan Check AC chopper Replace AC ch...

Страница 65: ...tting on the wired controller Correct the setting There are heat source other than human in the detecting area of the sensor Check heat source a moving object whose temperature is different from surroundings Remove it There is sensor with high sensitivity Stop the operation from the wired controller no motion in the detection area of the motion sensor and check the Check Mode 1 q1 Check if there i...

Страница 66: ... is Cold Radiation sensor setting is disabled on the wired controller Check setting on the wired controller Correct the setting There is a heat sources other than human in the detection area of the sensor Check heat source a moving object whose temperature is different from surroundings Remove it Depending on the heat source the control is hard to operate Setpoint on the wired controller is low an...

Страница 67: ...HOOTING 3 3 Procedures for Checking 3 3 1 Self Checking of PCBs using Wired Controller Refer to Section 3 1 4 Checking Wired Controller 3 3 2 Self Checking of Wired Controller Refer to Section 3 1 4 Checking Wired Controller ...

Страница 68: ...nd outdoor temperature out of the working range Heating operation may not be operated due to the activation of the overload operation prevention under the ambient temperature of 66o F 19o C or over To perform the test run set the test run mode with the wired controller 1 Insulation Resistance l If the unit has been turned OFF for long periods insulation resistance may decrease to 1MW or less becau...

Страница 69: ...red zone controller the connection of the remote control cable is correct The total number of indoor units connected is indicated on the liquid crystal display LCD If the indicated number is not equal to the actual number of connected indoor units the auto address function is not performed correctly due to incorrect wiring or electromagnetic interference Turn OFF the power supply and correct the w...

Страница 70: ...ock 3 Connecting Order of Power Line Between Indoor Units and Outdoor Unit The unit does not start The operation lamp flashes 1 time 1 sec And the Unit No 00 Alarm Code dd and Unit Code E 00 flash The connecting wires of operating line are incorrect or loose An authorized service person should check the unit using the Alarm Code Table in this manual 5 Checking Procedure for Abnormalities If the un...

Страница 71: ...V3 Rated Voltage 10 Starting Voltage V2 Rated Voltage 15 Voltage Imbalance between Phase 3 3 Normal Operating Pressure Normal operating suction pressure is 29 to 159 5 psi 0 2 to 1 1 MPa and normal operating discharge pressure is 145 to 507 6 psi 1 0 to 3 5 MPa when the refrigerant charge quantity is correct Check the operation pressure in the test run mode 4 High Pressure Switch Check the operati...

Страница 72: ...ll be indicated on the 7 segment display of the outdoor unit PCB If the high pressure retry control occurs three times or more within 30 minutes alarm code will be indicated on the LCD of the wired controller or the 7 segment display of the outdoor unit PCB NOTE High pressure may not increase until the high pressure switch is activated because of the temperature condition For CIW01 Sel OP MODE I U...

Страница 73: ...MAINTENANCE SM 18003 4 1 4 Maintenance ...

Страница 74: ...MAINTENANCE 4 2 SM 18003 4 1 Maintenance of Outdoor Unit Refer to the Service Manual for Outdoor Unit ...

Страница 75: ...et Grille 1 The air filter is attached to the inside of the air inlet grille While sliding the knobs on both sides of the air inlet grille in the arrow directions open the air inlet grille 2 Push the air filter toward the arrow direction to remove from filter catches Remove air filter from the air inlet grille 3 Open the air inlet grille at an approximately 45o angle from the decorative panel surf...

Страница 76: ...Take care not to drop the electrical box cover Electrical Box Electrical Box Cover Fixing Screws for Electrical Box Cover Loosen the fixing screws to remove the electrical box cover Slide the electrical box cover downward to remove NOTE The electrical box is placed on the outside of the unit so that the air inlet grill does not need to be opened Open the grid ceiling or access door to remove elect...

Страница 77: ...ving Optional Decorative Panel 1 Remove the auto swing motor connector CN17 from PCB 2 Remove the corner pocket covers The corner pocket covers can be removed pulling A part toward the arrow direction in the figure below CN17 PCB Electrical Box A Tool Phillips Screwdriver ...

Страница 78: ...nd rotate the decorative panel according to the arrow direction to remove the decorative panel Refrigerant Pipe Electrical Box Indoor Unit Fixing Plate Indoor Unit Decorative Panel Indication PIPE SIDE Long Screw Qty 4pcs 3 3 A B A B Mounting Sheet TURN OFF all power source switches Tool Phillips Screwdriver ...

Страница 79: ...emoving Turbo Fan and Fan Motor a Remove the nut fixing the fan runner b Remove 3 nuts fixing the fan motor c Then remove the fan motor TURN OFF all power source switches P Wire Cover Vibration Absorber 3 pcs Tightening Torque 5 9lbf ft 8 N m Fan Motor Fixing Nut Turbo Fan Fixing Nut Tightening Torque 5 9lbf ft 8 N m Bell Mouth Fixing Screw 4 pcs Tightening Torque 0 6lbf ft 0 8 N m Fixing Screw 8 ...

Страница 80: ...ower source switches NOTES 1 Do not touch electrical components on the indoor unit PCB 2 Do not to apply an excessive force to the indoor unit PCB nor bend it Otherwise it may cause failure of the indoor unit PCB 3 When attaching the indoor unit PCB make sure that the connectors are connected correctly If not the indoor unit PCB may be damaged In addition securely attach the screws for each wire P...

Страница 81: ... drain pan Although silicon sealant is applied over the rubber plug the rubber plug can be removed by pulling the bottom side NOTE 1 Do not damage the rubber plug with a cutter 2 Do not damage or remove the insulation attached to the bottom side of the rubber plug when removing attaching it b Check any clogging in the drain hole 6 Removing Drain Pan a Remove 4 screws fixing the drain pan to the un...

Страница 82: ...e into the drain pump completely 2 After attaching the drain up mechanism check that the drain hose does not contact the fixing base of drain up mechanism If the drain hose contacts the fixing base of drain up mechanism adjust the position of the drain hose 3 For reassembling wrap up the lead wires for the drain up mechanism float switch and outlet air thermistor together with the vinyl tube seal ...

Страница 83: ...drain pan b Loosen the resin nut for the float switch and remove the float switch from the fixing plate TURN OFF all power source switches NOTE 1 When attaching the float switch again fit the tab of the fixing plate into the slot on the drain pan Then tighten the screw 2 When attaching the float switch again tighten the resin nut with a tightening torque of 0 2 to 0 3 lbf ft 0 3 to 0 4 N m If the ...

Страница 84: ...according to Section 4 2 7 Removing Drain up Mechanism 3 Removing the rubber plug then remove the outlet air thermistor from fixing base of drain up mechanism Tool Phillips Screwdriver Nipper TURN OFF all power source switches Float Switch Float Switch Fixing Plate Fixing Screw for Drain up Mechanism 3 pcs Fixing Screw for Float Switch Drain up Mechanism Fixing Base of Drain up Mechanism Outlet Ai...

Страница 85: ...a thermistor holder 6 Removing Expansion Valve a Remove butyl sheet attached to the expansion valve b Loosen the locknut using a wrench by turning it counterclockwise viewed from the expansion valve coil NOTE Remove the expansion valve coil with no pressure applied to it Otherwise the pressure would cause the bellows to pop up Do not touch the bottom side of the drive part of the expansion valve c...

Страница 86: ... by hand and then completely with the wrench The tightening torque shall be 8 9 to 11 1 lbf ft 12 to 15N m NOTE Do not apply an excessive force to the expansion valve coil The expansion valve coil is attached with its eccentricity facing the opposite side of the pipe joint The direction does not affect the valve s opening closing action Even if the position of the expansion valve coil is slightly ...

Страница 87: ... 3 Tear off the filament tape then remove the thermistor cable attached to the bell mouth 4 Push the thermistor case cover to the direction shown in the picture below to remove the inlet air thermistor with the thermistor case cover TURN OFF all power source switches Tool Phillips Screwdriver Bell Mouth Bell Mouth Thermistor Case Cover Pushing Direction Thermistor Case Cover Thermistor Cable with ...

Страница 88: ...ew for AS Motor from the decorative panel Then remove the louver louver bearing and AS motor 4 Remove the AS motor stopper and bearing from the louver 5 Disconnect the connector for the AS motor Press the catch to disconnect the connector to avoid breakage C Cover Decorative Panel Screw Decorative Panel Bearing Bearing Connector AS Motor Louver AS Motor Stopper Bearing Bearing Louver Air Inlet Sid...

Страница 89: ...s 6 Bucket Approx 5 liters Qty 2 7 Phillips Screwdriver Qty 1 8 Pliers Qty 1 9 Adjustable Wrench Qty 1 10 Megohm Tester 500V 11 Cleaning Agent Select a neutral type cleaning agent 12 Spray To spray cleaning water 13 Adhesive Tape To tape the vinyl sheet to protect the room from cleaning water 14 Rope 3ft 7in 1m four pieces 15 Vinyl Sheet Select a vinyl sheet with 1 6 inch 0 5mm thickness 16 Gloves...

Страница 90: ...ure Tool 1 Remove the optional decorative panel according to Section 4 2 3 Removing Optional Decorative Panel Phillips Screwdriver 2 Remove the electrical box after opening the electrical box cover and disconnecting the connectors between the indoor and outdoor units and other connectors according to Section 4 2 2 Removing Electrical Box Cover Phillips Screwdriver 3 Remove the bell mouth and fan a...

Страница 91: ...rough the holes of the cleaning water collector as shown in Section 4 3 1 5 Attach the ropes to the four bars of the cleaning water collector and suspend the cleaning water collector as shown in the figure 6 Connect the hose to the boss and put the end of the hose in a bucket Tool Brush Bucket or Box Tool Knife Bucket TURN OFF all power source switches Suspension Bolt Indoor Unit Rope Suspension B...

Страница 92: ...anger After cleaning spray clean water to remove the cleaning water Adjust the pressure of the water pump so as not to damage the fins NOTES 1 If any cleaning water remains fins will become corroded 2 Adjust the pressure of the pump at 36 to 71 psi 2 5 to 5 0 kg cm2 so as not to damage the fins Tool Clean Water Cleaning Agent Water Pump Cleaning Spray TURN OFF all power source switches Cleaning Sp...

Страница 93: ...nsure that the insulation is greater than 1 MΩ when 500V is applied 11 Connect wiring as it was 12 Neutralization Treatment after Cleaning The cleaning agent specified in Section 4 3 1 is of the neutral type However the cleaning water after use should not be neutral Collect all cleaning water and provide necessary neutralization treatment for the cleaning water Tool Phillips Screwdriver TURN OFF a...

Страница 94: ... Main Parts MAINTENANCE 4 22 SM 18003 4 4 Main Parts 4 4 1 for Outdoor Unit Refer to the Service Manual for Outdoor Unit 4 4 2 for Change Over Box Refer to the Service Manual for Outdoor Unit ...

Страница 95: ...3 CN14 THM5 THM3 THM2 THM1 CN36 GND VCC15 CN1 P VDC PCN7 GND 4 4 3 2 Fan Motor Rotating Direction φ4 7 16 φ112 φ 5 7 8 φ 1 5 0 φ 5 1 8 φ 1 3 0 4 7 8 123 5 11 16 18 1 7 7 16 61 8 1 4 7 φ4 7 16 φ112 φ3 7 8 φ98 35 7 16 900 1 3 16 0 30 0 41 15 16 1050 1 3 16 0 30 0 P Enlarged View from P 8 7 6 5 4 3 2 1 Red Vm Black GND White Vcc Yellow Vsp Blue PG Mini Cassette Mini Cassette ...

Страница 96: ... thermistor for indoor discharge air temperature is utilized for the control of prevention from cold air discharge in heating operation etc The resistance characteristics of thermistor is shown in the above figure 4 Thermistor for Liquid Pipe Temperature of Indoor Heat Exchanger The resistance characteristics of thermistor is shown in the above figure 5 Thermistor for Gas Pipe Temperature of Indoo...

Страница 97: ...29 7 8 23 Electronic Expansion Valve Coil Model PAM MD12HS 4 Electronic Expansion Valve Body 1 3 4 5 6 Red COM White Yellow Orange Blue D Enlarged View of D φ7 8 21 75 b c a Connector No 2 is unoccupied Unit inch mm Micro Computer Pulse Signal 2 Phase Permanent Magnetic Pulse Motor Control 0 to 2 000 Pulse by 1 Pulse Refrigerant Flow Control Precise Control ...

Страница 98: ... 100 250PPS 2 Phase Excitation Wiring Diagram Drive Circuit and Activation Mode White COM Yellow Blue Red Orange φ1 φ2 φ4 φ3 M ON OFF Procedure Phase No 2φ 4φ 3φ 1φ White Lead Wire Color Orange Yellow Blue Activation Mode 1 2 3 4 1 Close 4 3 2 1 4 Open 1 2 3 4 1 6 4 3 1 5 The coil resistance shall be 100 10Ω between each phase Connector Nos Unit inch mm Model Diameter Valve Body a b c d H Y C ICM0...

Страница 99: ...SM 18003 5 1 EXTERNAL INPUT OUTPUT AND FUNCTION SETTING 5 External Input Output and Function Setting ...

Страница 100: ...ettings of Outdoor Unit Refer to the Service Manual for Outdoor Unit 5 2 High Static Pressure Setting DSW5 No 5 ON Refer to the Service Manual for Outdoor Unit 5 3 External Input Output and Function Setting Mode for Outdoor Unit Refer to the Service Manual for Outdoor Unit ...

Страница 101: ...put output setting can be set from the test run menu OK Test Run Menu Elevating Grille Setting Input Output Thermistor Selection Function Selection 01 03 Test Run Entr Rtrn Sel Back Press and hold Menu and Back Help simultaneously for 3 seconds during the normal mode OK Menu Back Help ECO On Off A C MODE SPEED TEMP COOL LOUV Adj Meeting Room LOUV FLTR Normal Mode Display Test Run Menu Display ...

Страница 102: ...ed 2 Select Function Selection or Input Output from the Test Run menu and press OK OK Test Run Menu Elevating Grille Setting Input Output Thermistor Selection Function Selection 01 03 Test Run Entr Rtrn Sel Back OK Function Selection 01 01 All 01 02 01 03 01 04 Entr Rtrn Sel Back 3 Select the indoor unit by pressing and touch OK This screen is NOT displayed when the number of an indoor unit connec...

Страница 103: ...iting Remote Control after Manual Stoppage 06 Output 1 CN7 1 2 Operation 01 Output 2 CN7 1 3 Alarm 02 Output 3 CN8 1 2 Thermo ON for Heating 06 Code Indicated Input Output 00 Not set Not set 01 Room Thermostat for Cooling Operation 02 Room Thermostat for Heating Alarm 03 Remote ON OFF 1 Level Cooling 04 Remote ON OFF 2 Operation Thermo ON for Cooling 05 Remote ON OFF 2 Stoppage Heating 06 Forbiddi...

Страница 104: ...ltiple indoor units are connected to the same communication cable for wired controller input the signal to any of these indoor units 4 When the communication cable is not used in the twin triple and quad combinations for simultaneous operation input the signal to the main indoor unit SS3 X1 Power Source Control Circuit Indoor Unit PCB CN3 X1 3P Connector 3 2 1 2 1 NOTE When the unit is started by ...

Страница 105: ...3 Stop NOTE Operation priority is given to the remote ON OFF signal or wired controller signal which is given last Control by Wired Controller Unit Operation Time Chart Time Example Operation Input is set to terminals 2 and 3 of CN3 Stoppage Input is set to terminals 1 and 2 of CN3 NOTES 1 Picking up signal within 10 seconds after power supply is turned ON is not possible due to initialization of ...

Страница 106: ...iagram Example of Remote ON OFF 3 Example Stoppage Input is set to terminals 1 and 2 of CN3 Signal to terminals 1 2 of CN3 Control by Wired Controller Unit Operation Time Chart Time Example Stoppage Input is set to terminals 1 and 2 of CN3 NOTES 1 Picking up signal within 10 seconds after power supply is turned ON is not possible due to initialization of the components Do not change the signal ON ...

Страница 107: ...rbidding Remote Control after Manual Forced Stoppage is set to terminals 2 and 3 of CN3 Signal to terminals 2 3 of CN3 Control by Wired Controller Unit Operation Time Chart Time Example Forbidding Remote Control after Manual Forced Stoppage is set to terminals 2 and 3 of CN3 4 Forbidding Remote Control after Manual Forced Stoppage Level Signal Input Input Setting Code 06 By using the signal from a...

Страница 108: ...d wire for a low voltage wire and ground one end The maximum wiring length is 230 ft 70m 2 When using this function it is recommended that safety devices such as an electric leakage breaker or smoke detector etc be used because this is an unattended function Component Manufacturer or Specifications Remarks Auxiliary Relay X1 X2 OMRON Mini Power Relay Model MY1F 2F or Equivalent Voltage 220V Change...

Страница 109: ... indoor unit 5 4 1 3 Power Supply ON OFF 2 Restarting Function After Power Failure This function is utilized to restart the unit operation automatically when the power supply is restored after the power failure over 2 seconds In case of the power failure for 2 seconds or less the standard unit memorize all the operation mode and restarts the operation automatically The compressor restarts operatio...

Страница 110: ... install the wires along the 220V power line Install them more than 12 in 30cm away from each other Intersecting them is acceptable If the wires are installed along the power line comply with the following points to prevent noise a Pass either of the low voltage wire and 220V power line through a metal tube and ground one end b Use a shielded wire for a low voltage wire and ground one end The maxi...

Страница 111: ...3 CN3 X1 3P Connector 3 2 1 2 1 COOL HEAT X1 Power Source Signal to terminals 1 2 of CN3 Heat Cool Heat Cool Operation Mode of Unit Control by Wired Controller Cool Time Chart Example Remote Cooling Heating Change is set to terminals 1 and 2 of CN3 Control by Wired Controller Heat 5 4 1 5 Remote Cooling Heating Change Input Setting Code 07 The cooling or heating operation mode can be changed by gi...

Страница 112: ...peration signal is given This function enables the signal check during remote control operation and an interlock of the fan for air inlet etc The contact of the auxiliary relay RYa is opened while the protection devices are activated Picking Up Operation Signal Example Operation Output is set to terminals 1 and 2 of CN7 RY CN7 Connector CN7 1 2 3 P Connector Indoor Unit PCB Auxiliary Relay RYa 2 P...

Страница 113: ... a cooling operation signal that has nothing to do with the compressor stoppage by a thermistor An example of basic wiring is shown below The contact of the auxiliary relay RYa is closed when this operation signal is given Picking Up Operation Signal Example Cooling Operation Output is set to terminals 1 and 3 of CN7 CN7 Connector CN7 1 3 P Connector Indoor Unit PCB 3 Auxiliary Relay RYa RY 4 Pick...

Страница 114: ...1 3 P Connector Indoor Unit PCB 3 Auxiliary Relay RYa RY NOTE These are examples using general purpose relay 6 Picking Up Heating Thermo ON Signal Output Setting Code 06 This function is utilized to pick up a thermo ON signal during the heating operation An example of basic wiring is shown below The contact of the auxiliary relay RYa is closed during thermo ON in heating operation Use this functio...

Страница 115: ... to Uneven Heat Load 00 01 02 Standard No Compensation Set Temp 2o F 1o C Set Temp 3o F 2o C 12 bC Not Prepared Not Used Use as 00 conditions 13 bd Not Prepared Not Used Use as 00 conditions 14 bE Not Prepared Not Used Use as 00 conditions 15 C1 Not Prepared Not Used Use as 00 conditions 16 C2 Not Prepared Not Used 17 C3 Not Prepared Not Used 18 C4 Not Prepared Not Used 19 C5 Hi Speed Except for H...

Страница 116: ...Indoor Fan Operation Time After Cooling Operation Stoppage 00 01 02 Not Available 60 min 120 min 43 E7 Not Prepared Not Used Use as 00 conditions 44 E8 Fan Operation Control during Heating Thermo OFF 00 01 Not Available LOW SLOW 45 E9 Not Prepared Not Used Use as 00 conditions 46 EA Not Prepared Not Used Use as 00 conditions 47 Eb Fan Operation Control during Cooling Thermo OFF 00 01 02 Not Availa...

Страница 117: ... 82o F 28o C 84o F 29o C 86o F 30o C 59 F7 Operation Stoppage Prevention by Wired Controller Operational Error 5 00 01 Not Available Available 60 F8 Lock Function for Operation Mode Selection 00 01 Not Available Available Factory Setting 61 F9 Lock Function for Temperature Setting 00 01 Not Available Available Factory Setting 62 FA Lock Function for Fan Speed Selection 00 01 Not Available Availabl...

Страница 118: ... as 00 conditions 84 K2 Not Prepared Not Used Use as 00 conditions 85 K3 Not Prepared Not Used Use as 00 conditions 86 K4 Not Prepared Not Used Use as 00 conditions 87 K5 Motion Sensor Detection Level 00 01 02 Standard High Low 88 K6 Operation Setting during Thermistor of Wired Controller or Remote Sensor 00 01 02 03 ALL COOL DRY HEAT ALL 89 K7 Radiation Temperature Correction 00 01 02 Standard Up...

Страница 119: ...t Prepared Not Used Use as 00 conditions 114 Pb Not Prepared Not Used Use as 00 conditions 115 PC Not Prepared Not Used Use as 00 conditions 116 q1 Not Prepared Not Used Use as 00 conditions 117 q2 Not Prepared Not Used Use as 00 conditions 118 q3 Not Prepared Not Used Use as 00 conditions 119 q4 Not Prepared Not Used Use as 00 conditions 120 q5 Not Prepared Not Used Use as 00 conditions 121 q6 No...

Страница 120: ... set by F4 it automatically changes to the temperature set by F5 or F6 In case that the set temperature of F5 and F6 is out of range the upper or lower limit temperature is applied 3 Applicable to fan cooling and dry operation modes 4 Applicable to heating operation mode 5 Operation is stopped by pressing the On Off button for 3 seconds 6 The sensor value at C8 will be indicated When the thermisto...

Страница 121: ...nge of Filter Cleaning Time b4 The period before filter sign indication is set according to indoor unit model before shipment The filter sign FLTR on wired controller is indicated according to the filter cleaning time Factory Setting However this filter cleaning time can be changed depending on the condition of the filter as shown in the table below Period for Filter Sign Indication Approx 1 200 h...

Страница 122: ...2 17 Not Prepared C3 18 Not Prepared C4 19 Hi Speed Except for Hi Speed during Heating Thermo OFF C5 This function is utilized to increase the fan speed for the sufficient air flow volume It is recommended to use when the air flow volume is decreased by using the optional high ceiling installation or etc 20 Hi Speed during Heating Thermo OFF C6 This function is utilized to increase the fan speed d...

Страница 123: ... power supply is restored 31 Not Prepared d2 26 Not Prepared CC 27 Not Prepared Cd 28 Not Prepared CE 29 Change of Louver Swing Angle CF This function is utilized to the change louver swing angle Setting Condition Louver Swing Angle Air Discharge Angle Purpose 00 7 Steps Standard Operation 01 Lower 2 Steps are Cut Draft Prevention 02 Higher 2 Steps are Cut For High Ceiling NOTE When changing the s...

Страница 124: ...not reach the fixed temperature 33 Not Prepared d4 34 Prevention for Heating Discharge Air Temperature Decrease d5 This function is utilized to prevent discharge air temperature decrease during the heating operation by making the actual fan speed lower than the speed indicated on the wired controller Large Fan Speed Small Indications on Wired Controller HIGH2 HIGH MED LOW Actual Fan Speed HIGH MED...

Страница 125: ...d the changing of the setting period for OFF timer can not be performed However the OFF timer function is canceled when the unit is stopped When the unit is operated again after stoppage the setting period for OFF timer is set by the optional setting The setting condition and the setting period for OFF timer are shown below 54 Wired Controller Main Sub Setting F2 This function is utilized when two...

Страница 126: ... to 57 58 Automatic Reset Temperature for Cooling Heating F5 F6 as following conditions It is effective to optimize the setting temperature and provide energy saving However the setting temperature is not automatically reset in the case that Automatic COOL HEAT Operation mode or Prohibiting Operation by Wired Controller is set by the centralized controller Example Automatic Reset Temperature for C...

Страница 127: ...g before shipment Each switch operation becomes unavailable by pressing and Back Help return buttons simultaneously for more than 3 seconds when these functions are set as 01 The indication operation lock indicator is indicated on the wired controller If and Back Help return switches are pressed simultaneously for more than 3 seconds during operation lock indicator is indicated indication is turne...

Страница 128: ...er Limit 16o F Lower Limit 9o C 82o F 28o C 10 Lower Limit 18o F Lower Limit 10o C 84o F 29o C In case of Standard Unit Setting Condition Details Setting Temperature Upper Limit HEAT 00 Standard Value 86o F 30o C 01 Upper Limit 2o F Upper Limit 1o C 84o F 29o C 02 Upper Limit 4o F Upper Limit 2o C 82o F 28o C 03 Upper Limit 6o F Upper Limit 3o C 80o F 27o C 04 Upper Limit 8o F Upper Limit 4o C 78o...

Страница 129: ... operation and while the operation is started stopped by ON OFF button on the wired controller the set temperature automatically returns to 57 58 Automatic Reset Temperature for Cooling Heating F5 F6 as in the following figure However the setting temperature is not automatically reset in the case that Automatic COOL HEAT Operation mode or Prohibiting Operation by Wired Controller is set by the cen...

Страница 130: ...e Reaction Rate 3 Reaction Rate 3 Reaction Rate 20 88 Operation Setting during Thermistor of Wired Controller or Remote Sensor K6 This function is utilized to change the function Thermistor of Wired Controller Remote Sensor C8 according to operation mode Setting Condition Operation Mode 00 ALL 01 COOL DRY 02 HEAT 03 same as 00 NOTE All modes are available during automatic Cool Heat operation mode ...

Страница 131: ...r corner with motion sensor and radiation temperature sensor by wired controller Setting Condition Installation Position 00 A Factory Setting 01 B 02 Not Available 03 D Ref Pipe Mark of Mark of Mark of Mark of Mark of The motion sensor cannot install to the location of the mark of C B C A The mark of A is the factory setting position for motion sensor D Electrical Box Decorative Panel without Four...

Страница 132: ...9 Dual Setpoint for Automatic COOL HEAT Operation r1 This function is utilized to activate deactivate dual setpoint of cooling and heating in automatic cooling and heating operation This function is invalid when the function of Automatic COOL HEAT Operation is invalid 130 Cooling Heating Changeover Temperature for Automatic COOL HEAT Operation r2 This function is utilized to change the indoor temp...

Страница 133: ...is detected card key is inserted return to the original setting temperature Setting Condition Actual Control Temperature 00 Standard Wired Controller Setting Temperature Indicated Value 4o F 2 5 o C 01 Wired Controller Setting Temperature Indicated Value 5o F 3 0 o C 02 Wired Controller Setting Temperature Indicated Value 6o F 3 5 o C 03 Wired Controller Setting Temperature Indicated Value 7o F 4 ...

Страница 134: ...erating condition such as protective control 4 This function is used to inhibit power consumption of the operating Do not use it for minimize the capacity of current and the voltage for the power circuit power supply wiring GFCI transformer etc It may cause actuation of interrupter and equipment fault 5 Power consumption depends on connected outdoor unit without Power Saving Setting Maximum Capaci...

Страница 135: ...d ten minutes 2 It is possible to change the rotation assigned number according to the minimum differential between the setting temperature and indoor temperature 3 Intermittent Control Function The intermittent control repeats Cooling Heating and Fan Thermo OFF mode in fixed intervals 30 Minutes 30 Minutes Cooling Operation 20 Minutes Cooling Operation 20 Minutes Fan Operation 10 Minutes Fan Oper...

Страница 136: ...f the week NOTE The operation noise reduction setting may decreases the Cooling Heating capacity For detail refer to Section Sound Reduced Function in the Service Manual for the outdoor unit 1 Power Consumption Display Function This function displays the power consumption of the outdoor unit compressor The value of each displayed in Graph List format is one day one week and one year The display pe...

Страница 137: ...ion Power Up Mode Compressor Frequency for Cooling Operation Compressor Frequency for Heating Operation Upper Limit Target Frequency Upper Limit Target Frequency 0 Default Setting 1 Default Setting 20 Default Setting 20 2 Default Setting 20 Default Setting 20 3 Default Setting 20 Default Setting 20 Default Setting 20 Default Setting 20 NOTES 1 If this function is set indoor fan speed is automatica...

Страница 138: ......

Страница 139: ...SM 18003 6 1 FIELD WORK INSTRUCTIONS 6 Field Work Instructions ...

Страница 140: ...re VRF system meets ASHRAE Standard 15 or any local codes regarding Safety The ASHRAE Standard 15 2013 provides safeguards for life limb health property and prescribes safety requirements The standard is recognized as the main guide for personal safety involving refrigeration systems It strives to ensure a safe application of refrigerant systems by limiting the maximum charge so that a complete di...

Страница 141: ...e non specified refrigerants or any of the following in the refrigerant system of a unit Hydrocarbon Refrigerants such as Propane Oxygen or Flammable Gases such as Acetylene Poisonous Gases The types of refrigerants are indicated in the Installation and Maintenance Manuals Engineering Manuals Service Manuals and the specification label for each unit Be aware that Johnson Controls does not take any...

Страница 142: ...nted circuit board PCB Line Condition Pay attention to working voltage amperage and phase balance Inspect for faulty contact caused by loosened terminal connections oxidized contacts foreign matter and other items Inspect for electrical insulation resistance f Control and Protective Devices Setting Do not readjust the setting in the field 2 For Outdoor Unit Only a Compressor Sound and Vibration In...

Страница 143: ...SM 18003 6 5 FIELD WORK INSTRUCTIONS 6 4 Service and Maintenance Record by 7 Segment Display Refer to the Service Manual for Outdoor Unit ...

Страница 144: ...ation I U Micro Computer C1 O U Micro Computer C2 D Stopping Cause State Indication Cause Code of Indoor Unit Stoppage d1 E Alarm Occurrence Times of Abnormality E1 Times of Power Failure E2 Times of Abnormal Communication E3 Times of Inverter Tripping E4 F Automatic Louver State Louver Sensor State F1 H Pressure Frequency State Indication Discharge Pressure H1 q9 Suction Pressure H2 qA Control In...

Страница 145: ...tion Motion Sensor Response Rate q1 Radiation Sensor Temp q2 Motion Sensor1 Response Rate q3 Motion Sensor2 Response Rate q4 Motion Sensor3 Response Rate q5 Motion Sensor4 Response Rate q6 Setting Temp Collected Value q7 Client Result Installation Date System No Date Checked Checked by NOTE Refer to Section 3 1 4 Checking Wired Controller for items of check mode ...

Страница 146: ...heck for leakage at reversing valve Check for any leakage GOOD or NOT GOOD 17 Check for leakage at check valve Check for any leakage GOOD or NOT GOOD 18 Check for leakage at accumulator Check for any leakage GOOD or NOT GOOD 19 Check for leakage at strainer Check for any leakage GOOD or NOT GOOD 20 Check for leakage at electronic expansion valve Check for any leakage GOOD or NOT GOOD 21 Check for ...

Страница 147: ...18003 6 9 FIELD WORK INSTRUCTIONS 6 7 Saturation Curve for Refrigerant 0 50 100 150 200 250 300 350 400 50 25 0 25 50 75 100 125 150 Saturation Pressure Liquid psi G R410A Saturation Temperature Liquid oF ...

Страница 148: ...6 10 SM 18003 FIELD WORK INSTRUCTIONS 6 8 Mollier Chart for R410A f t 3 l b ...

Страница 149: ...SERVICE PARTS LIST SM 18003 7 1 7 Service Parts List ...

Страница 150: ...SERVICE PARTS LIST 7 2 SM 18003 Refer to the Service Parts List for Mini Cassette ...

Страница 151: ......

Страница 152: ... 2018 Johnson Controls Inc SM 18003 Code No LIT 12013034 Issued April 2018 ...

Отзывы: