


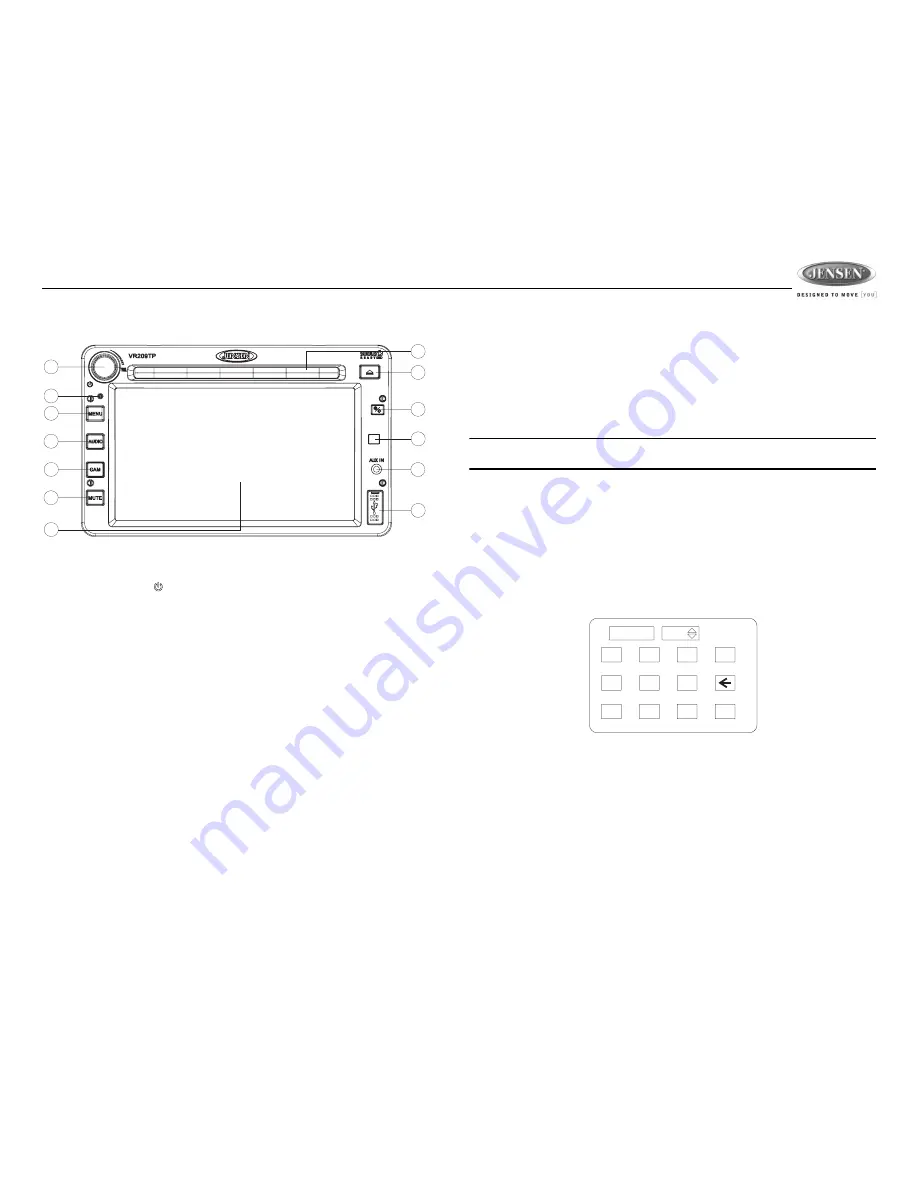
VR209TP
7
BASIC OPERATION
Power On/Off
•
Press the
power
VOL
/ button (1) to turn the unit on/off.
•
Press and hold
to turn the touch screen backlighting off when driving at night. Audio playback
is not interrupted.
•
Touch any area of the screen to resume the previous display lighting and mode.
Volume Control
•
To increase the volume, rotate the
VOL
control (1) clockwise.
•
To decrease the volume, rotate the
VOL
control counter-clockwise.
•
During adjustment, the volume level is displayed in the middle of the display as a horizontal bar
graph with the associated numbered level setting from 0 (full mute) - 40 (0dB, no attenuation).
•
The screen will display the volume indicator bar for 3 seconds and then revert to the previous
mode information.
Reset
Use a ball point pin or thin metal object to press the
RESET
button (2). The reset button should be
activated for the following reasons:
•
initial installation of the unit when all wiring is completed
•
function buttons do not operate
•
error symbol on the display
Menu
•
Press the
MENU
button (3) to access the main User Settings Menu.
•
Touch the icon on the display to go to the desired menu for setting adjustment.
•
Press and hold
the
MENU
button (3) to access the “System Setup” menu. See “User Settings
Menu” on page 9.
Camera (CAM)
•
Press the
CAM
button (5) to access camera mode.
•
Press and Hold
to enter the “Camera Setup” menu. See “Camera Operation” on page 21.
Audio
•
Press the
AUDIO
button (4) to access Audio Mode and select a source for playback.
•
Press and hold
the
AUDIO
button to enter the “Audio Setup” menu. See “Source Select Menu”
on page 10.
NOTE: CD/MP3/WMA, iPod or USB mode is inaccessible if the disc is not inserted or the
module is not installed. These buttons will be gray on the screen.
Mute
•
Press the
MUTE
button (6) on the control panel to mute the audio output. “MUTE” will appear
on the display.
•
Press
MUTE
again or touch any area of the screen to restore the audio output to the previous
level.
Adjusting the Clock
The current time is displayed in the top right hand corner of the LCD display. To adjust the clock:
1.
Press and hold
the
MENU
button (3) to view the System Setup menu.
2.
Touch the “Clock” field to view the clock set screen:
3.
Use the on-screen touch pad to enter 4 digits representing the time.
4.
Touch the “AM/PM” field to toggle between AM/PM, if necessary.
11
7
13
3
2
6
4
5
1
8
9
10
12
1
2
3
4
5
6
7
8
9
0
ok
AM
__ __ : __ __


