background image

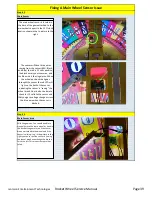
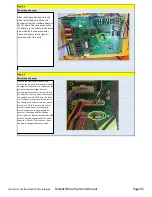
Step # 2

Pointer Sensor Issue

When there is no deflection in the 
pointer you should see only the 
middle red LED lite. This will give a 
voltage change across the 

Green 

sensor wire and either the Red (12 
volt) or the Black (comm) wires when 
the LED is lite as opposed to it being 
unlite.

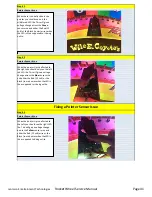
Step # 3

Pointer Sensor Issue

When the pointer tip is deflected to 
the right you should only see the left 
red LED lite. This will give a voltage 
change across the

 Blue

 sensor wire 

and either the Red (12 volt) or the 
Black (comm) wires when the LED is 
lite as opposed to it being unlite.

Fixing a Pointer Sensor Issue

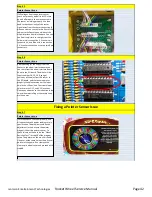
Step # 4

Pointer Sensor Issue

When the pointer tip is deflected to 
the Left you should see the right LED 
lite. This will give a voltage change 
across the 

Yellow

 sensor wire and 

either the Red (12 volt) wire or the 
Black (comm) wires when the LED is 
lite as opposed to being unlite.

Jennison Entertainment Technologies

Rocket Wheel Service Manual

Page 41

Содержание Wile E.Coyote's Rocket Wheel

Страница 1: ...Phone Number 1 855 JET GAME Service Email Service JennisonGames com Phone Number 1 386 255 1599 www JENNISONGAMES com For Additional Information or for an Electronic Copy of This Manual Visit Our Web...

Страница 2: ...uirements Installation Instructions 38 32 7 8 9 RoHS Compliance Cabinet Dimensions 4 Section Page Safety Notifications Epilepsy Warning 30 4 2 3 Table of Contents TABLE OF CONTENTS 31 Warnings Caution...

Страница 3: ...These messages are provided in cases where service personal must follow directions provided by J E T NOTICE Notices are given in GREEN boxes These messages are provided for the operator s convenience...

Страница 4: ...eizures may also cause loss of consciousness or convulsions that can lead to injury from falling down or striking nearby objects Immediately stop playing and consult a doctor if you experience any of...

Страница 5: ...g the entire installation guide in this manual DANGER DO NOT attempt to assemble Ocean Pearls without another adult to assist in the assembly JET recommends at least three people for assembly DANGER D...

Страница 6: ...UTION Use appropriate care when servicing the game and ensure that all removed components are away from facility guests and children Rocket Wheels SAFETY CAUTIONS NOTICES Set the 115 230 VAC selector...

Страница 7: ...ratus meets all requirements of the Canadian Interference Causing Equipment Regulations Cet appareil num rique da la classe A respecte toutes les exigences du R glement sur le mat riel brouilleur du C...

Страница 8: ...of November 2014 Jennison Entertainment Technologies has tested all components used in the manufacturing of Rocket Wheel All components have been found to be within the standards set forth for RoHS c...

Страница 9: ...the front of the main cabinet as there is a large Acrylic cover over the wheel and monitor 96 2439 48 DO NOT ALLOW ANYONE TO GET UNDER THE UNIT WHILE IT IS BEING LIFTED WEIGHT HEIGHT WIDTH LENGHTH Roc...

Страница 10: ...IT TO A DIFFERENT LINE VOLTAGE THAT IT WAS AT INITIAL TIME OF DELIVERY YOU MUST ALSO SELECT THE NEW INPUT AC VOLTAGE ON ALL POWER SUPPLIES AND SPEAKER AMPLIFER Rocket Wheel ELECTRICAL REQUIREMENTS HER...

Страница 11: ...RTAINMENT TECHNOLOGIES OR YOUR DISTRIBUTOR PRIOR TO CONTINUING NEITHER J E T NOR YOUR DISTRIBUTOR IS RESPONSIBLE FOR ANY DAMAGE CAUSED DURING IMPROPER INSTALLATION PROCEDURES RED SECTIONS RED SECTION...

Страница 12: ...graphics or acrylics that are on the fron side fo the game NOTICE PACKAGING AND PALLET MAY BE SLIGHTLY DIFFERENT THAN SEEN IN PHOTO Check Box When This Step is Complete Step 3 Ensuring you received a...

Страница 13: ...net lay the marque down flat on it s back so you have access to the bolts holding the shipping brackets to the margue There are 8 bolts in total 4 on the bottom of each header foot Using a hex headed...

Страница 14: ...achine screws To install you need to use a 2 5mm Hex headed allen key Be sure to not to damage the LED light strip that runs under the newley installed fin Also the LED lights need to be pointed towar...

Страница 15: ...to do the job Once you have the ladders in place lift the unit and make sure the feet of the marque go into the foot mount pockets found in the last step WARNING The Rocket Marque is Very heavy You s...

Страница 16: ...ires with the two pin molex connectors making sure not to push out a pin when connecting the two sides Check Box When This Step is Complete Step 15 Connecting the Marque LED s and control wires Other...

Страница 17: ...is you will need a 14mm end wrench or socket Unbolt the two bolts that are holding the support leg to the main cabinet This will have to be done on both side for a total of 4 bolts Check Box When This...

Страница 18: ...s Check Box When This Step is Complete Step 21 Adjusting the Volume Once the game is loaded and running you can adjust the sound output by opening the access door to the right of the player station In...

Страница 19: ...ounted to the rear of the access door above the cash box Push and hold the green ENTER button on the right of the assebly to enter the program mode menu PROGRAM SETUP INFORMATION Locate and open the f...

Страница 20: ...me versions of the software will display the software or version number on this page Step 5 Navigating the main menu You will use the UP INCREASE DOWN DECREASE buttons to move between selections and t...

Страница 21: ...ntly the Wile E Coyote s Big Bonus can be changed in this menu To change the value move the curser down the the desired menu item with the Decrease button and select it from the menu with the Enter bu...

Страница 22: ...NGS menu move the curser down to SAVE EXIT and hit the ENTER button to save your changes and exit the current menu Step 9 In this menu you can now change from one of our multiple preset score states t...

Страница 23: ...To exit the menu move the curser to EXIT and press the ENTER button Step 13 Clearing Tickets Owed To clear tickets owed move the curser to the CLEAR TICKETS OWED and hit the ENTER button You should s...

Страница 24: ...ou select the wrong value the equation will display an incorrect value Under the same title AUDIT INFORMATION there is a menu function for checking past scores by the customer Under PLAY RECORD you ca...

Страница 25: ...payout with a customer To exit this menu just hit the ENTER button To clear historical data saved in the AUDIT INFORMATION menu just select it from the menu and hit the ENTER button This will clear a...

Страница 26: ...h the movement of the physical pointer of the game The score spaces should move in conjunction with the virtual spaces as well You can also see the game count the pointer PINS in white and the individ...

Страница 27: ...ton Step 23 Testing Inputs Once you have accessed the I O test menu you can test each Item on the menu When the input is triggered the input listed will turn green in the FUNCTION column and the STATU...

Страница 28: ...Step 26 Exiting the Menu Once exiting the programming functions the game is ready to be played Jennison Entertainment Technologies Rocket Wheel Service Manual Page 28...

Страница 29: ...501 N the game will not accept more than 4 coins on 1 00 Play or 8 coins on 2 00 Play 3 Device must lockout after 10 00 is inserted Ocean Pearls will not accept more than 2 00 maximum 4 Device must lo...

Страница 30: ...IT ROAD RUNNER BONUS BONUS SLOT 1 500 150 50 55 TICKET PER PLAY 60 65 TICKET PER PLAY WHEEL SPINS PER CREDIT ROAD RUNNER BONUS ROAD RUNNER BONUS BONUS SLOT BONUS SLOT 1 1000 250 90 95 TICKETS PER PLAY...

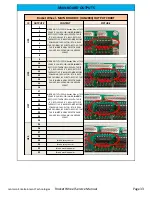
Страница 31: ...2 U09 9 SETTINGS BUTTON UP 10 SETTING BUTTON DOWN U10 17 18 19 20 21 22 23 24 POINTER SENSOR 2 POINTER SENSOR 3 POINTER SENSOR 4 12 HANDLE BUTTON SWITCH 13 14 15 16 U08 1 COIN CREDIT SIGNAL 2 BILL ACC...

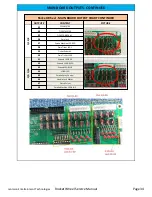
Страница 32: ...INPUTS CONTINUED OCEAN PEARLS MAIN BOARD INPUT CHART CONTINUED IC INPUT CONTENT PICTURE U12 33 U12 IS NOT UTLIZED IN Rocket Wheel THIS SPARE IC CAN BE USED IN U08 U09 U10 U11 TO RECTIFY POTENTIAL ISS...

Страница 33: ...S WITH THOSE IC S IF YOU SWAP IC S BE SURE TO PUT THE DEFECTIVE IC BACK INTO U27 BEFORE POWERING THE UNIT ON IF THIS FIXES YOUR PROBLEM BE SURE TO RECORD THAT THE IC IN U27 IS NOW DEFECTIVE AND CANNOT...

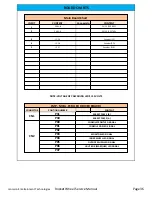
Страница 34: ...ET DRIVER 1 36 Coin lock 37 Smoke Machine LED RED 38 Owe Ticket LED 1 39 Ticket Driver 2 40 Owe Ticket LED2 Q9 Q16 41 Ground LED RED 42 Ground LED GREEN 43 Ground LED BLUE 44 LOGO LED 45 Smoke Spray C...

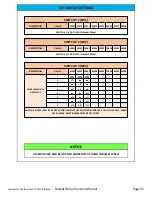
Страница 35: ...ON ON ON 2 off on on 3 on off on 4 off off on DIP SWITCH SETTINGS SWITCH 1 SW1 DESCRIPTION VALUE SW11 SW12 SW13 SW14 SW15 SW16 SW17 SW18 SWITCH 1 IS NOT USED IN Rocket Wheel NOTICE DIP SWITCH 1 AND 2...

Страница 36: ...E SIDE LED SIGNAL P02 CN1 2 CN13 A CN1 3 P31 TXD 3 J3 34 Encoder CS BOARD CHARTS Main Board Chart INPUT CONTENT Connects to CONTENT 1 CN13 B CN1 2 P30 RXD CONNECTOR POSITION NUMBER CONTENT P31 NOTE VO...

Страница 37: ...problem Before contacting your distributor please check to make sure that the unit is in fact plugged in and receiving power and that there are no loose connections Should you have any questions pleas...

Страница 38: ...sensor As seen in the picture to the right the computer sees a score of 40 while the physical wheel shows 20 These values will varry Also you can see the physical pointer is strait up and down as is t...

Страница 39: ...seeing the wheel break Now is also the time to check for 12 volts to the sensor and that you get a voltage change accross the blue wire when the sensor is blocked Fixing A Main Wheel Sensor Issue Step...

Страница 40: ...pointer sensor is located directly under the pointer itself behind the yellow acrylic sensor cover You should be able to see the red sensor LED s through the yellow acrylic but for the purpose of thi...

Страница 41: ...ly see the left red LED lite This will give a voltage change across the Blue sensor wire and either the Red 12 volt or the Black comm wires when the LED is lite as opposed to it being unlite Fixing a...

Страница 42: ...can check from the wheel interface board down to the I O board The wires will be inputs number 18 19 20 If you get coninuity all the way from the sensor to the I O board and the sensor operates prope...

Страница 43: ...licks faster than the monitor pointer you will have to loosen the bolts Please note only small adjustments will be needed all bolts need to be adjusted at the same rate A Wheel Speed sensor error will...

Страница 44: ...r to the sensor pulley These should be a slight rotational play as there is a some give in the gear teeth and this small motion is normal Diagnose A Wheel Speed Sensor Step 4 Wheel Speed Sensor The Wh...

Страница 45: ...of the game please grab voltages from the cirsrlced molex connector in the picture to the right The sensor is a 5 volt sensor and the positive line is the RED wire The Black wire is the common ground...

Страница 46: ...Diagnose A Wheel Speed Sensor Step 1 Wheel Speed Sensor Step 2 Wheel Speed Sensor Jennison Entertainment Technologies Rocket Wheel Service Manual Page 46...

Страница 47: ...Wheel Speed Sensor Step 3 Jennison Entertainment Technologies Rocket Wheel Service Manual Page 47...

Отзывы: