background image

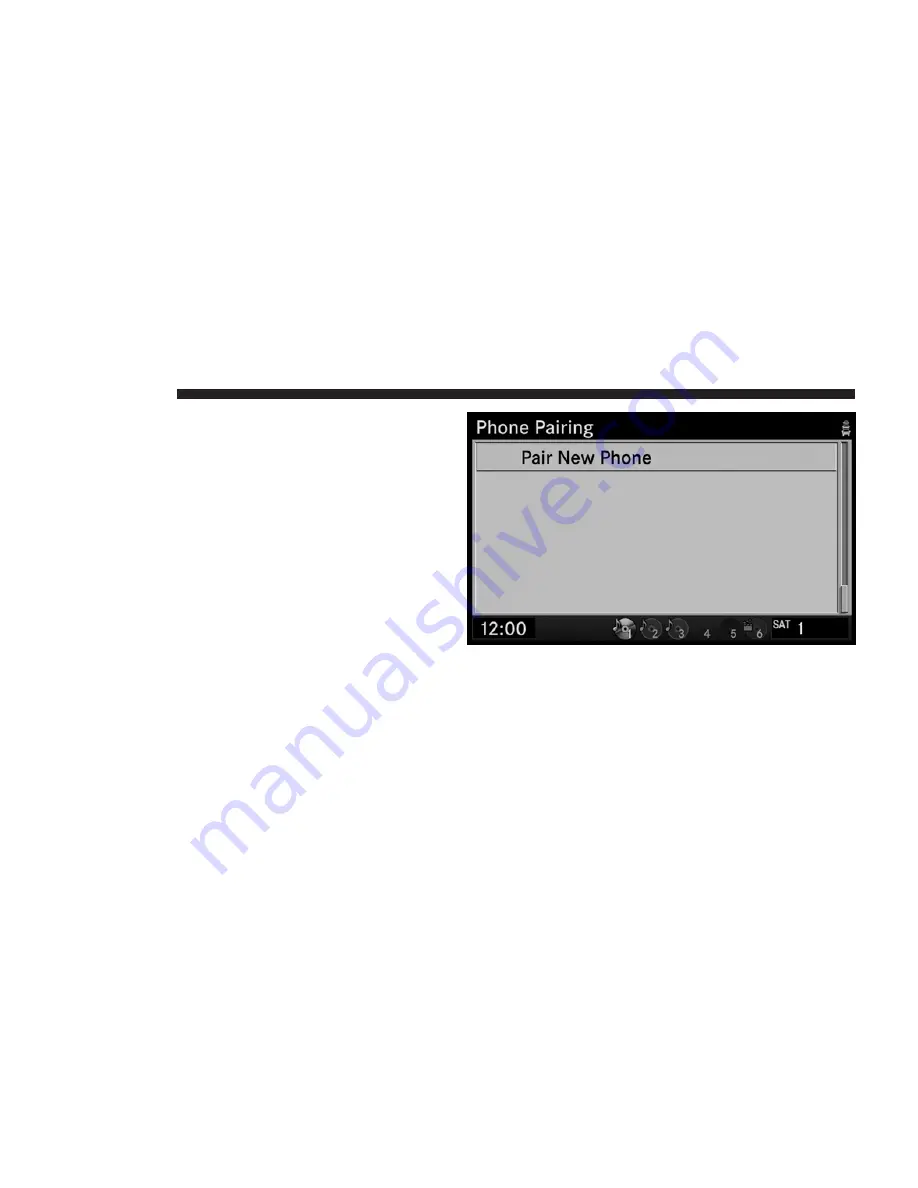
Connect Bluetooth Phone

1. Press the SETUP button.

2. Turn the CENTER CONTROL knob until Phone Pair-
ing is highlighted

3. Press the JOYSTICK to select the Phone Pairing menu.

4. Turn the CENTER CONTROL knob until Pair New
Phone is highlighted.

5. Press the JOYSTICK to select Pair New Phone.

You need to input a 4 digit PIN number (The same 4 digit
pin number must be entered in your phone. You will not
need to remember this pin number after the initial
pairing process. Refer to the user’s manual of your
phone.)

26

NAVIGATION

Содержание Navigation

Страница 1: ...REU REU...

Страница 2: ...ve to another state you should consult your dealer for the proper enable disable setting for your new state As of the time of printing the states that prohibit front seat video viewers were Connecticu...

Страница 3: ...and this device must accept any interference received including interference that may cause undesired operation NOTICE Changes or modifications made to this equipment not expressly approved by the rad...

Страница 4: ...e determined by turning the equipment off and on the user is encouraged to try to correct the interference by one or more of the following measures Increase the separation between the equipment and re...

Страница 5: ...X PLANATORY PRINTED DOCUMENTATION PUB LISHED BY NAVTEQ JOINTLY THE DATABASE BY USING THE DATABASE YOU ACCEPT AND AGREE TO ALL TERMS AND CONDITIONS OF THIS END USER LICENSE AGREEMENT AGREEMENT IF YOU D...

Страница 6: ...nal laws based on the European Software Directive you shall grant NAVTEQ reasonable opportunity to provide said information on reasonable terms including costs to be determined by NAVTEQ TRANSFER OF L...

Страница 7: ...Q your supplier or any other person shall create a warranty or in any way increase the scope of the limited warranty described above The limited warranty set forth in this Agreement does not affect or...

Страница 8: ...o incorrect results The Database does not include or reflect information on inter alia neighborhood safety law enforcement emergency assistance construction work road or lane closures vehicle or speed...

Страница 9: ...agree that you will use Gracenote Data the Gracenote Software and Gracenote Servers for your own personal noncommercial use only You agree not to assign copy transfer or transmit the Gracenote Softwa...

Страница 10: ...data from the Gracenote Servers or to change data categories for any cause that Gracenote deems sufficient No warranty is made that the Gracenote Software or Gracenote Servers are error free or that...

Страница 11: ...the following U S Patents 5 987 525 6 061 680 6 154 773 6 161 132 6 230 192 6 230 207 6 240 459 6 330 593 and other patents is sued or pending Some services supplied under license from Open Globe Inc...

Страница 12: ......

Страница 13: ...Intended Use 6 System Care 6 General Handling 10 User Interface Elements 10 Steering Wheel Mounted Controls If Equipped 16 Audio Settings 18 Getting Started 20 Disclaimer For Navigation Radio 20 Chan...

Страница 14: ...dia Remote Devices 93 Sirius Backseat TV If Equipped 93 Video Entertainment System VES 95 USB Connector 103 AUX Mode 106 Voice Command System 108 Voice Command System Operation 108 Uconnect Phone If E...

Страница 15: ...affic By Sirius Satellite Radio 216 Address Book 220 System Information 227 Data Backup And Updates 227 Troubleshooting 228 Radio 228 Disc 228 HDD 228 Navigation 228 Navigation Map 229 Voice Command 2...

Страница 16: ...screen only when necessary and safe to do so If prolonged viewing of the screen is necessary pull over at a safe location Road conditions and regulations take precedence over information contained on...

Страница 17: ...stination Use your own personal judgement if the navigation system is unable to provide you with an alternative route The law in some states prohibits the Front Seat DVD Viewer As a result it may be d...

Страница 18: ...ribed in this manual If you have any questions please contact the vehicle manufacturer Intended Use Generally recognized rules of navigation technology were maintained during the development and manuf...

Страница 19: ...atures of this radio are speed depen dent For your own safety it is not possible to use the predictive speller to enter a name e g street name while the vehicle is in motion Keep drinks rain and other...

Страница 20: ...r DVD that has a peeled off label on it Discs that have been modified with an adhesive label should not be used in the CD DVD player Do not insert more than 1 one CD DVD at a time into the drive slot...

Страница 21: ...e decreased performance Larger luggage items should be placed as far forward as possible Do not place items directly on or above the antenna Other Electronic Devices You may bring other electronic dev...

Страница 22: ...t 2 PRESETS Radio Mode and 6 DVD Changer While in Radio Mode Press a preset button once to switch to one of the radio station presets 1 to 6 Press a preset button twice to switch to one of the radio s...

Страница 23: ...es a few seconds to eject a CD DVD if one is in the slot To eject all discs press and hold the EJECT button 6 LOAD To load a disc press LOAD and select the desired slot with buttons 1 6 When inserting...

Страница 24: ...UP button to access the systems setup menu 12 MUSIC TYPE Press the MUSIC TYPE button to enable disable certain program types and in Hard Disk Drive mode to display a list or filter options by song by...

Страница 25: ...en if the radio is in standby mode It is possible to eject the CD DVD and to display the time if the unit is switched off It may take a few seconds for the radio to power up and show the time or the c...

Страница 26: ...n map mode move the JOYSTICK to move the cursor on the screen While in list mode press the JOYSTICK to select a highlighted menu item While in list e g Radio Presets HDD Disc move the JOYSTICK to the...

Страница 27: ...ress the REPEAT PROMPT button to hear the current navigation announcement 23 DELETE Press the DELETE button to delete items at the current cursor position on the screen E g characters in name spellers...

Страница 28: ...Information Center EVIC Some vehicles feature an Electronic Vehicle Information Center EVIC with driver interactive display The EVIC is normally located in the instrument cluster or overhead It can d...

Страница 29: ...he operation of the SCROLL switch in each mode AM FM SAT Operation Pressing the top of the switch will seek up for the next available station and pressing the bottom of the switch will seek down for t...

Страница 30: ...the lower left corner of the display Audio Controls Menu Press the AUDIO TUNE rotary knob on the right side of the radio to access the Audio Controls menu Use the CENTER CONTROL knob to highlight one...

Страница 31: ...ROL knob to adjust the bass Press the JOYSTICK again to exit the adjust mode Balance Fade Press the JOYSTICK and then use the JOYSTICK to move the cross hair to the desired position Press the JOYSTICK...

Страница 32: ...s turned on Press the JOYSTICK to accept the disclaimer Change the Language The navigation radio will conform to the vehicle lan guage set in the ELECTRONIC VEHICLE INFORMA TION CENTER EVIC if equippe...

Страница 33: ...sired language is highlighted 5 Press the JOYSTICK to select the highlighted lan guage 6 Turn the CENTER CONTROL knob until YES is high lighted 7 Press the JOYSTICK to confirm the language change NOTE...

Страница 34: ...igation prompts Voice Com mand etc Set the Time GPS Time 1 Press and hold the TIME button NOTE The Time Settings screen can also be accessed through the SETUP menu NOTE The check mark indicates the cu...

Страница 35: ...6 Press the BACK button to go to the previous screen You can also press the SETUP button to exit the Setup screen Daylight Savings 1 Turn the CENTER CONTROL knob until Daylight Savings is highlighted...

Страница 36: ...ates the currently active setting 3 Turn the CENTER CONTROL knob to highlight Set Hours 4 Press the JOYSTICK to select the desired setting 5 Turn the CENTER CONTROL knob to adjust the hours 6 Press th...

Страница 37: ...ect a radio band 2 Press the RADIO button repeatedly until the desired band is selected 3 Either press the SEEK up down buttons or the SCAN button or rotate the TUNE knob to change the currently playi...

Страница 38: ...Pairing menu 4 Turn the CENTER CONTROL knob until Pair New Phone is highlighted 5 Press the JOYSTICK to select Pair New Phone You need to input a 4 digit PIN number The same 4 digit pin number must be...

Страница 39: ...plete the procedure 12 The phone appears on Phone Pairing screen You can press the joystick and then use the Center Control knob to move the phone to a different priority slot If desired and then pres...

Страница 40: ...ct Guide Me Home NOTE The following steps are different if the home address has been set already Refer to Address Book for more information NOTE The vehicle must be in park in order for a HOME address...

Страница 41: ...his manual 7 Change the country if necessary 8 Change the state or province if necessary 9 Select Input Street Name and press the JOYSTICK to confirm 10 Enter the street name and confirm CONTINUE 11 E...

Страница 42: ...ommand tutorial Press the Voice Command or Uconnect Phone button to cancel the tutorial Uconnect Phone Tutorial When you press the Uconnect Phone button you will hear a beep The beep is your signal to...

Страница 43: ...pressing the RADIO button Satellite Radio Mode In order to receive satellite radio the vehicle needs to be outside with a clear view to the sky If the screen shows Acquiring Signal you might have to c...

Страница 44: ...press the MENU button again NOTE If Presets List is not check marked the radio will show all Channels in SAT mode by pressing the LIST button Display Radio Preset List in AM FM 1 Press the LIST butto...

Страница 45: ...AN button again to stop the scan function and to select a radio station RBDS Radio Broadcast Data System This radio navigation system is capable of receiving RBDS signals in the FM band RBDS is a tech...

Страница 46: ...to hide additional radio text information MUSIC TYPE Program Type Filter Program Type PTY is only available in FM and SAT mode Radio stations are grouped according to their program e g Soft Rock Rhyt...

Страница 47: ...Public Religious Music Religious Talk Rhythm and Blues Rock Soft Soft Rhythm and Blues Soft Rock Sports Talk Top 40 Weather SIRIUS Satellite Radio Program Types Pop Rock Electronic Dance Hip Hop R B C...

Страница 48: ...of the SIRIUS Satellite Radio screen 1 Press the MENU button while in SAT mode 2 Turn the CENTER CONTROL knob until Presets List is highlighted 3 Press the JOYSTICK to mark the selection NOTE The che...

Страница 49: ...lock Re Subscribe to SIRIUS Satellite Radio Press Menu and Select Subscription to access the Sub scription Information screen New vehicle purchasers or lessees will receive a free one year subscripti...

Страница 50: ...ers for your receiver To reactivate your service either call the number listed on the screen or visit the provider online SAT VIDEO MENU if equipped While in SATV Mode press the MENU button to display...

Страница 51: ...radio Following expiration of the one year free services it will be necessary to access the information on the Subscription Information screen in order to re subscribe Write down the SIRIUS ID numbers...

Страница 52: ...isplay Settings menu Select Daytime Colors to switch to manual daytime mode and to adjust the brightness of the display using daytime colors Select Nighttime Colors to switch to manual nighttime mode...

Страница 53: ...switch of the vehicle View Settings Press the SETUP button and select View Setting to access the View Settings menu Check Default View to enable the default view mode Check Picture View to enable the...

Страница 54: ...brand logo is displayed in the right half of the screen In Picture View a pictures can be displayed on the right half of the radio screen Refer to the Importing Pictures in the Media section for a det...

Страница 55: ...or turn by turn navigation can be displayed on the right half of the radio screen see Navigation View Settings for more information In Screen Saver View the screen stays black Press any button on the...

Страница 56: ...manual transmission the reverse gear must be engaged Disable ParkView To disable the ParkView feature press the SETUP button and select Rear Camera Check or uncheck the check mark in order to enable...

Страница 57: ...equirements CAUTION This disc player will accept a 4 3 4 inch 12 cm disc only The use of other sized discs may damage the disc player mechanism The radio is capable of playing compact discs CD recorda...

Страница 58: ...iscs Discs that have been modified with an adhesive label should not be used in the CD DVD player High definition content and media e g HD DVD Blu Ray is not supported NOTE On MP3 and WMA CD s with a...

Страница 59: ...radio The radio pulls the disc automati cally The radio selects the appropriate mode after the disc is recognized and starts playing the first track The display shows Reading during this process Remov...

Страница 60: ...or 10 seconds each Press the SCAN button again to stop the scan function Next Track Press the SEEK up button The next track on the disc is played Once the last track has been reached in the forward di...

Страница 61: ...ct the desired track you wish to play by turning the CENTER CONTROL knob until the track is highlighted Press the JOYSTICK to play the highlighted track Press the LIST button again to hide the list Di...

Страница 62: ...more information visit www gracenote com NOTE Visit http www chrysler com mygig for up date information Copy Disc to Hard Drive Read about copying discs in the Hard Disk Drive section of this manual...

Страница 63: ...ng a MP3 WMA Disc 1 Press the LOAD button once 2 Select an empty slot by pressing one of the preset buttons 1 6 3 Wait until the radio displays Insert Disc on the left side of the screen 4 With the pr...

Страница 64: ...L knob to highlight a folder 7 Press the JOYSTICK to open a highlighted folder and to play the songs in the folder Playing a Video DVD NOTE Viewing a DVD video on the radio screen is not available in...

Страница 65: ...a chapter or track in the list to start playback from the selected section DVD MENU Controls If you insert a DVD video disc that contains a top menu a menu may appear Use the JOYSTICK to navigate menu...

Страница 66: ...the RW button during playback to fast reverse playback Press the SEEK up button to locate succeeding chapters or tracks Press the SEEK down button to start playback from the beginning of the current c...

Страница 67: ...nu to view the video on the screen Select Hide Video in the DVD Menu to hide the video on the screen Select DVD Menu in the DVD Menu to view the top menu if available on the disc Select DVD Setup in t...

Страница 68: ...forward until the damaged area is passed Temperature Protection If the temperature of the disc reader during operation becomes too high a popup message will inform the user of an over temperature sit...

Страница 69: ...l need to copy tracks to the internal hard drive The files will be stored on the internal hard disk drive and can be used in the HDD mode Copy Audio Disc to Hard Drive 1 Insert and select a disc 2 Pre...

Страница 70: ...the entire disc to the hard disk drive During the copy process the disc player cannot play audio The copy progress is shown in the display It is possible to listen to radio modes AM FM and SAT or oth...

Страница 71: ...stop the copy process Copy WMA MP3 Files to Hard Drive You can copy MP3 and WMA formatted compressed audio files from a disc or via USB e g USB stick It is recommended to sort music files into folder...

Страница 72: ...n playlist 1 Song 2 mp3 Second song in playlist 1 Song 3 wma Third song in playlist 1 My Playlist Folder 1 Playlist 2 01 Song mp3 First song in playlist 2 02 Song mp3 Second song in playlist 2 03 Song...

Страница 73: ...er cannot play audio The copy progress is shown in the display It is possible to listen to radio modes AM FM and SAT or other media modes HDD during this process Copying from USB 1 Insert a USB device...

Страница 74: ...3 Check mark the desired music titles folders or Select All 4 Highlight Import Selected Music 5 Press the JOYSTICK to start the copy process 62 NAVIGATION...

Страница 75: ...port Playing Audio Files from the Hard Disk Drive You can play songs directly from the internal hard disk drive 1 Press the MEDIA button repeatedly until the HDD tab is highlighted 2 Press the LIST bu...

Страница 76: ...t a song 4 Press the JOYSTICK to play the highlighted song Playing Audio Files by Music Categories 1 Press the MUSIC TYPE button to select an available category The navigation radio can sort the files...

Страница 77: ...SEEK down button The previous track of the current album is played If the first track has been reached in the backward direction the unit will switch from the first track to the last track If a track...

Страница 78: ...e Time The elapsed title time of the current playing track is displayed on the left side of the screen HDD Menu While in HDD mode press the MENU button to access the HDD Menu Random Playback The rando...

Страница 79: ...ay order function plays all songs in normal order Add To Quicklist The Add To Quicklist function adds the currently playing song to a playlist named QuickList NOTE Additional items under HDD MENU can...

Страница 80: ...2 Select the My Files function 3 Select My Music 68 NAVIGATION...

Страница 81: ...ou may create a new playlist rename a playlist add songs to a playlist remove songs from a playlist rearrange a playlist or delete a playlist Create a New Playlist 1 While in HDD mode press Menu 2 Sel...

Страница 82: ...used if you make a mistake 7 Highlight CONTINUE and press the JOYSTICK The playlist is now created but does not yet contain any music 8 Select one of the filters to display a list of songs In this ex...

Страница 83: ...function to uncheck all songs 11 Once you made your selection scroll up and select Add Selected Songs and press the JOYSTICK You may now select another filter and add more songs to the playlist If you...

Страница 84: ...JOYSTICK 5 Select a song in the list and press the JOYSTICK again to play the playlist Rename a Playlist 1 While in HDD mode press MENU 2 Select My Files 3 Select My Music 4 Select Manage Playlists 72...

Страница 85: ...named You may rename another playlist in the list If you don t want to rename another Playlist press MEDIA to go to the HDD screen To play the renamed playlist 1 Press the MUSIC TYPE button 2 Select P...

Страница 86: ...DD mode press MENU 2 Select My Files 3 Select My Music 4 Select Manage Playlists 5 Select Add Songs to Playlist 6 Select a playlist and press the JOYSTICK 7 Select a filter In this example we use by A...

Страница 87: ...gs and press the JOYSTICK You may now select another filter and add more songs to the playlist If you don t want to add more songs to the Playlist press MEDIA to go to HDD screen To play the new playl...

Страница 88: ...ect Manage Playlists 5 Select Remove Songs from Playlist 6 Select a playlist and press the JOYSTICK 7 Check mark the songs you would like to have re moved from the playlist You may use the Select All...

Страница 89: ...NTER CONTROL knob until the new playlist is highlighted 4 Press the JOYSTICK 5 Select a song in the list and press the JOYSTICK again to play the playlist NOTE Deleting a file from a Playlist will not...

Страница 90: ...he list 10 Press the JOYSTICK to confirm You may now select another song to be rearranged If you don t want to rearrange a Playlist press MEDIA to go to HDD screen To play the new playlist 1 Press the...

Страница 91: ...have removed from the list You may use the Select All function to select all playlists in the list or the Clear All function to uncheck all playlists 7 Once you made your selection highlight Delete S...

Страница 92: ...ylist will not delete files from the Hard Disk Drive Deleting Songs Permanently from the Hard Disk Drive 1 While in the HDD mode press the MENU button to access the HDD Menu 2 Select the My Files func...

Страница 93: ...3 Select My Music 4 Select the Delete Music function NAVIGATION 81...

Страница 94: ...vailable artists from the internal HDD 6 Turn the CENTER CONTROL knob until the desired artist is highlighted and press the JOYSTICK 7 Check mark the songs you would like to permanently delete You may...

Страница 95: ...he hard disk drive If you don t want to delete more songs press MEDIA to go to the HDD screen Deleting All Music Files from the Hard Disk Drive 1 Press the SETUP button 2 Select the Manage HDD functio...

Страница 96: ...ss the JOYSTICK again Importing Pictures It is possible to import display pictures to the internal hard disk drive You can import pictures either from DISC or from USB Refer to the Remote Devices sect...

Страница 97: ...Digital Camera to 476 by 348 pixels before the import NOTE USB devices e g camera memory USB adap tors etc must comply with the MSD Mass Storage Device standard This USB terminal can provide power to...

Страница 98: ...3 Select My Pictures 4 Highlight Add Picture 5 Press the JOYSTICK 86 NAVIGATION...

Страница 99: ...disc or USB device to be recognized 6 Select USB for this example 7 Insert the USB device containing the pictures 8 Select Import Pictures and press the JOYSTICK 9 Select the desired picture 10 Press...

Страница 100: ...pecific mode The navigation radio can store 48 user pictures NOTE A USB device can be inserted and the download process can be started in any mode Navigation Radio Media etc Deleting Selected Pictures...

Страница 101: ...ng YES the picture will be permanently removed from HDD If you don t want delete more pictures either press the BACK button to go to previous screens or press one of the hard keys RADIO MEDIA NAV to g...

Страница 102: ...All of My Picture files 4 Press the JOYSTICK NOTE If you confirm the next step all pictures will be permanently deleted Picture can not be recovered 5 Select YES and press the JOYSTICK again Set Pictu...

Страница 103: ...s screen or press one of the hard keys RADIO MEDIA NAV to go to a specific mode Slideshow NOTE The slideshow is not available when the vehicle is in motion 1 Press the Menu button 2 Select the My File...

Страница 104: ...7 Press the JOYSTICK 8 Press the JOYSTICK again to stop the slideshow 92 NAVIGATION...

Страница 105: ...e needs to be outside with a clear view to the sky If the screen shows Acquiring Signal you might have to change the vehicle position in order to receive a signal In most cases the satellite radio doe...

Страница 106: ...ed and the shifter must be in position P for vehicles with automatic transmission In vehicles with manual transmission the parking brake must be engaged In order to watch the desired SIRIUS Backseat T...

Страница 107: ...op the scan function Video Program Information Press the INFO button to display additional program information in the right half of the screen Press the INFO button again to close additional program i...

Страница 108: ...e VES system is turned on Press the MEDIA button repeatedly until the VES audio source is selected Press the MENU button and select Select VES Source Select the desired source to play the selected sou...

Страница 109: ...this example the Rear AUX 1 audio is playing on the navigation radio You can play the VES source through the navigation radio sound system Sending audio video and controlling the VES The navigation ra...

Страница 110: ...he Rear VES Controls The Rear VES Controls are displayed Check or uncheck the VES Screen Power to turn the VES screen on or off The second entry shows the source of the rear VES channel 1 Plays FM tun...

Страница 111: ...mote control Uncheck the Lock Rear Controls to enable the controls on the VES remote control unit A VES headset can listen to either audio channel 1 or audio channel 2 Select channel 1 In this example...

Страница 112: ...lected tuner is displayed You may select a preset to change the station or turn the TUNER knob or press the SEEK up or SEEK buttons to change the radio station NOTE The navigation radio cannot play bo...

Страница 113: ...video DVD The playback starts automatically after the DVD video is recognized by the disc drive 2 To access the rear VES press the MENU button 3 Select VES Controls to display the Rear VES Con trols...

Страница 114: ...For this example the third entry shows the source of the rear VES Channel 2 plays DISC 5 Select DISC 6 Turn the CENTER CONTROL knob to select Disc Functions 102 NAVIGATION...

Страница 115: ...stick The USB connector is covered by a small cover which protects the connector from dust or damage NOTE USB devices e g camera memory USB adap tors etc must comply with the MSD Mass Storage Device...

Страница 116: ...loads from the internet cannot be played on this radio NOTE Some MP3 Players do not allow songs to be copied into other devices How to Open the Cover 1 Place finger under the pull arrow and pull forwa...

Страница 117: ...orts of your radio Make sure your connectors are the identical shape and size before you connect How to close the cover 1 Using your thumb to place the flap into the frame as shown above 2 Then push o...

Страница 118: ...device The display will switch automatically to the AUX mode when a 3 5 mm stereo mini jack cable has been connected The radio screen will revert back to the last tuner mode when the cable is unplugge...

Страница 119: ...quires your full attention If you re engaged in driving or any activity that requires your full attention we recommend that you not use external device controls NOTE Inserting of a mono jack will resu...

Страница 120: ...uld be kept on the roadway ahead Failure to do so may result in an accident causing serious injury or death When you press the Voice Command button you will hear a beep The beep is your signal to give...

Страница 121: ...this system you should speak clearly and at a normal speaking volume The system will best recognize your speech if the win dows are closed and the heater air conditioning fan is set to low At any poi...

Страница 122: ...ands are available if the supported radio mode is active Changing the volume Start a dialogue by pressing the Voice Command button Say a command e g MAIN MENU Use the ON OFF VOLUME rotary knob to adju...

Страница 123: ...ay RADIO to switch to AM FM or SAT Say RADIO MENU In this mode you may say the following commands RADIO AM to switch to the AM band RADIO FM to switch to the FM band SATELLITE RADIO to switch to the s...

Страница 124: ...ommands STATION 1 250 to change the station NEXT STATION to select the next station PREVIOUS STATION to select the previous station LIST STATIONS to hear a list of available stations SELECT NAME to sa...

Страница 125: ...k DISC NUMBER 1 6 to change the disc NEXT DISC to play the next disc PREVIOUS DISC to play the previous disc MAIN MENU to switch to the main menu Hard Drive To switch to the HDD mode say HARD DRIVE In...

Страница 126: ...E to delete the recording PLAY MEMOS to play previously recorded memos During the playback you may press the Voice Command button to stop playing memos You proceed by saying one of the following comma...

Страница 127: ...ook first Refer to Address Book section in this manual You may say DESTINATION ENTRY GUIDE ME TO A NAME STREET ADDRESS INPUT COUNTRY INPUT STATE INPUT CITY NAME INPUT STREET NAME INPUT HOUSE NUMBER PO...

Страница 128: ...GE METHOD FASTER ROUTE SHORTER ROUTE TRAVEL INFO MAP OPTIONS MAP ZOOM IN ZOOM OUT ADDRESS BOOK NEW ENTRY NAVIGATE TO A NAME DELETE ERASE ALL System Setup To switch to the system setup say SETUP You ca...

Страница 129: ...he Voice Command system This will train your own voice to the system and will improve Command For best results the Voice Training session should be completed when the vehicle is parked engine running...

Страница 130: ...you would like to restore the Voice Command system to factory default settings Select Start Voice Training to train the voice Command system Select Listen to Tutorial to hear instructions on the Voice...

Страница 131: ...connected phone Uconnect Phone allows you to dial a phone number with your cellular phone using simple voice commands e g Call Jim Work or Dial 248 555 1212 Your cellu lar phone s audio is transmitte...

Страница 132: ...one allows you to transfer calls between the system and your cellular phone as you enter or exit your vehicle and enables you to mute the system s microphone for private conversations The Uconnect pho...

Страница 133: ...nds you will be prompted to repeat it If you have trouble with recognition you should press the Voice Command button then say Voice Train ing This will train your own voice to the system and will impr...

Страница 134: ...ow what your options are at any prompt say Help following the beep The Uconnect Phone system will play all the options at any prompt if you ask for help To activate Uconnect Phone from idle simply pre...

Страница 135: ...ery new phone must be paired before it can be used NOTE The pairing process shall be performed by a passenger while the vehicle is in motion The following are general phone to Uconnect Phone voice pai...

Страница 136: ...However at any given time only one cellular phone can be in use connected to your Uconnect Phone System The priority allows Uconnect Phone to know which cellular phone to use if multiple cellular pho...

Страница 137: ...onebook to learn how to store a name in the phonebook 5 Uconnect Phone will ask you to confirm the name and then dial the corresponding phone number which will appear in the display of the navigation...

Страница 138: ...radio will allow you to enter up to 500 names in the phone book with each name having ad dresses and up to four associated phone numbers and designations Voice Tags In step 4 of the Add Names to Phon...

Страница 139: ...ook For example the entry John Doe may have a mobile and a home number but you can add John Doe s work number later using the Phonebook Edit feature Delete Phonebook Entry 1 Press the Uconnect Phone b...

Страница 140: ...phonebook After confirmation the phonebook entries will be deleted List All Phonebook Names 1 Press the Uconnect Phone button to begin 2 Wait for the beep 3 Say PHONEBOOK 4 When prompted after the be...

Страница 141: ...feature can be accessed through the Uconnect Phone system Check with your cellular service provider for the features that you have Answer or Reject an Incoming Call When no Call Currently in Progress...

Страница 142: ...o place the current call on hold and answer the incoming call NOTE Uconnect Phone compatible phones in market today do not support rejecting an incoming call when another call is in progress Therefore...

Страница 143: ...beep indicating that the active and hold status of the two calls have switched Only one call can be placed on hold at one time Conference Call When two calls are in progress one active and one on hold...

Страница 144: ...not become active automatically This is cell phone dependent To bring the call back from hold press and hold the Uconnect Phone button until you hear a single beep Redial 1 Press the Uconnect Phone bu...

Страница 145: ...ssistance If you are in an emergency and the mobile phone is reachable Pick up the phone and manually dial the emergency number for your area If the phone is not reachable and Uconnect Phone is operat...

Страница 146: ...800 712 3040 for outside Mexico city in Mexico Please refer to the 24 Hour Towing Assistance coverage details in the 24 Hour Towing Assistance Program Guide Paging To learn how to page refer to secti...

Страница 147: ...pin number followed with a pound 3 7 4 6 Press the Voice Command button Say SEND 3 7 4 6 Saying a number or sequence of numbers followed by SEND is also to be used to navigate through an auto mated c...

Страница 148: ...ice tag to send a saved touch tone sequence For example if required to enter your pin number saved as Voicemail Pin Code Press the Voice Command button Say SEND Voicemail Pin Code Turning Confirmation...

Страница 149: ...our paired Bluetooth cellular phone the audio will be played through your vehicle s audio system Uconnect Phone will work the same as if you dial the number using voice recognition NOTE Certain brands...

Страница 150: ...he Voice Command button barging in and say TRANSFER CALL The navigation radio starts playing the last used audio source and you can continue your call on the cellphone Transfer Call to Uconnect Phone...

Страница 151: ...one names of all paired cellular phones in order from the highest to the lowest priority To select or delete a paired phone being announced press the Voice Command button and say SELECT or DELETE Also...

Страница 152: ...ity You may change a phone priority by using the CENTER CONTROL knob 1 Press the SETUP button 2 Select Phone Pairing 3 Select the desired phone 4 Select the Modify Priorities 5 Highlight the desired p...

Страница 153: ...the SETUP button 2 Select Phone Pairing 3 Select the desired phone 4 Select Delete Pairing 5 Confirm by selecting YES in the confirmation screen 6 Press SETUP to exit the setup menu Things You Should...

Страница 154: ...d to store similar sounding names in the Uconnect phonebook Uconnect phonebook name tag recognition rate is optimized for the person who stored the name in the phonebook You may say O letter O for 0 z...

Страница 155: ...this happens the connection can generally be re established by switching the phone off on Your cell phone is recom mended to remain in Bluetooth on mode Power Up After switching ignition key from off...

Страница 156: ...Voice Tree Setup Menu To initiate Uconnect Phone press Uconnect Phone button After the system beep say Uconnect SETUP In this menu you may say the following commands PHONE PAIRING PAIR A PHONE DELETE...

Страница 157: ...calculate a route As you drive along your chosen route you are guided with pictorial displays and voice prompts Navigation Software This navigation radio requires digital data from a Navi gation Datab...

Страница 158: ...business loca tions there may be situations where the navigation system is not able to route you to your desired destina tion by the entry method you have chosen If this occurs choose another entry m...

Страница 159: ...Destination Input section for details Guide Me Home Select this function when you want to route to your home destination See the Guide Me Home section for details Where Am I Now Select this function...

Страница 160: ...Default Settings section for details Emergency Information Select this function when you want to route to an emergency facility near to the current location of your vehicle You may list fire stations...

Страница 161: ...are only a few choices left you may press the LIST button to display a list of names IMPORTANT NOTE Use the space symbol _ as a space between words e g NEW_YORK_CITY NOTE Press the DELETE button to de...

Страница 162: ...e safety of others it is not possible to use the speller while the vehicle is in motion Destination Input Press the NAV button to access the NAV Main Menu Select Destination Entry to get to the Destin...

Страница 163: ...nation from a list of locations and public places or point of interest POI Search by place name by phone number by category or place type Recent Destinations are previously entered addresses or locati...

Страница 164: ...from the Map screen By selecting a street segment or icon you can quickly enter a destina tion without the need to input the city name or street Destination Input by Street Address For this example we...

Страница 165: ...the state is already set to your destination continue with Enter a Street Address If your destination is not in the displayed state 1 Turn the CENTER CONTROL knob and highlight Change State 2 Press th...

Страница 166: ...destination is not in the displayed province 1 Turn the CENTER CONTROL knob and highlight the province 2 Press the JOYSTICK 3 Either enter the name in the speller or press the LIST button 4 Highlight...

Страница 167: ...n the speller the second letter of the street name CONSTITUTION AVE NW In the upper right corner the number of possible roads decreases more 4 Press the LIST button to display a list of possible stree...

Страница 168: ...not wish to enter a number you can select SKIP instead The navigation system will guide you to a selection of the entered street which is the closest to your current location 6 Select WASHINGTON DC 7...

Страница 169: ...oll roads tunnels or ferries Save the destination to the favorite places folder to the address book to the My Trips folder or as Home address Simulate the route Destination by Point of Interest A poin...

Страница 170: ...3 Enter the name into the speller 4 Press the JOYSTICK when Continue is highlighted 5 Confirm the destination Select Type from List For this example we will continue by entering a Gas Station close t...

Страница 171: ...s sorted by distance to the current vehicle location 4 Select a gas station of your choice 5 Confirm the destination Favorite POI Types NOTE For your safety the number of displayed PO s may be limited...

Страница 172: ...t of Interest function in the Destination Entry screen 2 Select the Favorite POI Types function 3 Select the Edit Favorite POI Types function 4 Select the Add Type function 5 Select the desired catego...

Страница 173: ...tion in the Destination Entry screen 2 Select the Favorite POI Types function 3 Select the Edit Favorite POI Types function 4 Select Rearrange Type function 5 Select the desired category 6 Press the J...

Страница 174: ...Selecting a Favorite POI Type 1 Select the Point of Interest function in the Destination Entry screen 2 Select the Favorite POI Types function 3 Select a category 162 NAVIGATION...

Страница 175: ...n to delete the category from the list NOTE Press and hold the DELETE button for 5 seconds will remove all categories from the list 3 Select YES 4 Press the JOYSTICK to confirm Find within a City For...

Страница 176: ...For this example we enter a city within the country 3 Highlight the country You may also highlight the state if you enter a city within the state 4 Press the JOYSTICK to confirm your selection For thi...

Страница 177: ...the city name into the speller 6 Press the LIST button to display a list of cities For this example we select DETROIT MI 7 Select the city from the list 8 Press the JOYSTICK to confirm the city NAVIGA...

Страница 178: ...9 For this example we choose the TRAVEL category 10 Select AIRPORT from the list 166 NAVIGATION...

Страница 179: ...tion Input Phone Number For this example we will continue by entering the phone number of the WHITE HOUSE in Washington DC 1 Select the Point of Interest function in the Destination Entry screen 2 Sel...

Страница 180: ...3 Enter the phone number 4 For this example there are 3 matches Select CON TINUE 5 Select the desired destination 6 Press the JOYSTICK to confirm the destination 168 NAVIGATION...

Страница 181: ...destination from the list 3 Press the JOYSTICK to confirm the highlighted destination Remove a Destination from Recent Destinations List 1 Highlight the Recent Destinations function in the Destination...

Страница 182: ...ct the Use Address Book function in the Destina tion Entry screen 2 Select a folder or select SEARCH to search for the desired contact to enter the destination see the Address Book section in this man...

Страница 183: ...menu see the route options section in this manual for more information Destination Input by Intersection For this example we will continue by entering the follow ing intersection Kaufman Ln and Bridwe...

Страница 184: ...ut Street Name 4 Enter the Name of the 1st street Kaufman Ln into the speller and confirm the name The navigation radio will display a list of possible cross streets of the initially entered street 17...

Страница 185: ...the speller or press the LIST button 5 Select Bridwell Dr for this example If you wish to change your mind and prefer to select a different cross street you can press the BACK button to select another...

Страница 186: ...ountry section to learn how to change state province and or country 2 For this example change the state to New York NOTE If you do not know the name of the state select Input City Name in Country in s...

Страница 187: ...tination Input by Geo Coordinate For this example we will plan a route to a park in Michigan 1 Select Geo Coordinate in the Destination Entry screen 2 Enter the first coordinate 42 31 22 N NAVIGATION...

Страница 188: ...feature allows quick and easy selection of a destina tion directly from the map screen By selecting a street segment or POI icon you can quickly enter a destination without the need to input the city...

Страница 189: ...yed either press the JOYSTICK or turn the CENTER CONTROL knob clock wise to zoom in closer 5 Once a transparent circle is displayed use the JOY STICK in the CENTER CONTROL knob to navigate the center...

Страница 190: ...ou can keep your hands on the steering wheel while you enter a destination You may press the Voice Command button in any mode 1 Press the Voice Command button say Destina tion Entry The navigation rad...

Страница 191: ...Wait for the beep and say YES The radio will respond Line one selected Now do you want to enter a house number 6 Wait for the beep and say NO The radio will respond Now do you want to start route gui...

Страница 192: ...ome 1 Select Guide Me Home in the NAV Main Menu 2 Select GO to confirm the route to the home address saved in the address book See the Getting Started and Address Book section in this manual for infor...

Страница 193: ...Saved Locations memory in the Address Book in the My Trips memory or as the home address Select NEARBY POI to search for a POI in the surround ing area of your vehicle Emergency Information Use this f...

Страница 194: ...1 Select Emergency Information in the NAV Main Menu 2 Select Hospitals Police Stations Fire Departments or Dealerships 3 Read and confirm the disclaimer 182 NAVIGATION...

Страница 195: ...dial 911 with a cell phone connected via Uconnect Phone See the Uconnect Phone section in this manual for more information on Uconnect Phone WARNING The CALL 911 function is not available if the phon...

Страница 196: ...will switch to the map and the trail appears as a yellow line on the map screen while you drive along a route Maneuver points bread crumbs are marked as yellow dots The start point is marked with a g...

Страница 197: ...Trail to stop recording The end point is marked with a red dot Select Discard Trail to discard the trail and stop the recording Select Continue Recording to continue the recording 4 Select Stop and Sa...

Страница 198: ...cannot make a destination entry using Voice Command NOTE You can save up to 12 trails If the trail memory is full you must discard one of the previous recorded trails in order to record a new trail R...

Страница 199: ...o simulate a route to the trail 5 Select GO in the Confirm Route To screen to start the route guidance Once you arrive at the destination the route guidance will end and the trail will be displayed un...

Страница 200: ...2 Select Map Items 188 NAVIGATION...

Страница 201: ...e heading indicator 4 Check mark Distance to Destination to show or hide the distance indicator 5 Check mark Time to show or hide the time display 6 NOTE Time needs to be check marked in order to sele...

Страница 202: ...the MENU button 2 Select Map Items 3 Select POI Icons to show a list of point of interest icons NOTE Not all POI icons categories are visible in higher zoom levels Zoom to lower zoom levels in order...

Страница 203: ...n mode press the MENU button 2 Select Map Perspective 3 Select either 2D Map or 3D Map Map View 1 While in navigation mode ress the MENU button 2 Select Map View Select Full Map to display a full map...

Страница 204: ...n by turn navigation can be displayed on the right half of the radio screen see View Settings for more information You find the View Settings menu by pressing SETUP and selecting View Settings Map Hea...

Страница 205: ...ly adjust your route Navigation Options NOTE A route guidance must be active to select navigation options Detour 1 While in navigation mode press the MENU button 2 Select Navigation Options 3 Select D...

Страница 206: ...e dis tance on the current route to be avoided 7 Press the JOYSTICK again to confirm the detour 8 Select YES and press the JOYSTICK again to confirm Avoid Road 1 While in navigation mode press the MEN...

Страница 207: ...OL knob to select a road 5 Press the JOYSTICK 6 Select Yes and press the JOYSTICK again to confirm View Destinations A route guidance must be active to select navigation options 1 While in navigation...

Страница 208: ...a destination from the list and press the JOYSTICK 5 Press NAV button to go back to NAV screen Route Choices A route guidance must be active to select navigation options 1 While in navigation mode pre...

Страница 209: ...o calculate and display the alternative route NOTE If SIRIUS Realtime Traffic is enabled the route may change back to the original route due to possible traffic message updates 5 Press the JOYSTICK to...

Страница 210: ...elect Avoidance Types 4 Check mark the desired types 5 Press the NAV button to confirm the new settings NOTE Avoiding freeways toll roads tunnels or ferries may result in very long routes 198 NAVIGATI...

Страница 211: ...s displayed 2 Select STOP ROUTING and press the JOYSTICK to confirm 3 Select YES and press the JOYSTICK again to stop routing NOTE If there is more than one route active you can cancel all destination...

Страница 212: ...nce During navigation you will receive voice recommenda tions to help guide you The following explains some guidance messages you may receive WARNING Danger of Accident DO NOT IGNORE TRAFFIC LAWS If a...

Страница 213: ...given Take the second turn to the right This arrow shows you which exit you should take from a traffic circle NOTE At intersections and traffic circles only the ends of the roads to be passed are disp...

Страница 214: ...ion while Faster Route utilizes more highways NOTE Avoiding freeways toll roads tunnels or ferries may result in very long routes Avoidance Types Mark or unmark route parameters and then press the BAC...

Страница 215: ...in order to see turn arrows in the Radio and Media modes Refer to the View Settings section in this manual Uncheck Play Audio Guidance Prompts to mute the navigation announcements Select Set Prompt Vo...

Страница 216: ...gation Settings 2 Select Units 3 Select either mi ft or km m GPS Display Format 1 While in NAV Main Menu select Navigation Settings 2 Select GPS Display Format 3 Select either Decimal Decimal Degrees...

Страница 217: ...ation The GPS Information menu displays Current Location Coordinates in degrees minutes and seconds number of used satellites a map of the calculated position and elevation 3 Press the JOYSTICK to tog...

Страница 218: ...unctional classification are not shown in higher zoom levels E g residential streets lightly traveled county roads Route Lines The navigation radio displays recorded trail lines as yellow lines on top...

Страница 219: ...he NAV Main Menu 2 Select the Add Stop Over NOTE The destination entry speller is locked out while the vehicle is in motion You may enter a destination either by point on map or utilize Voice Command...

Страница 220: ...firm the position in the list 6 If the STOP OVER destination is the first destination in the list select GO in the Confirm Stop Over screen 7 If the STOP OVER destination is not the first destina tion...

Страница 221: ...the list Trip Planner If you are traveling to multiple destinations the My Trip function will allow you to calculate and save the route to each destination NOTE The vehicle should be parked to plan a...

Страница 222: ...AN NEW TRIP to plan a new trip 3 Enter a name for the trip NOTE The DELETE button can be used to make a correction to the entry 4 Highlight CONTINUE and press the JOYSTICK to confirm the trip name 210...

Страница 223: ...tion Input in this manual 8 Highlight ADD in the Add Destination screen 9 Press the JOYSTICK to Insert the destination into the destinations list 10 Turn the CENTER CONTROL knob to position the entry...

Страница 224: ...p to eight trips to the list The display shows the My Trips is FULL message on the screen if all eight trips are used Add a Destination to a Trip 1 Press the NAV button to go to the NAV Main Menu and...

Страница 225: ...ed Delete a Destination from a Trip 1 In the NAV Main Menu select My Trips 2 Highlight the trip 3 Press the JOYSTICK 4 Highlight the destination you would like to delete 5 Press the DELETE button 6 Se...

Страница 226: ...in a Trip 1 In the NAV Main Menu select My Trips 2 Highlight the trip you would like to edit 3 Press the JOYSTICK 4 Highlight Edit Trip 5 Press the JOYSTICK 6 Select Rearrange Destinations to rearrang...

Страница 227: ...select My Trips 2 Highlight the trip 3 Press the JOYSTICK 4 Highlight the destination you would like to start with 5 Press the JOYSTICK 6 Highlight GO in the confirmation screen 7 Press the JOYSTICK...

Страница 228: ...IUS Satellite Radio chapter in the Radio section of this manual Display Traffic Messages 1 Press the MENU button 2 Select Sirius Traffic to display the available traffic messages The traffic message s...

Страница 229: ...ep through the list of available messages 5 Press the JOYSTICK to see the location of a message on a map NOTE You can turn the CENTER CONTROL knob to see the location of other messages on the map 6 Pr...

Страница 230: ...receiver is on In addition to informing the customer whether Realtime Traffic is turned on or off the color green indicates whether a subscription is active or not If the subscription is active and t...

Страница 231: ...will ask for each traffic event the OFF mode will not consider any available traffic information for route guidance Symbols Legend The navigation radio can display icons on the map when the SIRIUS Tra...

Страница 232: ...en 10 and 45 mph A transparent red line indicates an average driving speed between 0 and 10 mph Address Book Overview The address book provides a way to organize and store frequently used addresses Th...

Страница 233: ...to the home address 2 If a phone number is stored and a phone is paired to the radio you may select Call in order to call 3 Select Edit HOME to change and or clear address and phone number 4 Select Vo...

Страница 234: ...a safety feature that limits the availability of certain navigation tasks while the vehicle is traveling Select In Motion Folder and add links to existing entries in the Default Folder VR Created Ent...

Страница 235: ...reated Entries folder Contains contacts which were created with the help of the Voice Command Select Voice Command Created Entries to access contacts created by the Voice Command Refer to the Entering...

Страница 236: ...lt folder select the Default Folder function To select an address from another folder select one of the folder buttons 5 Select Add Contact or Edit Folder to add a new contact You may now Create New C...

Страница 237: ...re information to the entry You may now Change the contact name Add an address Clear the address Add a phone number or Clear the phone number Search a Contact in the Address Book 1 Press Menu button 2...

Страница 238: ...e 6 Press either LIST or select CONTINUE 7 Select a contact from the results list 8 Once the contact information is displayed you may Route To the contacts address or Call the contacts phone number if...

Страница 239: ...cle with a compatible navigation radio e g end of lease Software and Database Updates Visit http www chrysler com mygig for information on available software and database updates Updates are available...

Страница 240: ...ntact your authorized dealership or website http www chrysler com mygig for available updates HDD Q The radio is playing songs from the HDD it jumps to the first song in the list Why does it do that A...

Страница 241: ...rent red line indicates an average driving speed between 0 and 10 mph Voice Command Q The voice command does not understand what I say What can I do to make this work A If the navigation radio has tro...

Страница 242: ...ot pair my phone anymore after I received a software update to my radio A Delete the Uconnect Phone device from your phone and remove and reinsert the battery from your phone to reset the phone 230 NA...

Страница 243: ...le Disc Changer FIX A position determined from terrestrial electronic or astronomical data GMD Gracenote Media Data base Gracenote Media Recognition Service ww w gracenote com GPS Global Positioning S...

Страница 244: ...from Apple s Music Store iTunes and is protected by a Digital Rights Man agement scheme NAV Navigation POS Position PTY Program type radio RBDS Radio Broadcast Data Sys tem SAT Satellite Radio SAT V...

Страница 245: ......

Страница 246: ...Printed in U S A 10REU 526 ENG AB 2nd Edition Chrysler Group LLC...

Отзывы: