background image

ENGLISH  

OPERATION 

MANUAL 


JB SYSTEMS® 

7/46 

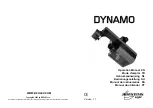
DYNAMO 

MAINTENANCE 

 Make sure the area below the installation place is free from unwanted persons during 

servicing. 

 Switch off the unit, unplug the mains cable and wait until the unit has been cooled down. 

During inspection the following points should be checked: 

 All screws used for installing the device and any of its parts should be tightly fastened 

and may not be corroded. 

 Housings, fixations and installations spots (ceiling, truss, suspensions) should be totally 

free from any deformation. 

 When an optical lens is visibly damaged due to cracks or deep scratches, it must be 

replaced. 

 The mains cables must be in impeccable condition and should be replaced immediately 

when even a small problem is detected. 

 In order to protect the device from overheat the cooling fans (if any) and ventilation 

openings should be cleaned monthly. 

 The interior of the device should be cleaned annually using a vacuum cleaner or air-jet. 

 The cleaning of internal and external optical lenses and/or mirrors must be carried out 

periodically to optimize light output. Cleaning frequency depends on the environment in 
which the fixture operates: damp, smoky or particularly dirty surroundings can cause 
greater accumulation of dirt on the unit’s optics. 

 Clean with a soft cloth using normal glass cleaning products. 

 Always dry the parts carefully. 

 Clean the external optics at least once every 30 days.  

 Clean the internal optics at least every 90 days. 

Attention: We strongly recommend internal cleaning to be carried out by qualified 
personnel! 


SPECIFICATIONS 

Mains Input: 

AC 230V, 50Hz  

Fuse: 

250V 3.15A fast blow (20mm glass) 

Sound Control: 

Internal microphone 

DMX connections: 

3pin XLR male / female


Lamp:


EFP 100W / 12V 

Size:


38.5 x 17 x 12cm  

Weight:

 3.8kg 


Every information is subject to change without prior notice 

FRANÇAIS  

MODE 

D’EMPLOI 


JB SYSTEMS® 

8/46 

DYNAMO


Merci d’avoir choisi ce produit JB Systems. Pour votre sécurité et pour une utilisation 
optimale de toutes les possibilités de l’appareil, lisez attentivement cette notice avant 
utilisation.  


CARACTERISTIQUES 

Cet appareil ne produit pas d’interférences radio. Il répond aux exigences nationales et 
européennes. La conformité a été établie et les déclarations et documents correspondants 
ont été déposés par le fabricant.  

 Cet appareil a été conçu pour la production d’effets lumière décoratifs et est utilisé dans 

des spectacles lumineux. 

 Scanner attractive et compact pour les DJ mobiles. 

 Programmes incorporés et micro pour mode stand-alone ou “Master/slave”! 

 Il suffit de connecter le petit contrôleur CA-8 (en option) pour faciliter les opérations 

 Facile à contrôler par iLEAD, SM1612 ou n'importe quel autre contrôleur DMX  

 10 Gobos multicolores 

 Effet Gobo Shaking  

 Blackout et strobo à vitesse variable 

 4 canaux DMX (pan, tilt, shutter/gobo shaking, gobo/color) 

 Ventilation forcée par ventilateur et protection de surchauffe. 

 Focus réglable 


AVANT UTILISATION 

 Avant d’utiliser cet appareil, assurez-vous de l’absence de dommage lié au transport. En 

cas d’endommagement, n’utilisez pas l’appareil et contactez le vendeur.  


Important: 

Cet appareil a quitté notre usine en parfaite condition et bien emballé. Il est 

primordial que l’utilisateur suive les instructions de sécurité et avertissements inclus dans 
ce manuel. La garantie ne s’applique pas en cas de dommage lié à une utilisation 
incorrecte. Le vendeur ne prend pas la responsabilité des défauts ou de tout problème 
résultant du fait de n’avoir pas tenu compte des mises en garde de ce manuel. 

 Conservez ce manuel dans un endroit sûr pour toute consultation future. Si vous vendez 

l’appareil, assurez-vous d’y joindre ce manuel également.  

 
Vérifiez le contenu: 

Vérifiez si l’emballage contient les articles suivants: 

 DYNAMO scanner  

 Câble d'alimentation 

 Lampe EFP 100W / 12V  

 Mode d'emploi 


Содержание Dynamo

Страница 1: ...cva Reproduction or publication of the content in any manner without express permission of the publisher is prohibited Operation Manual Mode d emploi Gebruiksaanwijzing Bedienungsanleitung Manual de i...

Страница 2: ...t toestel en de gebruikte batterijen op een milieuvriendelijke manier conform de in uw land geldende voorschriften DU ENTSORGUNG DES GER TS Entsorgen Sie das Ger t und die Batterien auf umweltfreundli...

Страница 3: ...ringing it into a warm room after transport Condense sometimes prevents the unit from working at full performance or may even cause damages This unit is for indoor use only Don t place metal objects o...

Страница 4: ...ention Check the label on the backside of the device or see the technical specifications in this manual to know which lamp should be used Never install lamps with a higher wattage Lamps with higher wa...

Страница 5: ...hen the blackout function is active After about 30sec blackout the lamp will be switched off automatically to extend its lifetime MODE FUNCTION BUTTONS With the MODE button you can select 3 different...

Страница 6: ...ject to change without prior notice FRAN AIS MODE D EMPLOI JB SYSTEMS 8 46 DYNAMO Merci d avoir choisi ce produit JB Systems Pour votre s curit et pour une utilisation optimale de toutes les possibili...

Страница 7: ...anique en vigueur dans votre pays Assurez vous que le voltage de la source d alimentation de la zone dans laquelle vous vous trouvez ne d passe pas celui indiqu l arri re de l appareil Le cordon d ali...

Страница 8: ...zone d installation supporte un point localis minimum de 10 fois le poids de l appareil Utilisez syst matiquement un c ble de s curit qui peut supporter 12 fois le poids de l appareil lors de l instal...

Страница 9: ...us du lieu d installation ne comporte pas de personnes ind sirables lors de la maintenance Mettez l unit hors tension d branchez le cordon d alimentation et attendez que l appareil ait refroidi Pendan...

Страница 10: ...ecoratieve lichteffecten te produceren en kan eventueel worden gebruikt in lichtshows Zeer compacte aantrekkelijke scanner voor mobiele DJ s De kleine CA 8 controller zorgt voor heel wat mogelijkheden...

Страница 11: ...geveer 10 minuten afkoelen alvorens de lamp te vervangen of alvorens te starten met de onderhoudsbeurt Trek altijd de stekker uit wanneer het apparaat gedurende langere tijd niet wordt gebruikt of alv...

Страница 12: ...compartiment met de schroef Klaar NEDERLANDS HANDLEIDING JB SYSTEMS 20 46 DYNAMO OPHANGEN VAN HET APPARAAT Belangrijk De installatie van het toestel mag uitsluitend door bekwaam onderhoudspersoneel ui...

Страница 13: ...n XLR M F aansluitingen Bvb JB Systems ref 7 0063 Om onvoorspelbaar gedrag door interferenties te vermijden dient men de keten af te sluiten met een weerstand van 90 tot 120 Gebruik nooit Y splitter k...

Страница 14: ...e Bedienungsanleitung sorgf ltig vor der Inbetriebnahme durch zur vollen Aussch pfung der M glichkeiten die dieses Ger t bietet sowie zu Ihrer eigenen Sicherheit EIGENSCHAFTEN Das Ger t ist funkentst...

Страница 15: ...nhaltung der Sicherheitsbestimmungen mu das Ger t geerdet sein Ger t nicht an einen Dimmer anschlie en Ausschlie lich vorschriftsm ige Kabel zur Installation verwenden Ger t nicht ffnen Abgesehen vom...

Страница 16: ...ationen vor Erstbetrieb fachm nnisch vorgenommen worden sind Installationen sollten j hrlich durch qualifiziertes Fachpersonal inspiziert werden um jederzeit einen sicheren Betrieb zu gew hrleisten DE...

Страница 17: ...rialien und Aufh ngungen Decke Balken abgeh ngte Decken d rfen keine Anzeichen von Verformung zeigen Ist die Optik sichtbar besch digt Spr nge oder tiefe Kratzer dann m ssen die entsprechenden Teile a...

Страница 18: ...escargas no exponga este aparato a la lluvia o humedad Para evitar que se forme condensaci n en el interior permita que la unidad se adapte a las temperaturas circundantes cuando la lleve a una habita...

Страница 19: ...or ver la conexi n de la l mpara Saque la conexi n de la l mpara con tacto fuera del compartimiento de la l mpara Desenchufe la l mpara vieja Sostenga la conexi n de la l mpara mientras desconecte la...

Страница 20: ...o master slave Conectar el controlador a la entrada jack de la primera unidad master Ahora todas las unidades pueden ser controladas BOTON STANDBY Pulsarlo para entrar salir del modo blackout sobre t...

Страница 21: ...nto caso de haberlos y las aperturas de ventilaci n deber an ser limpiados mensualmente El interior del aparato deber a ser limpiado anualmente usando una aspiradora o m quina de aire La limpieza de l...

Страница 22: ...a o no interior da unidade ao transport la para ambiente quente aguarde algum tempo de modo a que haja uma ambienta o temperatura A condensa o poder afectar o desempenho da unidade ou at danific la Es...

Страница 23: ...rtar o parafuso que fecha o compartimento da l mpada No interior ir ver o conector da l mpada Com cuidado retire o conector da l mpada do compartimento Ao retirar a l mpada usada segure o conector N o...

Страница 24: ...o modo blackout em todas as unidades ligadas O LED est aceso quando a fun o est activa Ap s cerca de 30 segundos em modo blackout a l mpada ser desligada automaticamente de forma a prolongar a sua dur...

Страница 25: ...limpos todos os meses Utilize um aspirador ou um compressor de ar para limpar o interior da unidade uma vez por ano De forma a optimizar a projec o de luz limpe as lentes pticas internas e externas e...

Отзывы: