background image


2. 

For Additional Support Call: 866.393.4202 or Email: [email protected]

Flex-Share Charging Stations are available in USB-C and AC configurations. Know which configuration you are assembling ahead 
of time. Skip sections that are labeled

 (USB-C stations only) 

or

 (AC stations only)

 if you are not using that configuration.

Flex-Share USB-C Charging Guide 

(USB-C Version Only)

User Guide: Quick-Sense USB-C Charging

The Quick-Sense USB-C hub will display a series of colored lights while in-use. 

Port LED Light Indication

Port Ready

Device 

Charging

Charge Level 

>90%

2

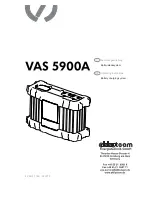
Unplug and replug the device in, and check that both ends of  
the cable are plugged into the port and the device. If the device 
is still not charging, unplug it from the 
port (A) and plug into a different port 
(B). If the device still does not charge, it 
may be an issue with the device.

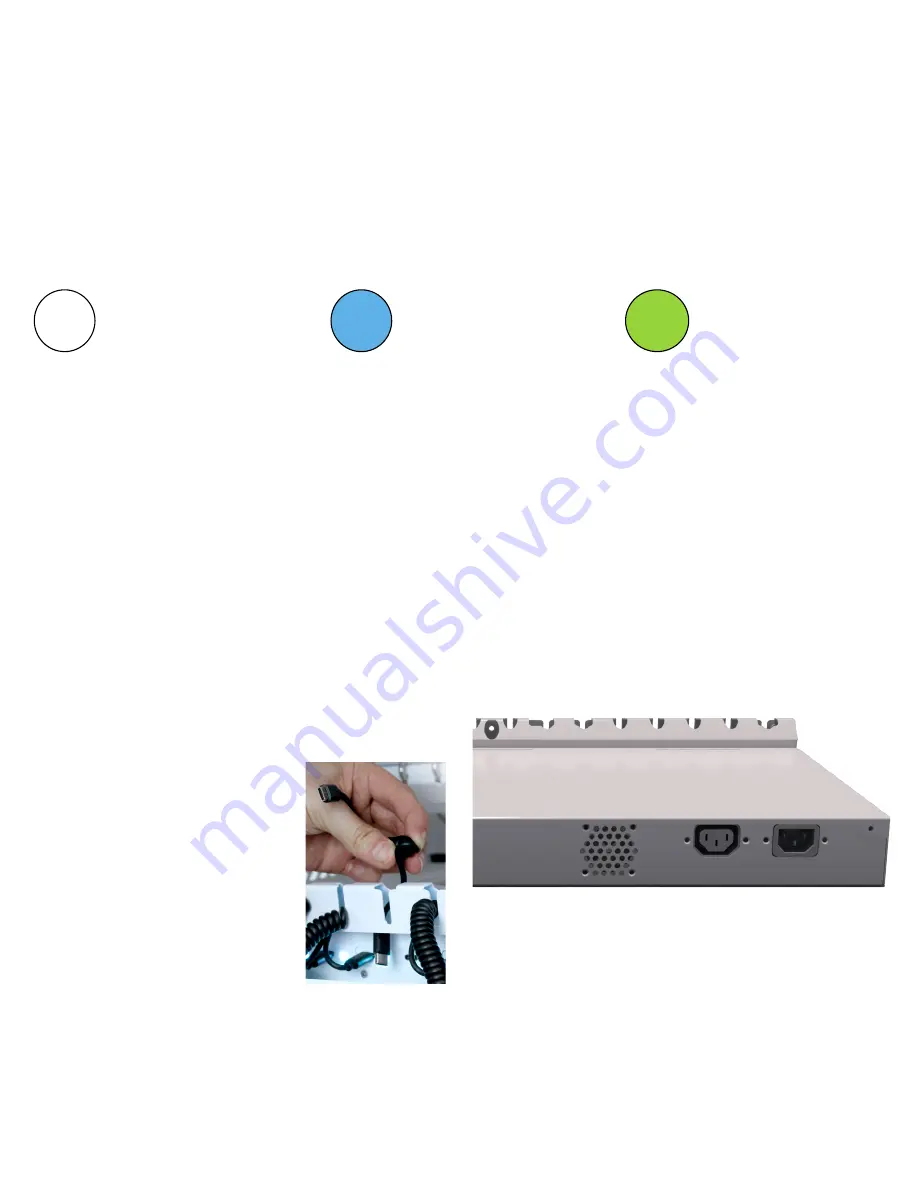
Check the AC power cable that is connected to the back (left, 
while looking at the front) of the charging hub to see if it is 
connected correctly. When the station is powered back on, the 
LED lights will begin to illuminate. 

(2)

If the device charges when connected 
to the port (B), exchange the cable from 
that port (B) to port (A) and see if it 
begins to charge. If it begins to charge, 
the cable is defective and will need to 
be exchange with a new one. 

(1)

Unplug and re-plug in the station’s power cord, then the station’s 
LEDs will begin to illuminate.

Unplug and re-plug in the station’s power cord, then the station’s 
LEDs will begin to illuminate.

Trouble-Shooting:  

Single Port or Device Issue

Trouble-Shooting:  

Entire Quick-Sense USB-C Hub

1

Plug the power cable into a standard 15A outlet. LEDs will illuminate white to indicate the the station is connected to a power 
source. Power down devices, then connect them to the USB-C charging cables. You may hear a clicking sound, and the LED lights 
will change color according to the power draw of the attached devices. The system will automatically limit power consumption by 
turning some of the USB-C ports off temporarily. Refer to the device itself for the level of charge.

The devices will charge as quickly 

and evenly as possible, up to 65W, without drawing too much power. Devices that do not feature a USB-C charging port can be 
charged using USB-C emulator cables. (Not Included, contact JAR Systems for more info)

Before You Start: 

USB-C or AC?

Содержание Flex-Share CSE-1615

Страница 1: ...e please contact a JAR Systems representative or visit www JAR Systems com Support Designed in the USA Made in China Pour obtenir la derni re copie du guide veuillez contacter un repr sentant de JAR S...

Страница 2: ...imited to the cost of repairing or replacing the failed product or component at the discretion of JAR Systems either within or outside of warranty periods and does not extend to any loss or damage whi...

Страница 3: ...e 2 If the device charges when connected to the port B exchange the cable from that port B to port A and see if it begins to charge If it begins to charge the cable is defective and will need to be ex...

Страница 4: ...eplace the screws Position 1 Positi RIP her the front or back side Loosen the three screws replace the screws Position 1 Position 2 1 2 Reversible Power Strip The power strip can be mounted on either...

Страница 5: ...the adapters as far back in the tray as possible from left to right D flipping about half on their side Contact JAR Systems for additional assistance Step 5 Plug the charger into the power strip For...

Страница 6: ...ith the other hand thread the nut onto the bolt down to the two guides in the plastic handle to hold the bolt in place as it is tightened eliminating the need for a wrench and tighten the bolt from be...

Страница 7: ...qu et vendu par JAR Systems est limit e au co t des r parations ou du remplacement du produit ou des composantes d fectueux la discr tion de JAR Systems pendant ou apr s les p riodes de garantie et ne...

Страница 8: ...s le port B changez le c ble de ce port B et branchez le dans le port A et v rifiez si la charge a commenc Si l appareil commence charger cela signifie que c est le c ble qui est d fectueux et qu il f...

Страница 9: ...prises qui font face aux ouvertures l arri re Position 3 Autre position pour un montage mural La barre d alimentation est fix e sur la face inf rieure du ch ssis avec les prises orient es vers le haut...

Страница 10: ...aptateurs le plus profond ment possible dans le plateau de gauche droite D en basculant la moiti d entre eux sur le c t Contactez JAR Systems pour du soutien suppl mentaire tape 5 Branchez le chargeur...

Страница 11: ...tre main vissez l crou sur le boulon jusqu aux deux guides de la poign e de plastique pour le tenir en place pendant que vous le serrez liminant ainsi le besoin d une cl puis serrez le boulon par le b...

Страница 12: ...cto o componente defectuoso a discreci n de JAR Systems dentro de los per odos de garant a o fuera de ellos y no abarca p rdida o da o algunos que se hayan sufrido como consecuencia del uso incorrecto...

Страница 13: ...o se carga cuando se lo conecta al puerto B cambie el cable del puerto B al puerto A y vea si comienza a cargarse Si comienza a cargarse el cable tiene un problema y deber cambiarlo por uno nuevo 1 De...

Страница 14: ...ior de la unidad con las tomas de corriente hacia dentro a trav s de la apertura de la parte posterior Posici n 2 Posici n alternativa para uso en escritorio o apilado La regleta de enchufes se coloca...

Страница 15: ...a posible de izquierda a derecha D y voltear aproximadamente la mitad sobre su costado Para recibir m s ayuda comun quese con JAR Systems Paso 5 Enchufe el cargador en la regleta de enchufes Para opti...

Страница 16: ...n la otra mano enrosque la tuerca en el perno por las dos gu as del asa de pl stico para sostener el perno en su lugar mientras lo ajusta sin necesidad de usar una llave y ajuste el perno desde abajo...

Отзывы: