INSTALLATION INSTRUCTIONS FOR WALL MOUNT DISPENSER UNIT ONLY
1. Supplied with the unit is a wall mounted dispenser unit consisting of three peristaltic pumps mounted inside of a
stainless box with conduit and wires coming from the bottom. With the lower kick plate removed connect the conduit
to the ledge of the unit and connect the plastic connector on the wires to the connector on the timer. This will
provide the power to operate the dispensing pumps from the timer.
2. After the connecting the wires to the timer, mount the box to the selected surface, using the two holes provided in
the rear and with the appropriate fasteners for the application. Consideration for the location of the chemicals and
service of the pumps should be given when selecting a mounting place.
3. Turn the customer's circuit breaker on to the unit and check the electrical connections for the proper readings as
indicated on the machine data plate.
4. Turn on the water to the unit and check for any water leaks. If they check out replace the lower kick plate. If there
are no leaks push the top of the fill switch and hold for approximately 45 seconds.
5. Coming from each dispensing pump in the box is a different colored tube. Above each peristaltic pump in the box is
a primer switch. After making sure that the feeder tubes to the pumps are in their proper containers, as marked on
the pumps, press the switch and hold it until there is a discharge of the fluid into the machine. This is to be done to
each pump before the initial operation of the machine. Water must be in the wash/rinse tub to prevent discoloration
or deterioration of the stainless steel by chemicals.
Removal of Pan Strainer for Cleaning:
(Wash/Rinse Head Assembly must be removed prior to removing strainer.)
1. Drain machine by depressing drain switch for approximately 50 seconds.
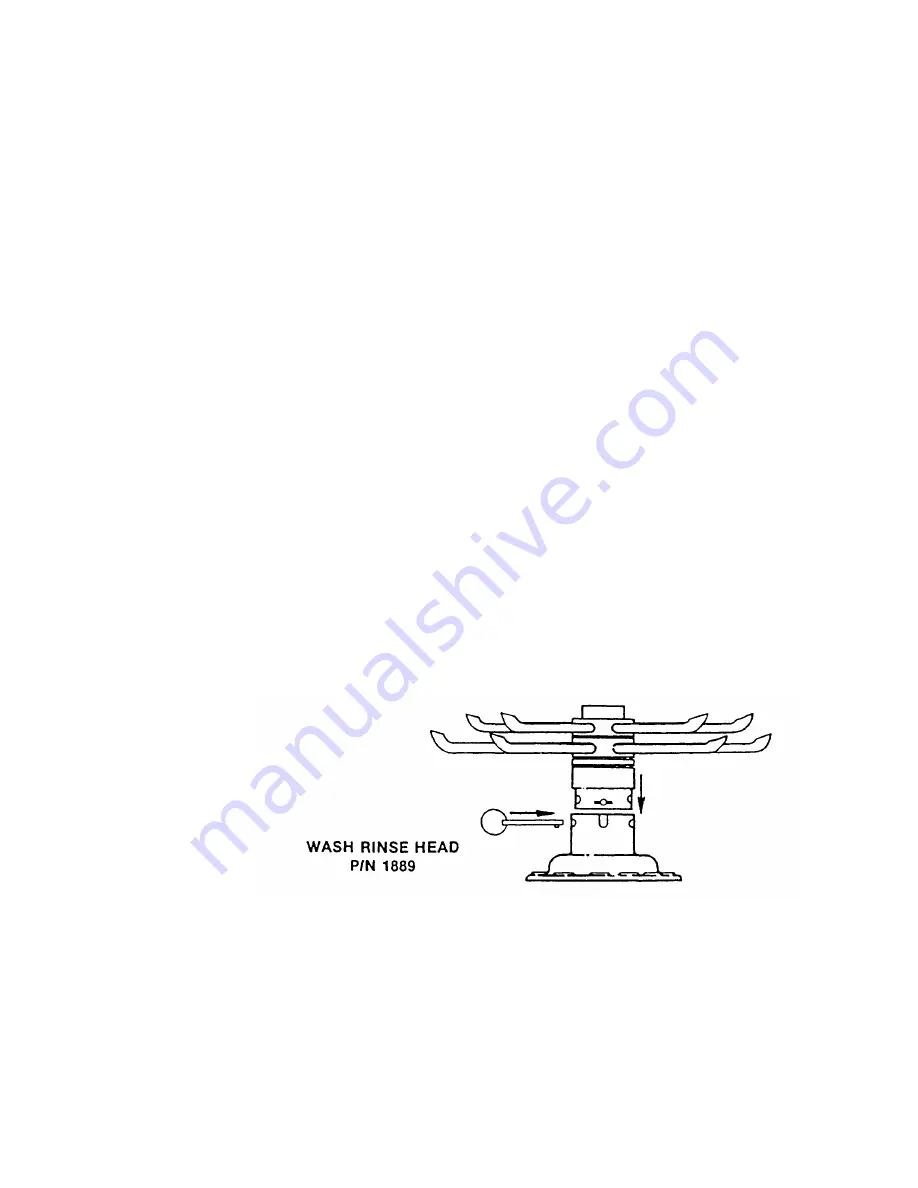
2. Remove wing nut from upper pump housing; wash/rinse head may now be lifted out.
3. Pan strainer now accessible; lift out and clean thoroughly.
4. Clean around pump intake with bristle brush.
5. Replace strainer pan.
6. Reinstall wash/rinse head assembly.
7. Clean strainer pan daily or as needed to ensure proper machine operation.
Installation of Wash/Rinse Head Assembly:
(Items disassembled for shipment.)
1. Line holes up on wash head assembly to match slots in pump housing.
2. Insert wash head assembly down into upper pump housing as far as possible.
3. Insert retaining pin to secure wash head to pump housing.


