Tellus 6 / Tellus i6
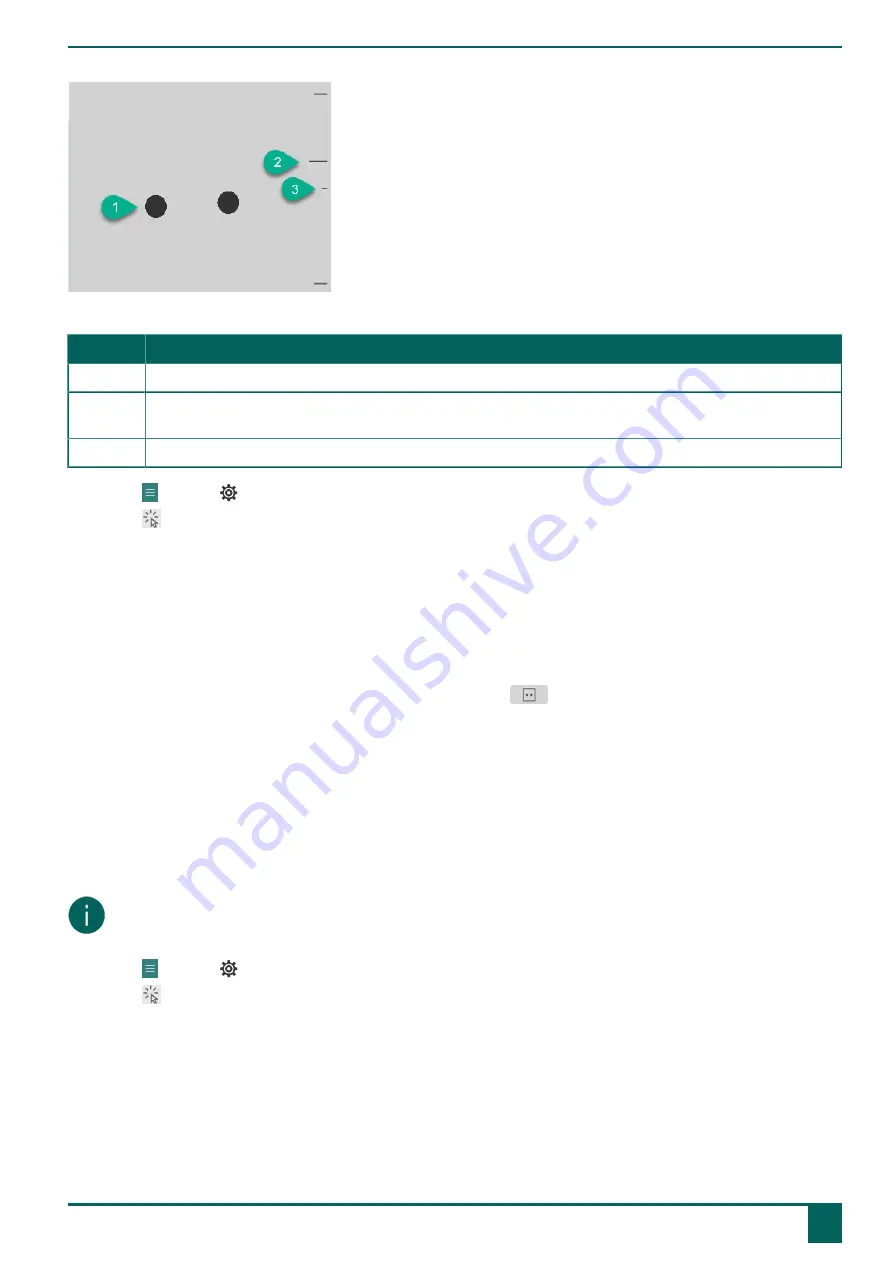
Figure 1: Eye position
Number Explanation
1
Position of the eyes.
2
This line visualizes the distance of the eyes from the screen. The ideal position is when this line is in the
center (3). The further away the eye is from the screen, the lower the stripe.
3
The ideal distance of the eye to the screen.
1.
Choose
Menu
>
Settings
.
2.
Choose
Access
.
3.
Choose the
Eye tracking
tab.
4.
From the
Eye monitor settings
options group, for
Camera image
select one of the following options:
•
Camera image
to show a real camera image. Green crosses are placed in the center of the pupils if the camera
detects the eyes properly.
•
Dots
to display the screen as a gray area. The eyes are visualized as black dots moving along with the head. If one
of the eyes is not found, the dots change into circles or they disappear.
5.
In
Show the distance
, choose
Yes
to show the distance of the eyes from the screen on the right side of the screen.
6.
In the
Camera
options group, in
Show the eye monitor
, choose
.
The position of the eyes is shown in the eye monitor.
7.
Adjust the eye position relative to the eye-tracking camera or vice versa. You can now also calibrate, see
on page 22.
8.
Choose
OK
.
1.5.3 Setting the selection indicator options on eye-tracking selection
You can specify how a cell should be visually highlighted when you select it and/or point at it.
Depending on the type of eye-tracking selection, some indicator options may or may not be available.
NOTE
For setting the type of dwell indicator and its color, see
Settings for selecting by dwelling with eye tracking
on page
25.
1.
Choose
Menu
>
Settings
.
2.
Choose
Access
.
3.
Choose
Eye tracking
.
E
Control
1
Control options
23
Содержание Tellus 6
Страница 1: ...Tellus 6 Tellus i6 Operating instructions ...
Страница 41: ...Tellus 6 Tellus i6 39 ...
Страница 42: ......


