


First-time Setup
For a new XRPi2, you need to connect to the XRPi2, and then configure its IP addresses so that you can
access it over your network. Once you can access it over the network, you can use a web browser to
perform more in-depth setup using the web setup.
Typically,you need to connect directly to the XRPi2 to set the IP address. There are three ways to do
this:
l
By connecting a monitor to the VGA port and a keyboard to the USB port.
l
By using a console cable to connect a laptop to the console port.
l
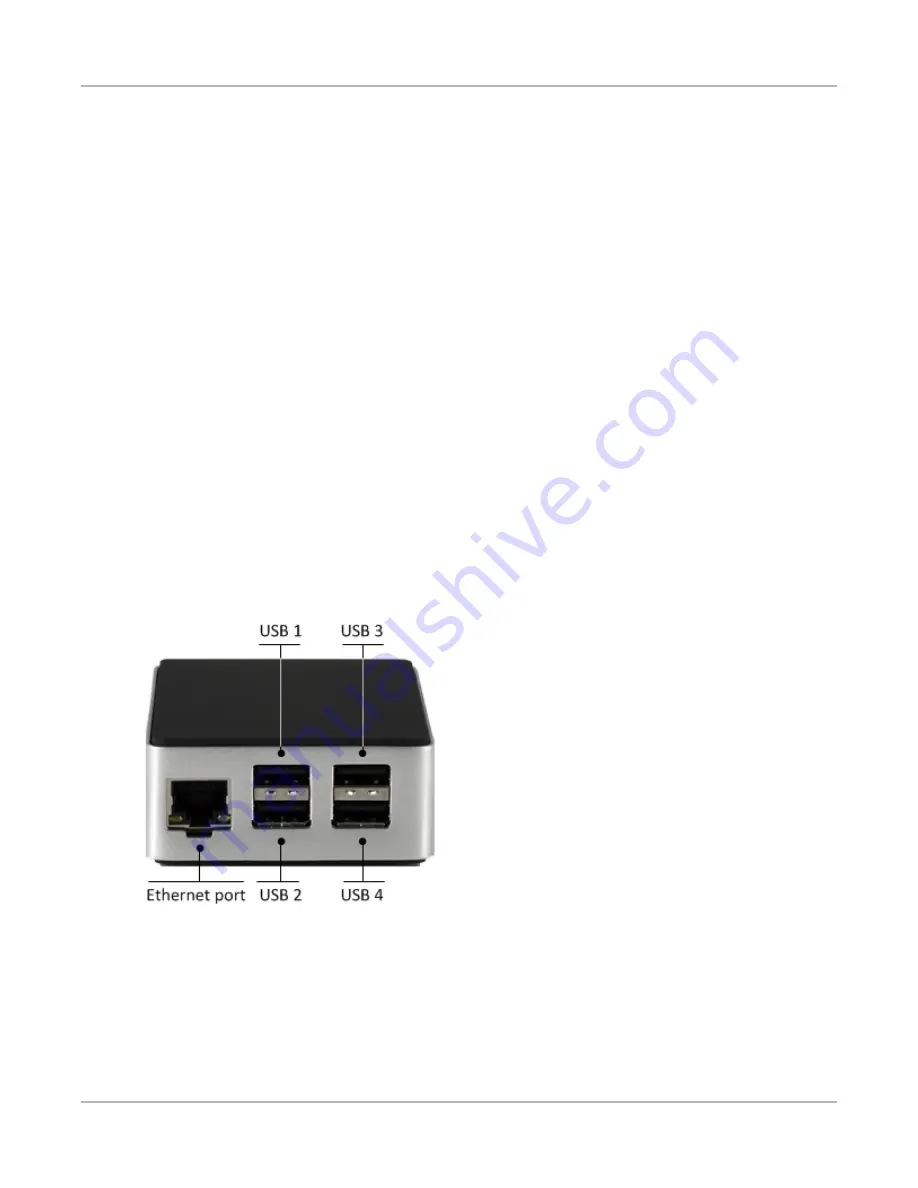
By using an Ethernet cable to connect a laptop one of the LAN ports.
Choose the method you want to use, and follow the corresponding procedure.
First-time Setup over Ethernet
In the first time setup, you connect to the XRPi2, and run a script to configure its name (the probe
name). You will need a terminal-type application such as PuTTY.
To perform the first-time setup over Ethernet:
1. Make sure that the XRPi2 is powered off.
2. Connect one end of an Ethernet cable to a laptop, and the other end to the Ethernet port on the
XRPi2.
As shipped from the factory, the XRPi2 is configured to use DHCP addressing. When it starts, it
attempts to obtain an addrss using DHCP.
3. Power on the XRPi2.
4. Check your DHCP server to find the address it assigned to the XRPi2. You can identify it by its
hostname, which is:
XRPi2 User Guide
7
Setting up the XRPi2
Содержание XRPi2
Страница 1: ...XRPi2 User Guide May 2016...
Страница 5: ...v XRPi2 User Guide This page intentionally left blank...
Страница 7: ...vii This page intentionally left blank...
Страница 19: ...10 XRPi2 User Guide This page intentionally left blank...
Страница 23: ...14 XRPi2 User Guide This page intentionally left blank...
Страница 25: ...16 XRPi2 User Guide This page intentionally left blank...


