iSYSTEM, March 2017
13/66
More information on configuring the Emulator and winIDEA can be found in the Hardware User’s Guide.
First step: Configuring the Emulator
The Emulator must be connected using USB port. The connection must be set up in the
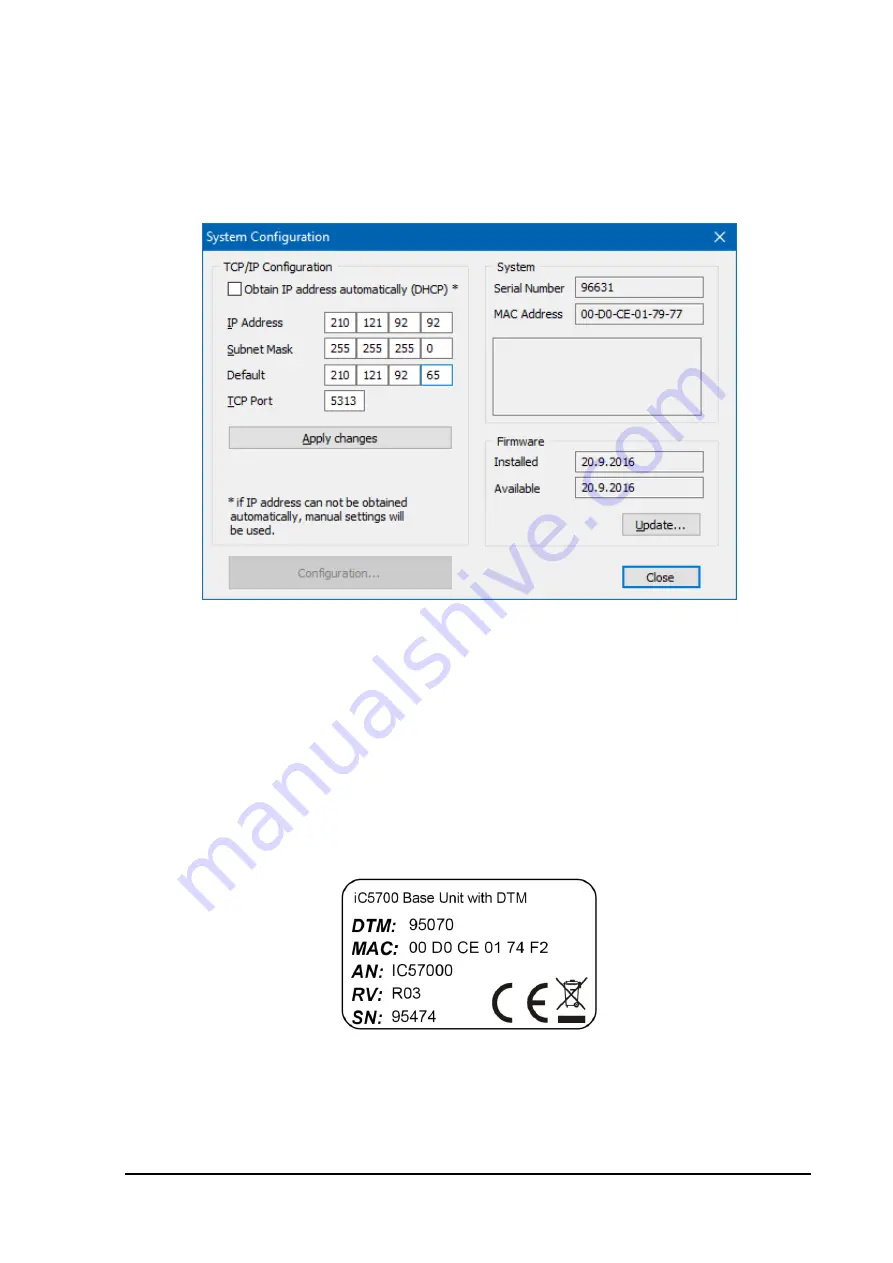
‘Hardware/Communication’ tab. Then, select the ‘Hardware/Hardware Type’ tab and click on the ‘System
Configuration…’ button.
System configuration options
The TCP/IP settings can be obtained from the DHCP server on the network. If such a server is not available, the
settings can be set manually. In this case, in the TCP/IP Configuration window, the IP Address, the Subnet Mask
and the TCP Port must be specified. The default gateway address must be specified, if the Emulator is used via a
gateway. The IP Address, available for the Emulator to use, the Subnet Mask and the default gateway, if needed,
are usually defined by your network administrator. The TCP Port can be any port between 1024 and 65535,
which is not already used. By default, the TCP port 5313 is used. For the information, if this port address could
cause any conflicts and for an alternative port address, also contact your network administrator. When the correct
settings are entered, click on the ‘Apply changes’ button. This writes the changes to the Emulator.
The Emulator must be switched off and then on again in order for changes to take effect.
Emulator’s MAC address is written on the same sticker where you will also find device serial number as it is
shown on the next picture.
Second step: Configuring communication
There are two ways of configuring TCP/IP in winIDEA: manually or by automatic discovery.
Manual Configuration
Select the Hardware/Communication tab.


