Ironwood SLR305 | User Manual
17
Step 2:
Adjust Rip Fence
Rip fence position
1. Pull the handle toward you to release the fence.
2. Hold up the anti-kickback fingers using the handle.
3. Move the fence assembly along the measuring guide to set the
width of cut (distance between the saw blade and fence).
4. Push the handle away from you to lock the fence in position for
your cut.
5. Release the anti-kickback finger handle to allow the fingers
to drop.
Rip fence squareness
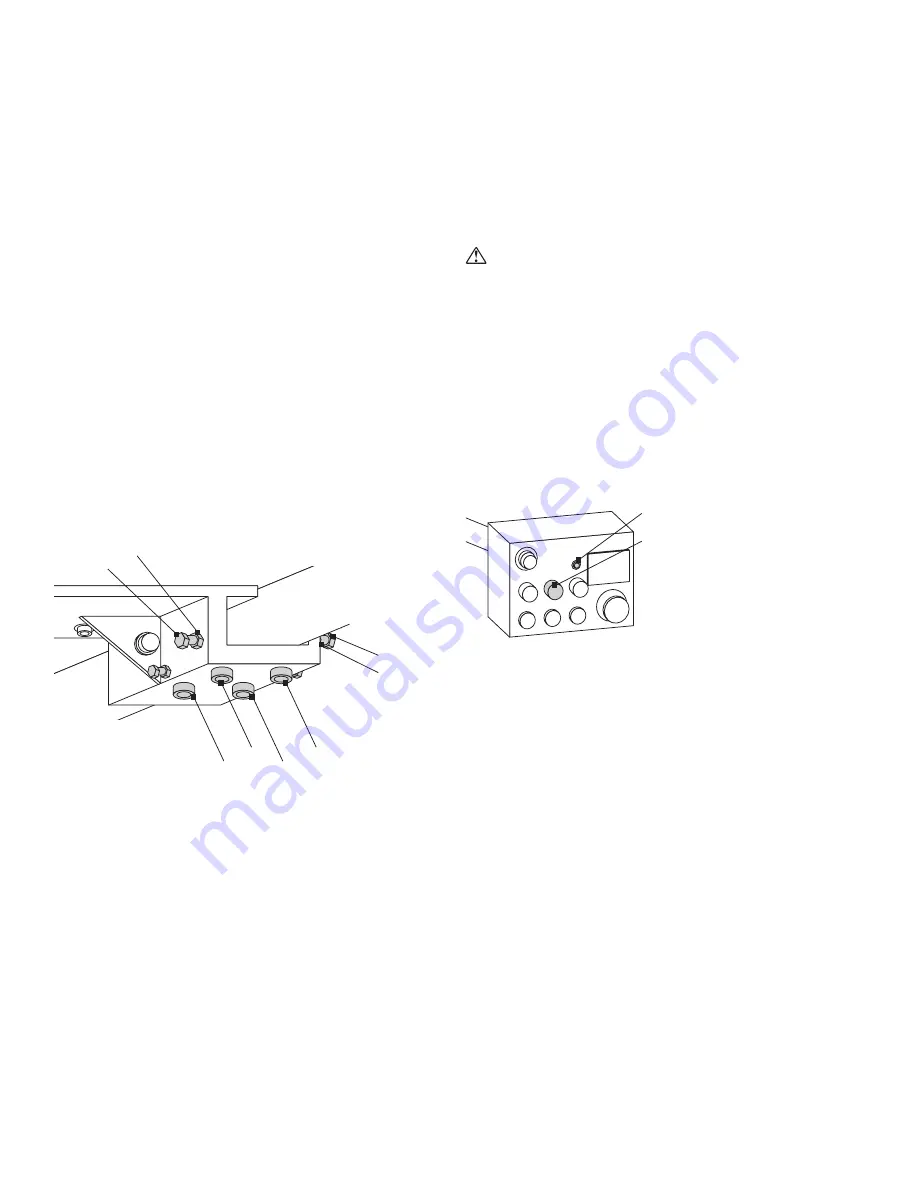
Adjust rip fence squareness on the bottom of the rip fence assembly.
Adjustment depends on which direction the rip fence is out of
alignment. For example, in the case of fig. 1 below:
1. Loosen screws A, B, and C.
2. Loosen lock nut B2, and turn B3 to the right.
3. Loosen lock nut A2, and turn A3 to the right.
4. Check for squareness.
5. Tighten the lock nuts and securing screws to fix the rip fence in
the correct position.
B3
A2
A3
B
A
D
C
B2
Step 3:
Check Anti-Kickback Fingers
There are three rows of auto-adjust anti-kickback fingers. The anti-
kickback fingers do not need to be adjusted.
For safety, be sure the top anti-kickback fingers hang down in a row,
point in the direction of the feed chain, and can be lifted smoothly.
Be sure the bottom anti-kickback fingers press down and lift up
smoothly.
Step 4:
Start the Saw Blade
WaRninG
Before starting the machine, inspect it to ensure it is free of all
debris. Remove wood chips and sawdust only with the power OFF.
Make certain that the saw blade is installed with the teeth pointing in
the same direction as the rotation of the saw arbor.
Never start the machine with the workpiece in contact with the saw
blade.
Make sure the workpiece is free of nails, loose knots, and other
defects that could cause personal injury or damage the saw blade.
Press the saw blade start button. Make sure the power-on indicator
lights up.
Power indicator light
Start button
When starting machine for the first time, blade rotation must be
checked. If blade rotation is not the same direction as the arrow
indicates (against the feed), phasing must be changed.
To re-phase machine:
1. Disconnect the main power supply.
2. Open the electrical cabinet and test power leads to ensure
power is off.
3. Switch two of the power legs (e.g., L1 and L2).
4. Close the electrical cabinet.
5. Activate power to the machine.
6. Test rotation again.


