Basics of the Presenter Software (cont'd)
13
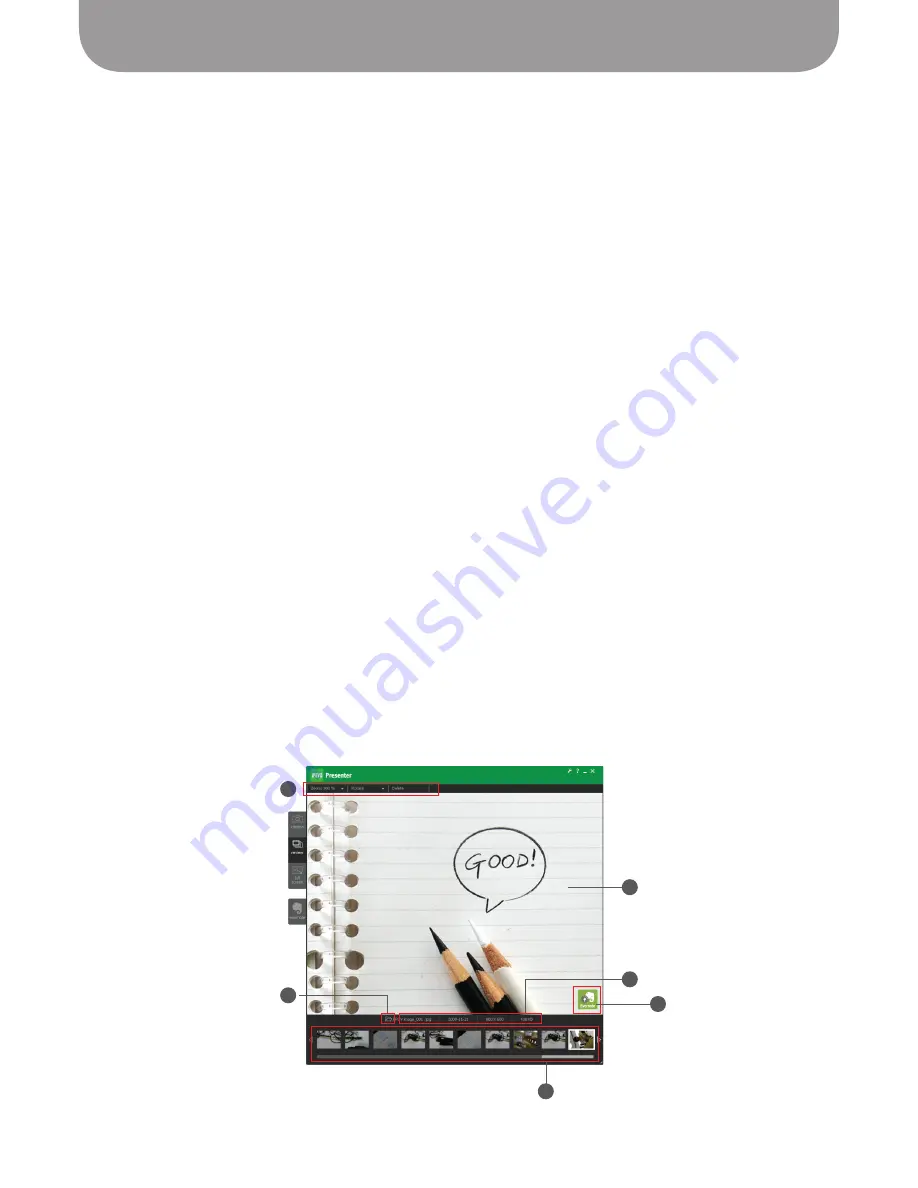
To review snapshots you've taken, enter Review mode by clicking on the “review” tab on the left-hand
side of the software.
A – Image Pane
This shows the currently selected snapshot.
B – Menu
This gives you some basic tools to manipulate the selected snapshot.
Zoom – Digitally zoom the image from 100% (normal, or 1x zoom) to 600% (or 6x) zoom in
100% increments.
Rotate – Rotate the image left or right.
Delete – Delete the selected image from your hard drive. The system will prompt you to ensure you
want to delete the image.
C – Folder Icon
Clicking on the folder icon will take you to the location on your computer where your snapshots are
stored.
D – Image Information
Provides information about the image, including file name, date taken, resolution taken at, and file
size (in kilobytes).
E – Thumbnail Timeline
The snapshots you've taken are presented in a horizontal timeline of thumbnails. You can click on a
thumbnail to select that snapshot, or you can use the arrow buttons to cycle through the snapshots.
By right-clicking on a thumbnail, you can choose to Copy or Delete that snapshot, or open the folder
it is contained in.
F – Upload to Evernote
Clicking on this button will bring you to the Evernote tab. It will also automatically attach the picture
or pictures you've selected to prepare them for upload to an Evernote notebook.
See Pages 24 and 25
for more about Evernote.
Review mode
A
B
E
C
D
F


