300 Mbps In-Wall Access Point
User Guide
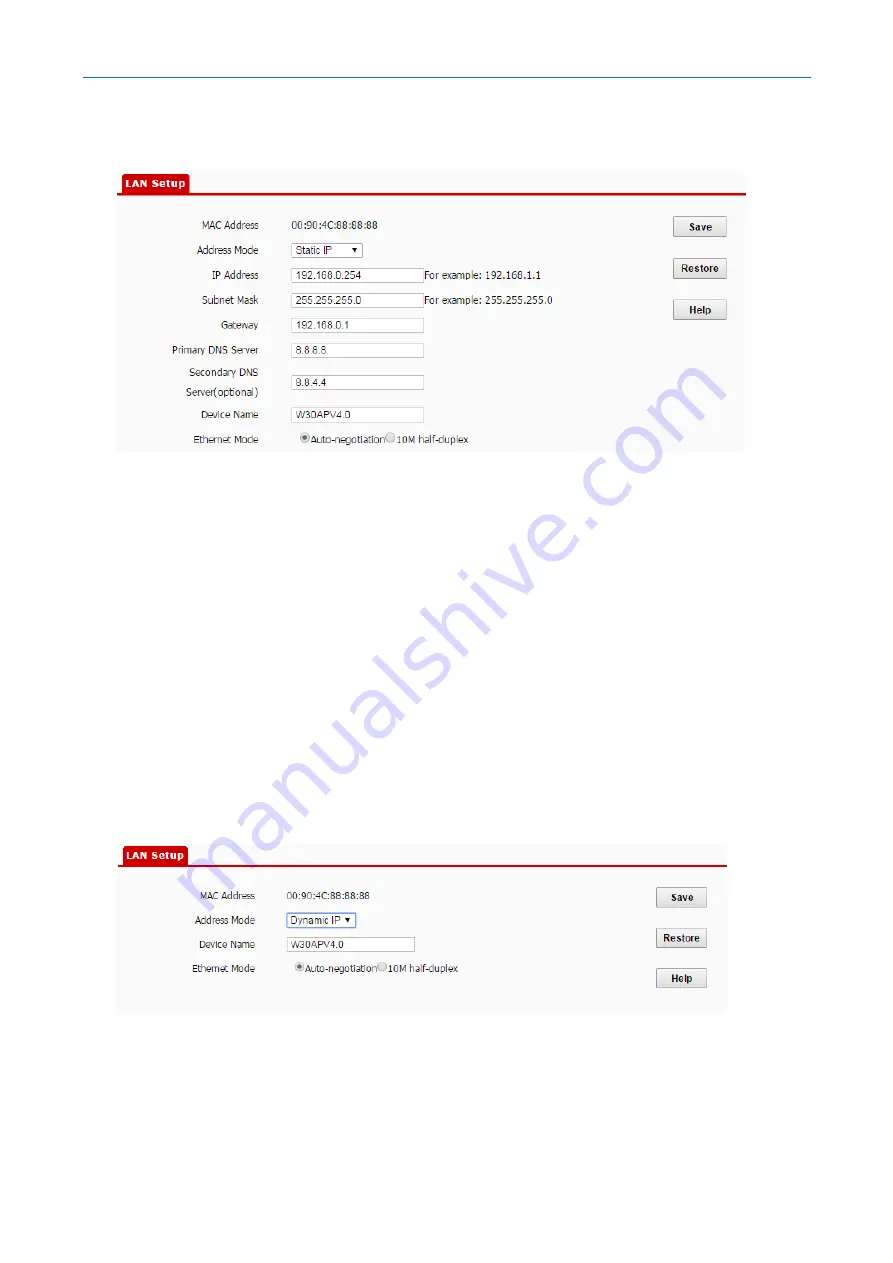
3.
Set
IP Address
,
Subnet Mask
,
Gateway
, and
Primary DNS Server
. If another DNS server is available,
set
Secondary DNS Server
to the IP address of the additional DNS server.
4.
Click
Save
.
---End
After the configuration, if the new and original IP addresses belong to the same network segment, you
can log in to the web UI of the AP by accessing the new IP address. Otherwise, assign your computer an IP
address that belongs to the same network segment as the new IP address of the AP before login.
6.2.2
Automatically Obtaining an IP Address
This mode enables the AP to automatically obtain an IP address, a subnet mask, a gateway IP address,
DNS server IP addresses from a DHCP server on your LAN. If a large number of APs are deployed, you can
adopt this mode to prevent IP address conflicts and effectively reduce your workload.
Procedure:
1.
Choose
Network
>
LAN Setup
.
2.
Set
Address Mode
to
Dynamic IP
.
3.
Click
Save
.
---End
After the configuration, if you want to relog in to the web UI of the AP, check the client list of the DHCP
server for the IP address assigned to the AP, ensure that the IP address of the management computer and
the IP address of the AP belong to the same network segment, and access the IP address of the AP.
Содержание W30AP
Страница 1: ......
Страница 50: ...300 Mbps In Wall Access Point User Guide Select Ethernet and click Next Select Group and click Add...
Страница 55: ...300 Mbps In Wall Access Point User Guide Click Add Click Manually create a network profile...
Страница 59: ...300 Mbps In Wall Access Point User Guide Select User or computer authentication and click OK Click Close...
Страница 89: ...300 Mbps In Wall Access Point User Guide 3 Click Save End...
Страница 102: ...300 Mbps In Wall Access Point User Guide End...


