34
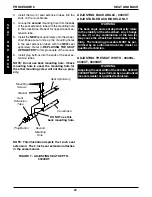
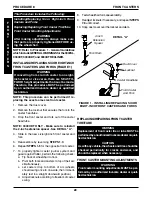
Side
Frame
Spreader
Bar
Recliner
Tube
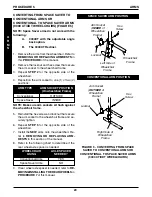
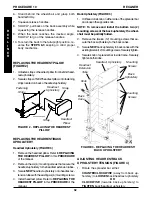
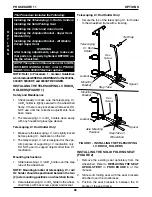
BACK VIEW OF 9000XT RECLINER
FIGURE 6 - STORING THE SPREADER BAR
R
E
C
L
I
N
E
R
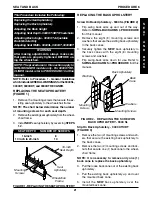
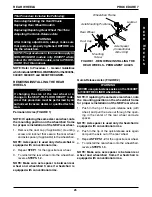
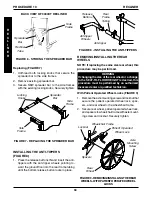
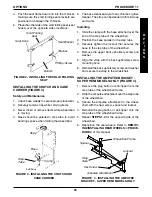
Replacing (FIGURE 7)
1. Unthread both locking knobs that secure the
spreader bar to the side frames.
2. Remove existing spreader bar.
3. Secure NEW spreader bar to the side frames
with the existing locking knobs. Securely tighten.
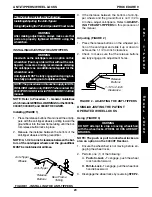
FIGURE 7 - REPLACING THE SPREADER BAR
Locking
Knobs
Side
Frame
Spreader
Bar
Side
Frame
Rear
Frame
Tubing
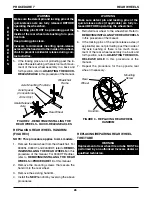
Release
Buttons
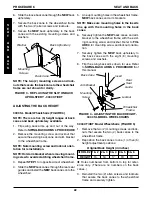
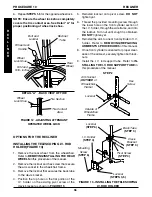
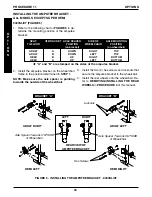
FIGURE 8 - INSTALLING THE ANTI-TIPPERS
INSTALLING THE ANTI-TIPPERS
(FIGURE 8)
1. Press the release buttons IN and insert the anti-
tippers with the anti-tipper wheels pointing to-
ward the ground/floor into the rear frame tubing
until the bottom release button locks in place.
PROCEDURE 10
RECLINER
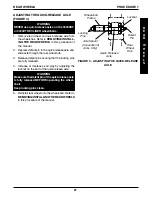
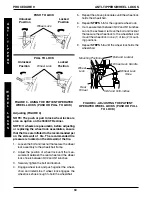
Spacers
Axle
Mounting
Screw
Patient Operated
Wheel Lock
Rear
Wheel
Wheelchair Frame
Locknut
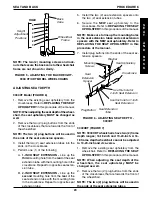
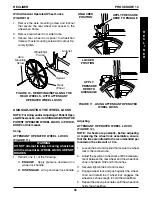
FIGURE 9 - REMOVING/INSTALLING THE REAR
WHEELS - WITH PATIENT OPERATED WHEEL
LOCKS
Anti-tipper
Wheels
Anti-tipper
REMOVING/INSTALLING THE REAR
WHEELS
NOTE: If replacing the same size rear wheel, this
procedure may be performed.
WARNING
If changing the size of the rear wheel or a change
in the SEAT-TO-FLOOR HEIGHT
is desired, this
procedure must be performed by an authorized
Invacare dealer or qualified technician.
With Patient Operated Wheel Locks (FIGURE 9)
1. Remove the axle mounting screw and locknut that
secure the patient operated wheel lock, spac-
ers, and rear wheel to the wheelchair frame.
2. Secure rear wheel, patient operated wheel lock,
and spacers to wheelchair frame with axle mount-
ing screw and locknut. Securely tighten.
Содержание 9000 SL
Страница 42: ...42 NOTES N O T E S NOTES...

