


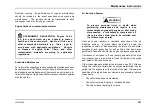


Maintenance Instructions
control, and desiccant quantity. Regularly check the desiccant,
purge valve and air dryer heater performance.
Desiccant Filter
Open reservoir drain valves and check for presence of water.
Small amounts of water due to condensation is normal. If the
wet, primary, or secondary tanks are collecting an abnormally
high amount of water between regular air tank drain intervals,
replace the air dryer desiccant.
The air dryer desiccant replacement interval may vary; it is
generally recommended that the desiccant be replaced every
12 months for small air dryers, like the Bendix AD-IP®, or every
24 months for large air dryers, like the Bendix AD-9® or Bendix
AD-IS®. If experience has shown that extended or shortened
life has resulted for a particular installation, then the interval
should be increased or reduced accordingly.
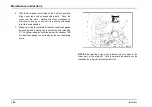
Purge Valve
Check that the purge valve opens and expels moisture when the
air governor shuts off the air compressor. Air should escape
rapidly and then quickly stop. If the purge valve does not open
or you can hear a slight audible air leakage past the valve for
longer than 30 seconds, the valve may be sticking and should
be rebuilt. Purge valves may also stick if the air dryer heater has
failed and ice is clogging the valve.
Heater
Check that the air dryer heater activates at temperatures below
freezing. With the vehicle in a cold environment and before the
engine is started, turn on the ignition and touch the air dryer
housing. It should be warmer than other metallic items on the
vehicle. If some warmth cannot be felt, it may indicate that the
heater element or the wiring powering it should be serviced.
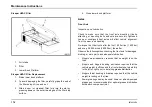
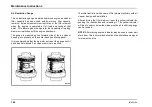
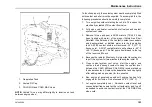
Air Reservoir/Tanks Moisture Draining
Moisture taken in with the air through the compressor inlet valves
collects in the air tanks. The wet tank is the first tank to receive air
from the air dryer and therefore collects most of the remaining
moisture that was not removed by the air dryer. Drain the wet
tank reservoir every day at the end of the trip. Drain the primary
and secondary tanks periodically. Periodically, manually drain
each reservoir by opening the drain cock located either on the
bottom of the tank or in the end of the tank. Make sure the
drain passage is not plugged. For ease of draining, some or all
air tank drain valves may be equipped with optional pull cords.
There must be some air pressure in the system to ensure proper
drainage. Close the drain cocks after all moisture has been
expelled. Drain the wet tank daily at the end of each trip to purge
collected water and prevent ice formation inside the tank when
the vehicle is shut off in cold weather. If you are unsure which
tank is the wet tank, drain all tanks daily.
On vehicles equipped with automatic drain valve(s), moisture
and contaminants are automatically removed from the reservoir
to which it is connected. It operates automatically during each
compression cycle and requires no manual assistance or control
lines from other sources.
The Bendix AD-IS® air dryer has an integral wet/purge tank
which automatically purges itself and the desiccant of collected
water at the end of each compressor cycle.
3878859R2
181
Содержание ProStar+ Eagle Series.
Страница 4: ...Operator s Manual ProStar Series Printed in the United States of America 3878859R2 ...
Страница 12: ...Table of Contents Section 10 Index Index 235 viii 3878859R2 ...
Страница 26: ...Model Description Exterior Components 14 3878859R2 ...
Страница 28: ...Model Description 16 3878859R2 ...
Страница 59: ...Controls Features 3878859R2 47 ...
Страница 70: ...Controls Features Declination Zone Map 58 3878859R2 ...
Страница 93: ...Controls Features Center Dash Panel Wing Panel 3878859R2 81 ...
Страница 128: ...Sleeper Features 116 3878859R2 ...
Страница 182: ...Operation 170 3878859R2 ...
Страница 241: ...Maintenance Intervals and Specifications Typical Interior Fuse Panel Layout 3878859R2 229 ...
Страница 242: ...Maintenance Intervals and Specifications Typical Luggage Compartment Fuse Panel Layout 230 3878859R2 ...
Страница 262: ...Index 250 3878859R2 ...