


Introduction
—
Chapter 1
7
CV60 Vehicle-Mount Computer User’s Manual
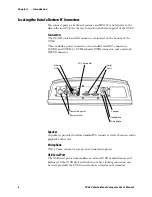
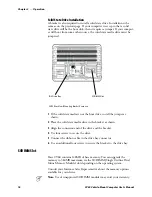
DC Power Input
This is a 5-pin circular power connector with a locking collar.
A reg12 volt power supply/converter is required.
PS/2 Keyboard
This is a standard keyboard connector for use with PS/2-type keyboards.
On/Off Switch
This switch is located on the bottom of the device next to the DC power
input connector.
Note
: ALWAYS perform a proper system (or Windows) shut-down before
shutting the computer OFF.
COM1, COM2 (Serial Ports)
Each port has its own address and a 9-pin male connector to attach
RS-232 serial devices. COM ports can provide 5 volts dc to support a de-
coding type tethered scanner.
Note:
Picolink uses the COM2 serial port, so you have COM1 left for
scanner or serial connection use. CV60 computers with the Picolink radio
option installed will have a cover plate over the COM2 serial port.
Headphone
This 3.5 mm connector accepts an external headphone.
Network Connection (NET)
The CV60 Vehicle-Mount Computer has Ethernet (10BASE-T, RJ-45
jack) on board.
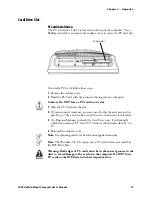
Caution: The Lithium-ion (Li-Ion) backup battery is not
user-replaceable. Refer to the
“Before You Begin”
section of this user
guide for information on where to send your CV60 Vehicle-Mount
Computer for service and warranty repairs.
Содержание CV60
Страница 1: ...CV60 Vehicle Mount Computer User s Manual ...
Страница 38: ...Operation Chapter 2 26 CV60 Vehicle Mount Computer User s Manual ...
Страница 54: ...PhoenixBIOS Setup Utility Chapter 3 42 CV60 Vehicle Mount Computer User s Manual ...
Страница 77: ...Windows Device Configurations Chapter 4 65 CV60 Vehicle Mount Computer User s Manual ...
Страница 98: ...Developing and Installing Applications Chapter 5 86 CV60 Vehicle Mount Computer User s Manual ...
Страница 106: ...Connector Pinouts Chapter 6 94 CV60 Vehicle Mount Computer User s Manual ...
Страница 107: ......
Страница 108: ......
Страница 109: ......


