background image

Using the 6820 Printer Configuration Utility

Chapter 4

39

6820 Series 80-Column Printer User’s Manual

Canceling the Operation

Click

Cancel

to return to the Main Menu without selecting a file to open.

Selecting a File Name

You can select the drive, directory, and file name with your pointing de-
vice, using standard MS Windows file selection methods. If you want to
enter text for a file name, you can do this with the alpha keyboard, or use
your host computer keyboard. Click

Alpha

to access the alpha keyboard

described on page 49.

Loading the Selected File

After selecting a configuration file to load, click

OK.

If the selected file

does

not

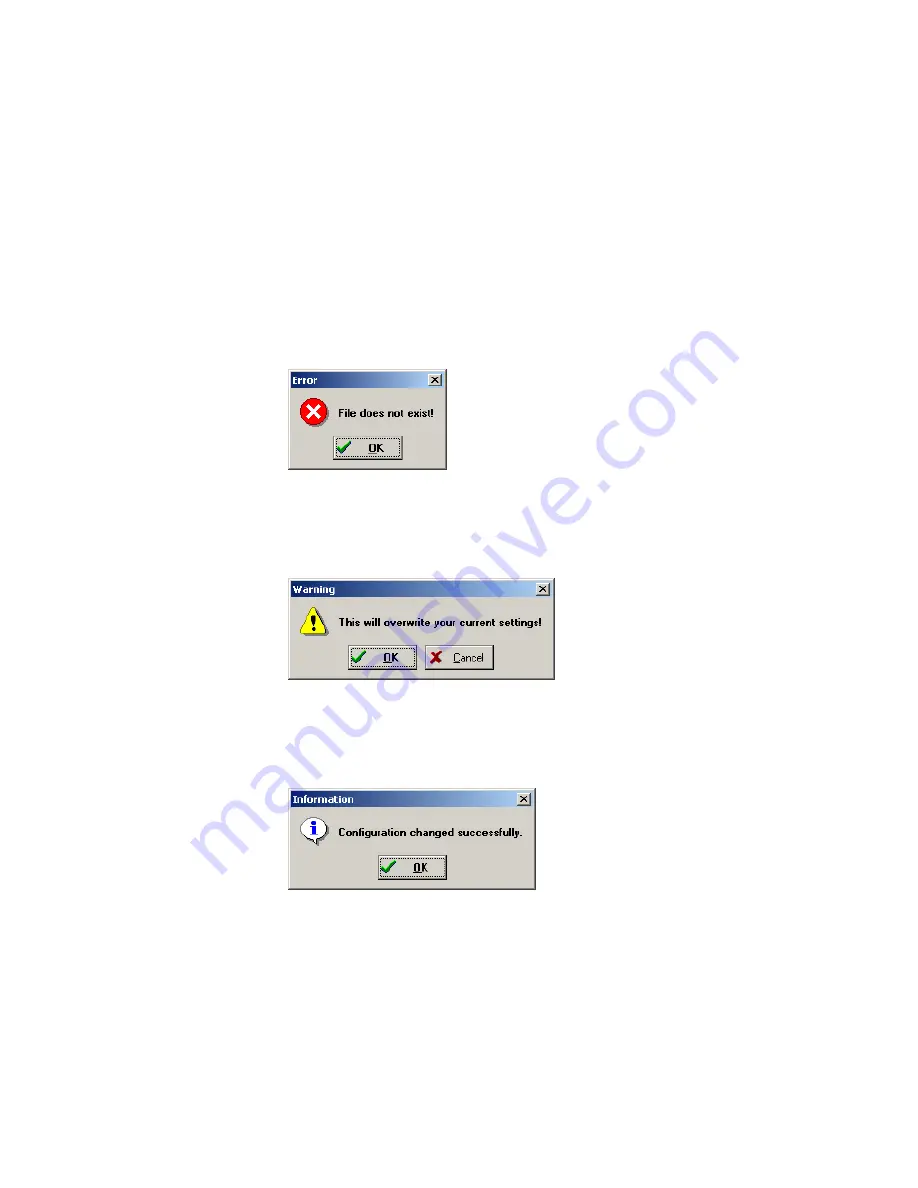
exist, you see an error message similar to the following. Click

OK

to return to the Main Menu without loading a file.

If the file does exist, you see a warning that loading the selected file will
overwrite your working configuration, as shown in the message box below.
Click

OK

if this is acceptable, otherwise click

Cancel

to return to the

Main Menu without loading a file.

After clicking

OK

, the configuration from the selected file is loaded into

memory and becomes the current working configuration. If this load is
successful, a message similar to the one shown below is displayed. Click

OK

to return to the Main Menu.

Содержание 6820 Series

Страница 1: ...6820 Series 80 Column Printer User s Manual ...

Страница 2: ...Corporation E 1997 2006 by Intermec Technologies Corporation All rights reserved The word Intermec the Intermec logo Norand ArciTech Beverage Routebook CrossBar dcBrowser Duratherm EasyADC EasyCoder EasySet Fingerprint i gistics INCA under license Intellitag Intellitag Gen2 JANUS LabelShop MobileLAN Picolink Ready to Work RoutePower Sabre ScanPlus ShopScan Smart Mobile Computing SmartSystems TE 20...

Страница 3: ...ers 700 Series Comput ers and the 6820 Configuration Utility application for Windows 2000 and Windows XP operating systems G 12 2004 Updated information for the Bluetooth shutdown timer Added Appendix C Printer Fonts Test Print Jobs to provide sample test font print jobs H 05 2005 Includes Bluetooth information for the wall mount printer J 11 2005 Included CK60 Handheld Computer information and in...

Страница 4: ...iv 6820 Series 80 Column Printer User s Manual ...

Страница 5: ...attery 3 Vehicle Battery 3 Connectors 4 Fixed Mount Printer 4 Portable Printer 4 Wall Mount Printer 4 Control Panel 5 Hinges on Printer Cover 6 Internal Power Module 6 Paper 7 Material Breakdown 7 Caliber Breakdown 8 Printer Dimensions 9 Wall Mount Printers 9 Fixed Mount Printers 9 Portable Printers 9 Remote Connections 9 Reset Button 10 Fixed Mount or Portable Printer 10 Wall Mount Printer 10 Spe...

Страница 6: ...in Terminal Holder 23 Inserting a 4000 Series or a 62XX Computer 23 Inserting a 61XX a 600 Series a 700 Series or a CK60 Computer 24 Maintenance 25 Operating Guidelines 26 General Cleaning 27 Cleaning the Outside 27 Cleaning the Inside 28 Removing Old Ribbon Cartridge 28 Cleaning the Mask Spring 29 Changing the Printer Settings 31 Protocol Selection Mode 31 Configuration Mode 31 Setting the Autofe...

Страница 7: ...rting the Program 54 Default Printer Settings 59 Error Messages 59 About the Configuration Utility 60 Connect Bluetooth Adapter 60 Enable Microsoft ActiveSync Serial Port Connections 61 Control Code Definitions 63 Control Code Definitions 64 I O Buffer 64 Print image Buffer 64 Special Notations 64 General Printer Control Functions 64 Backspace 64 Beeper 65 Cancel Line 65 Carriage Return 65 Delete ...

Страница 8: ...ode 75 Cancel Italic Mode 75 Master Select 75 Select Pica Pitch 76 Select Superscript Mode 76 Select Subscript Mode 77 Cancel Subscript Superscript Mode 77 Select Underline Mode 77 Cancel Underline Mode 77 Tabs and Tab Setting Functions 77 Horizontal Tabs 77 Vertical Tabs 78 Character Sets and User Defined Functions 80 Single Byte Character Sets 80 Double Byte Character Sets 80 Multi Byte Characte...

Страница 9: ...ation 102 Unpackaged Drop 102 Terminal Inspection 102 Safety Regulatory Agency Requirements 102 Default Configuration 103 Troubleshooting and Diagnostics 105 Checking the Power Source 106 Self Test Failure 106 Printer Mechanism Alignment 107 Communications or Host Computer 108 Communications Pin Out Configurations 109 Troubleshooting 114 Verifying the Printer Components 114 Power Source Verificati...

Страница 10: ...tibility Issues 125 Diagnostic Information 125 Nonvolatile Flash Storage 125 Updating Diagnostic Information 125 Accessing Diagnostic Information 126 Bluetooth Configuration Commands 131 Notation 132 Command 132 Operating Modes 133 Command and Control Modes 133 Query Mode Commands 133 Set Local Bluetooth Device Name 134 Set Class of Device Service Field 134 Set Service Name 135 Connectable On Off ...

Страница 11: ... Factory Installed Printer Defaults 150 Printer Font Test Jobs 153 Big 5 Traditional Chinese Character Set 154 Simplified Chinese Character Set 154 IBM 437 Codepage Character Set 154 Japanese Shift JIS Character Set 155 Korean Character Set 155 International Character Set 155 Index Control Codes 158 General Index 161 Files Index 167 C I ...

Страница 12: ...Contents xii 6820 Series 80 Column Printer User s Manual ...

Страница 13: ...otes either provide extra information about a topic or contain special instructions for handling a particular condition or set of circumstances Global Services and Support Warranty Information To understand the warranty for your Intermec product visit the Intermec web site at www intermec com and click Service Support The Intermec Global Sales Service page appears From the Service Support menu mov...

Страница 14: ...ervice invoicing questions 1 or 2 and then choose 3 Outside the U S A and Canada contact your local Intermec representative To search for your local representative from the Intermec web site click Contact Who Should Read This Manual This document is written for the person who is responsible for installing configuring and maintaining the 6820 Printer This document provides you with information abou...

Страница 15: ...ts 1 Visit the Intermec web site at www intermec com 2 Click Service Support Manuals 3 In the Select a Product field choose the product whose documentation you want to download To order printed versions of the Intermec manuals contact your local Intermec representative or distributor ...

Страница 16: ...Before You Begin xvi 6820 Series 80 Column Printer User s Manual ...

Страница 17: ... the route accounting industry to produce high quality customer invoices receipts load reports transfers and other documents A unique sleep feature saves energy when the printer is not printing eliminating the ON OFF switch Data input is normally pro vided by hand held or mobile computers ...

Страница 18: ...thout the use of an external power source The terminal holder is an integral part of this printer A shallow paper tray which holds up to 50 3 ply forms about an inch or 2 5 centimeters thick is under the printer mechanism S Wall Mount Printer The wall mount printer hangs on a mounting plate secured to a wall Computers communicate with this printer through the remote terminal holder remote dock or ...

Страница 19: ...nter discharges the internal battery even when the printer is not is use Over time the internal battery can discharge to the point where the bat tery is not recoverable This issue is seen especially when the battery is new and the battery chemi cal reactions are not fully formed or the printer has had only one charge cycle When possible plug the printer into an external charge source or discon nec...

Страница 20: ... printer behind the printer terminal holder The data communications socket is in either the printer terminal holder or a separate vehicle dock Portable Printer The dc power connector is on the side of the printer beneath the printer terminal holder The data communications socket is either in the printer terminal holder or a separate vehicle dock Wall MountPrinter The dc power connector is on the b...

Страница 21: ...ake When the printer is in sleep mode or without power this is dark Buttons FORM FEED Press this button to feed the paper into the printer mechanism or when the printer should advance to the next form If the printer ran out of paper press this button to initiate automatic paper loading SET PAGE Press this button to signal the beginning of the page to the printer after you have made the appropriate...

Страница 22: ...ternal Power Module The alternating current ac power module or the ac foot is available for fixed mount and portable printers not for wall mount printers and allows for ac operation The ac foot is installed at the factory and is not an add on option Insert the power cord connector into the ac foot connector in the printer then plug the cord into an ac outlet This power cord can wrap around the ac ...

Страница 23: ...oft flexible rubber type cement applied to one perforation strip only is preferred The resultant lamination should wrap around a 1 1 4 inch di ameter roll without curl or wrinkle Material Breakdown The following tables show the material broken down per ply 14 CBF Carbonless Back and Front Target Under Over Basis Weight 14 13 3 14 7 Caliper 2 9 2 6 3 2 Moisture 5 0 4 0 6 0 Smoothness RS 165 110 230...

Страница 24: ...ess Wht 86 84 88 Opacity Wht 81 78 5 82 20 OCR Laser Bond Target Under Over Basis Weight 20 15 2 16 8 Caliper 4 0 3 8 4 2 Moisture 3 8 4 7 5 0 Smoothness 140 100 170 Brightness Wht 94 82 N A Opacity Wht 85 84 N A Not Applicable Caliber Breakdown The following information show the caliber of forms broken down per ply 1 Ply 20 Targeted 4 0 Maximum 4 2 2 Ply 15 and 16 Targeted 6 3 Maximum 7 0 3 Ply 1...

Страница 25: ...m 14 5 36 8 cm 8 0 20 3 cm with 61XX Holder Top Mount 16 75 42 5 cm 16 75 42 6 cm 7 5 19 1 cm with 4000 Series 62XX 600 Series 700 Series or CK60 Holder Top Mount 15 0 38 1 cm 16 75 42 6 cm 8 0 20 3 cm Portable Printers The Portable Printer may come with a handle an ac foot or with a termi nal holder top mount Note the ac foot adds 2 5 6 35 cm to the width Portable Printer Dimensions Configuration...

Страница 26: ...r Both the fixed mount printer and the portable printer have the reset but ton on the left hand side of the raised printer mechanism See the follow ing illustration for the location of the reset button Reset button Printer mechanism raised Wall MountPrinter The wall mount printer has the reset button on the right hand side of the printer case Reset button Front of printer ...

Страница 27: ...40_ F 20_to 60_ C AC Operating 4_ to 113_ F 20_to 45_ C Storage 22_ to 158_ F 30_ to 70_ C Humidity Operating 10 to 85 noncondensing Storage 5 to 95 noncondensing Altitude Operating 100 to 5000 meters Storage 15 000 meters Electrical Voltage 13 8 volts dc nominal Current 10mA idle sleep mode not charging batteries 3 5A average while printing 450mA charging internal battery Up to 1 5A charging comp...

Страница 28: ...cable P N 206 875 102 16 Battery cable P N 206 875 106 22 Battery cable P N 206 875 109 Y power cable P N 226 325 101 Internal battery P N 317 075 001 Cleaning solutions MICRO CLEAN II P N 901 438 001 Guide Shaft Cleaner P N 901 439 001 Paper 1 ply P N 816 027 111 2 ply P N 816 027 012 3 ply P N 816 027 013 Ribbon cartridges with Black ribbon P N 805 060 001 Purple ribbon P N 805 060 002 ...

Страница 29: ...13 6820 Series 80 Column Printer User s Manual 2Operation This chapter provides instructions how to set up the 6820 Printer for the first time ...

Страница 30: ... from the print head S Power cable is hooked up to the vehicle battery or power source S Printer is mounted in the vehicle The following tasks must be done Specific instructions for these tasks are described on the pages given 1 Connect the battery page 15 2 Install the ribbon cartridge page 16 3 Load the paper into the paper tray page 18 and into the printer sever al steps starting on page 20 4 I...

Страница 31: ...tions the external power source is passed through the printer to the mobile comput er The printer battery does not provide charge to the computer Note Remove the printer battery when storing a printer for over 30 days After storage reinstall the battery and connect the printer to an external power source for at least 14 hours to recharge the battery 1 Unlatch and open the printer mechanism 2 Lower...

Страница 32: ...tion of the ribbon straight and even 1 Turn the ribbon advance knob in the direction of the raised arrows to remove any slack in the ribbon 2 Squeeze the ribbon cartridge locking tab into the cartridge then lower the cartridge over the print head 3 Lower the tab side of the cartridge until it clicks 4 Release the tab and press down on the arrow to fully seat the ribbon car tridge tab clicks outwar...

Страница 33: ...into the printer S If you are using single sheet forms set the head gap adjuster to the third notch away from the paper S If you are using multiple sheet forms 2 ply or 3 ply set the head gap adjuster to the fourth notch away from the paper S If you experience frequent head jams set the head gap adjuster to the fifth notch away from the paper This may stop the head jams S If the 2 ply and 3 ply pa...

Страница 34: ... 3 Pull the top form out and over the rear of the printer mechanism Low er and latch the printer mechanism Printer mechanism raised Paper tray beneath printer mechanism Wall Mount Printer The wall mount printer can load paper from either an optional flat paper tray or an optional compact paper tray Loading the FlatPaper Tray If you have a flat paper tray attached to the wall mount printer hold a s...

Страница 35: ... Simultaneously lower the paper into the compact paper tray and pull up the bottom end of the paper until the entire stack fits like a U inside the compact paper tray 3 Pull the top form out to load into the printer The compact paper tray is filled in this illustration ...

Страница 36: ...ose the pinfeed holders 5 Raise the paper bail Adjusting the Pinfeed Holders Note There are two pinfeed holders one next to the green thumb wheel and one opposite the same wheel Always loosen the pinfeed holder oppo site the green thumb wheel Note Adjusting the pinfeed holder next to the green thumb wheel may cause information to print in the wrong place If this pinfeed holder is moved correct its...

Страница 37: ...e printer 1 Press the FORM FEED button on the control panel to feed the paper into the printer 2 Lower the paper bail An empty printer autofeeds new paper approxi mately 0 1 0 25 cm beyond the top of the paper bail Note The ideal distance to feed paper beyond the paper bail may vary due to environmental conditions such as humidity and specific aspects of certain paper Use the green thumb wheel to ...

Страница 38: ... Manual 3 Once the paper is properly positioned press the SET PAGE button thus clearing the PAPER OUT light and to indicate where the top of the page is 4 Close the printer lid Ensure that the paper passes through the paper slot when the printer begins to print ...

Страница 39: ... a 4000 Series or a 62XX Computer Do the following to insert either a 4000 Series or a 62XX Computer into the terminal holder 1 Insert the bottom of the computer into the terminal slide retainer 2 Use the computer to push the terminal slide retainer all the way in the direction shown See part A in the following illustration 3 Lower the connector end of the computer into the terminal holder 4 Slide...

Страница 40: ...into the terminal slide retainer 2 Use the computer to push the terminal slide all the way in the direction shown See part A in the following illustration 3 Lower the connector end of the computer into the terminal holder 4 Slide the computer to fully seat it in the docking connector See part B in the following illustration A 1 Top display of computer inserted in terminal slide retainer 2 Docking ...

Страница 41: ...25 6820 Series 80 Column Printer User s Manual Maintenance 3 The printer lasts longer and performs better when it is operated correctly and kept clean ...

Страница 42: ...using a soft cloth moistened with mild soap and water a good quality cleaner such as MICRO CLEAN II and if necessary rubbing alcohol Make sure your printer is loaded with paper before communicating with your mobile computer Do Not Spill liquids or food crumbs into the printer Sit or stand on the printer Use solvents or abrasive cleaners on the printer Rest objects on under or against the printer A...

Страница 43: ... cleaners can damage the case Note GUIDE SHAFT CLEANER is recommended for cleaning your 80 column printer guide shafts Cleaning the printer guide shaft can re duce the number of head jams caused by dirt and buildup Note Both cleaners are sold separately See Inside Sales in Chapter 1 for ordering information and part numbers Periodic cleaning helps maintain the appearance and reliability of the pri...

Страница 44: ...cuum to re move accumulated paper dust from the printer mechanism The printer ribbon contains a special lubricant to ensure that the fine dot wires inside the print head receive adequate lubrication Replace the rib bon frequently to prolong the life of the print head The printer requires no additional user applied lubrication Ribbon cartridges available in black or purple are sold separately See I...

Страница 45: ...needs to be cleaned go on to the next page If the mask spring appears to be in good condition install a new ribbon cartridge as described on page 16 Print head Mask spring This shows the location of the mask spring Do the following to clean the mask spring 1 Unlatch the print head locking tabs to release the print head lift the print head aside then lift up the paper bail Do not detach the print h...

Страница 46: ...e your fingernails to loosen the base of the paper guide then pull the paper guide straight up from the printer mechanism 3 Remove the metal mask spring from the paper guide and clean with a quality cleaner Replace if damaged 4 Put the good clean mask spring into the paper guide and install the pa per guide into the printer 5 Close the paper bail reinsert the print head latch the two print head lo...

Страница 47: ... to enter the following modes and set the printer Factory defaults are in bold S Protocol Selection Sets the protocol NPCP or DTR S Configuration S Autofeed CR versus CR LF S Bit Rate 9600 bps or 19 2K S Zero Print Option slashed 4 or unslashed 0 Protocol Selection Mode Press and hold both the FORM FEED and LINE FEED buttons until you hear a beep to activate the protocol selection mode See the Pro...

Страница 48: ...nfigurations Protocol Binary Sequence Protocol PAPER OUT Indicator HEAD JAM Indicator LOW BATT Indicator NPCP factory default OFF OFF OFF Reserved OFF OFF ON Reserved OFF ON OFF Reserved OFF ON ON DTR no parity ON OFF OFF DTR odd parity ON OFF ON DTR even parity ON ON OFF IrDA ON ON ON Repeatedly press the LINE FEED button to increment the light sequence to the protocol of choice NPCP to IrDA Exam...

Страница 49: ...Printer Configuration Utility is run on a host com puter to manipulate the configuration of a 6820 Printer flash memory This chapter describes how to install and use the configuration utility Be fore using the configuration utility you must connect your host computer to your printer go to page 35 for instructions ...

Страница 50: ...onts Arabic directory S The Turkish version is in the Default Fonts Turkish directory S The International version is in the Default Fonts International direc tory Once the Configuration Utility is installed on the host computer any of these default font modules can replace the existing default font module NFT00000 MOD Copy the desired default font from the appropriate toolkit CD default fonts dire...

Страница 51: ...ted behind the printer mechanism on the same side as the green thumb wheel and is the one that is not attached to the printer mechanism Disconnect this terminal holder ribbon cable from the floor of the printer cavity Ignore this cable attached to the printer mechanism Intermec provides a printer configuration utility based on several operating systems that may be used on your host computer Below ...

Страница 52: ... used in the example below is 6820PRTR Execute the self extracting file from the target directory while specifying the path to NPTK6820 EXE in the command line Upon executing NPTK6820 EXE a TOOLKIT subdirectory is created as well as other associated subdirectories as shown in the diagram below The Configuration Utility application program and the initialization file are extracted to the TOOLKIT su...

Страница 53: ...ded and modified you can save this to either a disk file or the printer by using one of the Save Printer Configuration op tions In addition to the various Load Modify and Save options a Defaults op tion is provided which allows you to restore the printer to a default con figuration with a single option Starting the Program When you run RPGPCONF EXE the first screen you see is like the fol lowing C...

Страница 54: ...No to return to the Main Menu Click Yes to exit the program Load Printer Configuration This set of options allows you to load configuration information from disk on the host computer or from the printer connected to the host com puter Load Configuration from File option This option selected from the Main Menu allows you to load a configura tion file from one of the drives on your host computer Cli...

Страница 55: ...49 Loading the Selected File After selecting a configuration file to load click OK If the selected file does not exist you see an error message similar to the following Click OK to return to the Main Menu without loading a file If the file does exist you see a warning that loading the selected file will overwrite your working configuration as shown in the message box below Click OK if this is acce...

Страница 56: ...rn ing message as shown below and indicate that the printer s configuration will overwrite the working configuration Click OK to overwrite the con figuration otherwise click Cancel to return to the Main Menu without loading the printer s configuration If you click OK a message is then displayed prompting you to reset the printer If the connection is not successful after approximately 20 seconds th...

Страница 57: ...his set of options allows you to view or change a working configuration including adding fonts from disk on the host computer deleting printer fonts and changing parameters settings Include Control Program is a switch that determines whether to include the printer control program when saving the working configuration to the printer Click this box to change the setting When checked the control prog...

Страница 58: ...error message is displayed for each of the duplicate font files The font file names become unhighlighted you remain in the Font Selec tion window and the duplicate fonts are not copied to the Fonts Selected list Deleting Font Files To avoid the problem of exceeding flash memory you can delete fonts in the printer flash from the Fonts Selected list To do this select the font names you want to delet...

Страница 59: ...onts However if you attempt to save fonts and there is not enough space in printer flash memory the following error message is displayed Click OK to return to the Font Selection window and delete fonts in the Fonts Se lected list Canceling the Operation Click Cancel to return to the Main Menu without making any changes If you have not made any changes to the Fonts Selected list you return to the M...

Страница 60: ...9 2K and the parity set to None Note The 6820 Bluetooth adapter does not support any other settings Note If your version of the Configuration Utility has a 38 4K bit rate selection ignore that selection If selected it defaults to 19 2K bps On future releases the 38 8K bit rate will not show on the display Note If your version of the Configuration Utility has an XON XOFF selection ignore that selec...

Страница 61: ... on Disk You can select the drive directory and file name with your pointing de vice using standard MS Windows file selection methods If you want to enter text for a file name you can do this with the alpha keyboard or use your host computer keyboard Click Alpha to access the alpha keyboard described on page 49 Saving the Configuration to Disk After you have selected the drive directory and file n...

Страница 62: ... Menu is clicked a warning message as shown below is displayed This means that the working configuration is copied into flash memory in your 6820 Printer and overwrites the current configuration settings that are in your printer Click OK to for the system to connect to the printer and transfer the configuration or click Cancel to return to the Main Menu without updating the printer Attempting a Co...

Страница 63: ...ted and the printer s configuration is updated to match the working configuration This screen displays the progress made while updating the printer s config uration Upon completion of this operation the Total Transfer bar reach es 100 and you return to the Main Menu Save Defaults to Printer Click Save to Printer on the Main Menu to load the default configuration file DEFAULT PCF and save it to the...

Страница 64: ...peration Attempting a Connection to the Printer If the default configuration was successfully loaded into working configu ration then a message is displayed prompting you to reset the printer Connection Failed If the connection is not successful after approximately 20 seconds the fol lowing message is displayed Click Yes to repeat the previous steps above starting with Attempting a Connection to t...

Страница 65: ...rinter defaults refer to the Printer Defaults paragraph in Appen dix B Cross Reference Tables Alpha Keyboard The Alpha button on either the File Open window or the File Save As window brings up the alpha keyboard onscreen for you to enter text Returning the File Name to the Previous Dialog Window After selecting all of the needed text click Save to return the text to the window where needed Click ...

Страница 66: ...lity All files necessary to configure the 6820 Printer are located on the CD for the 6820TKCD toolkit including the 6820 Printer Configuration Utility application program PCONFIGAPP EXE To set up your host computer to use the Configuration Utility do the following 1 Insert the toolkit CD in your host computer 2 From your desktop use your Explorer application to view the contents of the tookit CD 3...

Страница 67: ... and applicable DLL files are extracted to this subdirectory If you wish to change the default location of this installation click Browse to change the destination If this installation is for anyone who uses this desktop computer select Everyone near the bottom of this screen Click Next to continue If you wish to know the amount of space required for the configuration utility click Disk Cost for t...

Страница 68: ...r User s Manual 5 Click Next to verify this installation click Back to adjust the informa tion in the previous screen or click Cancel to exit this installation 6 A progress screen followed by an Installation Complete screen finishes this installation Click Close to exit the installation ...

Страница 69: ... of the following check boxes Click OK then close the ActiveSync application Configuration Utility Operation This configuration consists of a list of fonts some parameter settings and a printer control program When the utility is active it holds a configuration in memory This is called the configuration clipboard Initially this configuration has pa rameters set to their default values Consider the...

Страница 70: ...If COM Port 1 is not available or is in use by another ap plication select another COM Port with which to connect to your printer Establishing a Communication with the Printer Click either the Get 6820 Configuration or the Set 6820 Configuration button to open communications with the printer 1 The Opening COM Port x to printer message appears in the text box of your utility The x in the message in...

Страница 71: ...nd your printer an Opening COM Port x to printer Done message appears in the text box Note If an Unable to open COM Port x to printer message appears in the text box as shown in the following example another software application may be using the selected COM Port Either select another COM Port or disable the software application using the COM Port in question See page 59 for more errors ...

Страница 72: ...tion 1 In the configuration clipboard if necessary select what settings are re quired for your printer To undo your selections and return them to their defaults click Reset to Defaults 2 Click Set 6820 Configuration to initiate communication The Setting printer parameters message appears in the text box of your utility 3 Once settings in your printer are changed the Setting printer parameters Done...

Страница 73: ...ur printer or to update the printer control program The Fonts Available for Update list shows font files that are available The Fonts Selected for Update list show fonts that are to go to the printer Get Printer Fonts To learn what fonts are currently in your printer click Get Printer Fonts then wait for the information to appear in the text box in the bottom right corner of the dialog Below is a ...

Страница 74: ...al space required in bytes for all of the fonts in the list The Space Remaining information listed below the Fonts Se lected for Update list displays the space remaining in the printer given the fonts in the Selected list Update Printer This button updates the printer fonts and the control program depending on the options selected on the dialog Note that if the Selected list is empty and the Inclu...

Страница 75: ...me available The control program is named NPFL6820 MOD Default Printer Settings The following settings are the defaults for your 6820 Printer Zero Print Option Print zeros without a slash Autofeed Configuration CR carriage return at end of line without line feed Protocol NPCP Parity N A for NPCP Bit Rate 19 2K 19200 For other printer defaults refer to the Printer Defaults paragraph in Appen dix B ...

Страница 76: ...Error Message Unable to open COM port x to printer COM port x cannot be found Access Denied Error The COM port exists but a connection with the printer is not established The particular COM port is identified in the error message Error Message Unable to open COM port x to printer Access to COM port x is denied Close applications using COM port x or try another port About the Configuration Utility ...

Страница 77: ...ou use Microsoft ActiveSync to connect to your terminals then do the following to enable its serial port based connections In the ActiveSync application on your desktop select File Connection Settings then check both the second Allow USB connections and third Allow connections to one of the following check boxes Click OK then close the ActiveSync application ...

Страница 78: ...Using the 6820 Printer Configuration Utility Chapter 4 62 6820 Series 80 Column Printer User s Manual ...

Страница 79: ...scape Sequences Index table in Appendix B Cross Reference Tables Locate the index for the control code and turn directly to that page S Numeric order single character codes only refer to the Single Character Control Code Definitions table in Appen dix B Cross Reference Tables Locate the index for the control code and turn directly to that page S Numeric order complete list refer to the Escape Sequ...

Страница 80: ...rinting ESC US 0 1 Used in the ASCII column of any of the Format definitions indicates that its value can only be one and not the character 1 For example Select Bottom Up Printing ESC US 1 When a number at the end of an escape sequence is marked with an asterisk then either the value corresponding to that number or the value of the string character can be used for that number For example if 1 is s...

Страница 81: ... the print buffer after printing all data in the buffer Also all of the one line functions are reset such as bold double strike double wide or unidirectional printing Format Decimal Hex ASCII 13 0D CR Note You can add an automatic line feed with a configuration item see Configuration Parameters in Chapter 7 Troubleshooting and Diagnos tics Delete The last character in the print buffer is deleted T...

Страница 82: ...or which the printer waits during inactivity before it goes into low power mode is set in n seconds The factory default is 10 seconds Format Decimal Hex ASCII 27 122 n 1B 7A n ESC z n Line Feed Perform Line Feed The contents of the print buffer is printed then cleared and the character count is reset to zero then the print head advances to the next print line using the current spacing The position...

Страница 83: ...mand Format Decimal Hex ASCII 27 64 1B 40 ESC Set Print Position absolute The print head is moved to an absolute horizontal position on the paper The distance is specified in dots from the left margin to the new print position at which subsequent characters are printed Each dot represents 1 60 of an inch The values for n1 and n2 determine the distance as fol lows number of dots n1 n2 256 Maximum p...

Страница 84: ... effect This function is also ignored in right center and full justification modes Format Decimal Hex ASCII 27 92 n1 n2 1B 5C n1 n2 ESC n1 n2 Select Top Down Printing Top down printing factory default is enabled First page is printed first Format Decimal Hex ASCII 27 31 0 1B 1F 00 ESC US 0 Select Bottom Up Printing Bottom up printing is enabled The last page is printed first Format Decimal Hex ASC...

Страница 85: ... the actual size of the paper used in the printer Page Length Set Page Length lines The length of the paper is set in lines where the range of n number of lines is 1 127 default 66 Keep in mind the line spacing and actual length of the paper when specifying this value since this function is depen dent on those parameters Top of Form is reset to the current line and the Skip Over Perforation settin...

Страница 86: ... ASCII 27 49 1B 31 ESC 1 Select 1 6 inch Line Spacing Line spacing is set to 1 6 of an inch 6 lines per inch for subsequent lines factory default 1 6 inch is equal to 12 dot spacing Format Decimal Hex ASCII 27 50 1B 32 ESC 2 Select n 216 inch Line Spacing Line spacing is set to n 216 of an inch for subsequent lines A spacing of 1 216 inch is 1 3 the distance between pins of the print head approxi ...

Страница 87: ... 2 136 in Com pressed mode Format Decimal Hex ASCII 27 81 n 1B 51 n ESC Q n Set Left Margin Print buffer text is cleared then the left margin is set relative to the num ber of columns to the left of the first column to print factory default 0 Minimum space between margins is the width of one double width pica character Maximum value must be less than the right margin Ranges shown below could vary ...

Страница 88: ...ly 60 of the normal width This results in character pitches as shown be low for exact pitch values see Master Select on page 75 Condensed Mode Condensed Expanded Condensed Elite 17 cpi approximate 9 cpi approximate 20 cpi approximate This function empties the print buffer and turns compressed mode on and stays on until canceled by Cancel Compressed Mode ESC SI 0 or DC2 factory default disabled Not...

Страница 89: ...y Expanded print is enabled for current line only The mode set previously returns on subsequent lines However expanded print can be canceled with Cancel Expanded Print DC4 or ESC W 0 before end of current line or wrapping of the print buffer This works with all three pitches Pica Elite Compressed This mode is also terminated by the execution of a Carriage Return Line Feed Form Feed Vertical Tab or...

Страница 90: ...W 0 Select Elite Pitch A character pitch of 12 cpi characters per inch is selected This also can cels Pica Pitch factory default Pica Note that this function is not sup ported in DBCS Format Decimal Hex ASCII 27 77 1B 4D ESC M Select Emphasized Mode Emphasized printing is enabled until Cancel Emphasized Mode is encoun tered The text is made bolder by printing each dot twice with the second dot sli...

Страница 91: ...rater Sets SBCS Format Decimal Hex ASCII 27 52 1B 34 ESC 4 Cancel Italic Mode The italic mode set by the Select Italic Mode function is canceled Note that this function does not work well with DBCS or alternate SBCS Format Decimal Hex ASCII 27 53 1B 35 ESC 5 Master Select Combinations of modes are allowed with this function The variable n is determined by combining values for the desired modes by ...

Страница 92: ...5 cpi Expanded 6 cpi Expanded Elite 8 58 cpi Expanded Compressed 10 cpi Pica 12 cpi Elite 17 16 cpi Compressed Select Pica Pitch A character pitch of 10 cpi characters per inch is selected factory de fault This also cancels Elite pitch Note that this function is not supported in DBCS Format Decimal Hex ASCII 27 60 1B 50 ESC P Select Superscript Mode All subsequent characters are printed approximat...

Страница 93: ...ent characters including spaces is enabled until the Cancel Underline Mode function is encountered Format Decimal Hex ASCII 27 45 1 1B 2D 01 ESC 1 Cancel Underline Mode The effect of the Select Underline Mode function is canceled Factory de fault also disables the Underline mode Format Decimal Hex ASCII 27 45 0 1B 2D 00 ESC 0 Tabs and Tab Setting Functions Horizontal Tabs Horizontal tabs set tabs ...

Страница 94: ...t tab to set any value less than the previous tab value acts as a terminating character NUL is the terminating character Clear Horizontal Tabs All horizontal tab stops are cleared It is merely a variant behavior of the Set Horizontal Tabs function where the NUL acts as an early terminating character as existing tabs normally clear before setting any new tabs Format Decimal Hex ASCII 27 68 0 1B 44 ...

Страница 95: ... 66 n1 n2 nk 0 1B 42 n1 n2 nk 00 ESC B n1 n2 nk NUL where n1 is the first tab range of values for tab stops 1 255 n2 is the second tab all tabs must be in ascending order are subsequent tabs maximum number of tabs 16 nk is the last tab to set any value less than the previous tab value acts as a terminating character NUL is the terminating character All tab settings with this function are stored in...

Страница 96: ...s the tabs stored in channel 0 Format Decimal Hex ASCII 27 47 c 1B 2F c ESC c where c is the channel number range 0 7 Character Sets and User Defined Functions Different character sets may be installed in the 6820 Printer In some cases more than one character set may be present at one time depending on the amount of available font memory The 6820 Printer reserves 438K of memory for installable fon...

Страница 97: ...render ing character codes and control codes from 0 to 127 Codes above 127 that fall within the range of lead in bytes for the selected character set treat the byte that follows as a trailing byte for that character set Other wise for character codes above 128 the character code from the selected SBCS is printed NFT00950 MOD BIG 5 DBCS does not allow the MBCS mode For this character set only contr...

Страница 98: ...red as codes 0 31 and 128 255 These are normally not accessible However the ESC R command makes these codes available but only 12 characters at a time These 12 are available in these positions of the ASCII character table 35 36 64 91 92 93 94 96 123 124 125 and 126 as shown in the International Character Sets table on the next page International Character Sets Country Country Number 35 36 64 91 92...

Страница 99: ...9 6d N 117 75 Φ 102 66 Z 110 6e Ξ 118 76 X 103 67 H 111 6f O 119 77 Ψ 104 68 θ 112 70 Π 120 78 Ω The selected set stays in effect until the printer is reset and receives a Mas ter Reset command or a new international character set is selected Note that this function is only used with the default character set User Defined Characters This code addresses user defined characters and selection into me...

Страница 100: ...e character is defined For each character defined 12 bytes of data must be supplied as follows where s1 is the first byte that describes the character format Bits 0 3 represent the end position in the grid bits 4 6 represent the start posi tion in the grid and bit 7 determines whether the character uses the top eight pins or the bottom eight pins of the print head If bit 7 0 the top eight pins are...

Страница 101: ...f these characters for user defined characters A user defined set must be selected using the Select User Defined Set function before these characters can print Factory de fault disables printing of these codes Note this function is only useful with the default SBCS character set This function is only available when the default SBCS character set is se lected Format Decimal Hex ASCII 27 54 1B 36 ES...

Страница 102: ...one 97 none 04 EOT 1C FS 84 none 9C none 05 ENQ 1D GS 85 none 9D none 06 ACK 1E RS 86 none 9E none 10 DLE 1F US 90 none 9F none Enable Printing of Character Graphics The printing of character graphics is enabled until disabled with the Dis able Printing of Character Graphics function Note this function is only useful with the default SBCS character set Format Decimal Hex ASCII 27 116 1 1B 74 01 ES...

Страница 103: ...Decimal Hex ASCII 27 43 n d1 dn 1B 2B n d1 dn ESC n d1 dn where n is the length of the character graphic string and d1 dn are the character graphics data stream The number of data bytes must be equal to the value of the variable n The range of values for the characters in each graphics data byte 0 255 For character values from 0 to 31 00h 1Fh S When the default SBCS codepage is selected the FX 86e...

Страница 104: ...graphics string by 256 Then n2 is the quotient the whole number and n1 is the remainder If you require less than 256 dots columns then n1 indicates the number of dots and n2 is set to zero Select Graphics Mode The graphic mode represented by the variable m Graphics Modes table is enabled The total number of dot columns to print is represented by n1 and n2 see parameter descriptions above Any graph...

Страница 105: ... n1 n2 1B 4B n1 n2 ESC K n1 n2 Select Low Speed Double Density Graphics Mode If Single Density graphics does not produce high enough density try this mode The number of dots per inch is doubled However the speed is re duced to half of what it would be with single density Calculating the pa rameters n1 and n2 is described on page 88 This is 8 pin single density graphics The resolution is now 120 do...

Страница 106: ...epresented by two data bytes the total length of the graphic string following the Select Graphics Mode command needs to first be divided by two These parameters are calculated as follows assuming a temporary variable n n total number of dots needed divided by 2 n2 integer of n divided by 256 n1 remainder of the n2 calculation First divide n the total number of dots needed for the graphics string b...

Страница 107: ...ics mode is enabled Calculating the parame ters n1 and n2 is described previously under Nine Pin Graphics Modes Format Decimal Hex ASCII 27 94 1 n1 n2 1B 5E 01 n1 n2 ESC 1 n1 n2 The resolution is now 120 dots per inch Each 8 inch line can accommo date 960 columns of graphic dots A graphic string that exceeds the length of the print line is discarded ...

Страница 108: ...Area Abcdef Assured Print Area 8 inches Max 1 inch 1 inch 0 75 inch or more area 2 0 75 inch or more area 2 Paper width Xyz Perforation 55 lines max at 1 6 line spacing area 1 area 1 1 8333 inches 11 lines Paper End Detection Position area 3 Generally you should leave a 1 inch margin at both the top and the bot tom of the page This provides for a margin of six lines at 1 6 inch line spacing Even t...

Страница 109: ...The left and right margins are represented by Area 2 For reliable print ing use a margin of at least 0 75 inch at the left and right edges of the paper Paper End Detection The Paper End Detection line shown in the previous illustration represents the point at which the Paper Out sensor detects the bottom edge of the pa per Area 3 represents the the distance between the the Paper End Detection posi...

Страница 110: ...Control Code Definitions Chapter 5 94 6820 Series 80 Column Printer User s Manual ...

Страница 111: ...Series 80 Column Printer User s Manual Bluetooth Adapter 6 This chapter provides general information and configuration information about the Bluetooth adapter that you may have upgraded to for your 6820 Printer ...

Страница 112: ...etooth printing Bluetooth self test 2 Pass through printing 0 1 Printing from 700 Series or CK60 Handheld Computers allowed to pass through the Blue tooth adapter transparently 3 Bluetooth Reconfiguration 1 0 Reconfiguring Bluetooth module via 700 Se ries or CK60 Handheld Computer 4 Bluetooth programming cabled X X Programming Bluetooth module via program ming cable S State 1 In addition to allowi...

Страница 113: ...0 Handheld Computer is set the adapter board automatically opens a path between the 700 Series or CK60 Handheld Computer and the 6820 Transition DC Board and powers down the Bluetooth module Testing the DSR pin to reflect DTR allows the mobile computer to differentiate between a Bluetooth equipped termi nal holder and a non Bluetooth equipped terminal holder 700 Series or CK60 Handheld Computer to...

Страница 114: ...uetooth radio shuts down after a configurable time default is two hours To wake the Bluetooth adapter the 6820 Printer is powered on by any button push on the printer control panel There are two ways to shutdown the Bluetooth module power S A 700 Series or CK60 Handheld Computer initiates a pass through mode or S The Bluetooth module sends a shutdown signal after a configurable amount of time Defa...

Страница 115: ...rough printing print job or 3 the shutdown time has elapsed default is two hours S Link Loss The 6820 Bluetooth adapter is able to recover from bro ken Bluetooth connections including out of range interference power failure or other conditions resulting in a broken connection It returns to its previous Discoverable Connectable state after a lost connection S Master Slave Printer shall participate ...

Страница 116: ... range while communicat ing with other Bluetooth devices Degradation in range and data throughput is expected when in automobile cabins or when involved in intermittent loss of line of sight communications across a busy road Diagnostics Capabilities The Bluetooth radio settings are available to a user The 6820 Bluetooth adapter sends a print out of Bluetooth information to the printer upon re ceiv...

Страница 117: ... CK60 Handheld Computer tap Start Pro grams the 6820 BT Information icon 3 On the 6820 Printer press the SET PAGE button on the printer con trol panel to wake the printer 4 From the 6820BT Self Test screen tap Trigger Self Test to print the information Note A GUI tool for Adapter configuration is not a deliverable of this product The adapter is configurable via the Bluetooth Configuration Commands...

Страница 118: ...it should operate normally Unpackaged Drop 2 feet to concrete Terminal Inspection Minimum of 30 000 insertions for the terminal holder Safety Regulatory Agency Requirements The Bluetooth adaptor within the 6820 Printer including all options must meet these electrical safety requirements for Information Technology Equipment The test configuration must include a portable computer con nected to the 6...

Страница 119: ...T SIG GAP and SPP conformance is a prerequisite FCC Part 15 247 US RSS 210 Canada indoor operation unlicensed Outdoor operation IF restricted to 2 450 2 4835GHz RSS 139 Canada indoor outdoor operation licensed 2 400 2 4835GHz RSS 102 Canada RF Exposure SAR Keep antennas more than 8 inches from operator to avoid SAR testing EN 300 328 1 2 EN 300 489 1 17 Europe SCT Mexico Additional Approvals IEC95...

Страница 120: ...Bluetooth Adapter Chapter 6 104 6820 Series 80 Column Printer User s Manual ...

Страница 121: ...er helps you correct printing problems that may occur If you experience a printing problem you can perform several tests to find and possibly cure the problem This chapter also contains troubleshooting strategies for the 6820 Printer and a detailed listing of the Diagnostics Information table ...

Страница 122: ...nected between the printer mechanism and its power source internal battery vehicle cable or ac If none of these steps wake up the printer with the problem then you need to return the printer for service S Internal battery Check the battery and its cable by installing into another known good printer S Vehicle cable Attach the printer in question to another vehicle power cable S AC power Plug the pr...

Страница 123: ...g illustration If the ribbon cartridge touches the pivot frame or press nut the printer mechanism needs realignment Press nut Pivot frame This illustration shows the print head to the far left in the printer 1 Loosen the four screws that hold the mechanism in place using a Phil lips screwdriver see the following illustration 2 Realign by pushing the printer mechanism to the right away from the gre...

Страница 124: ...sition of the print head should NOT touch the pivot frame or press nut If the print head does touch the pivot frame or press nut return the printer for hardware repair Communications or Host Computer The self test report can verify that the communications protocol options selected for the printer match those expected by the host computer If these options do not match then reconfigure the printer u...

Страница 125: ...e Chassis Ground shell 1 NC No Connection Charge Input 8 9 HHC_CHARGE SG Signal Ground 9 7 GND DSR Data Set Ready 7 6 DTR DTR Data Terminal Ready 2 20 NC CTS Clear To Send 6 5 RTS RTS Ready To Send 3 4 CTS RXD Receive Data 5 3 TXD TXD Transmit Data 4 2 RXD Dock_A B_SW NC 12 Term A B 13 Mobile Computer Wall Mount Printer or Remote Mount Terminal Holder 25 Pin DSUB Male 1 25 14 8 15 Pin DSUB Male 15...

Страница 126: ...tion RC Receive Carrier 17 17 NC TC Transmit Carrier 15 15 NC DCD Data Carrier Detect 8 8 NC SG Signal Ground 7 7 GND DSR Data Set Ready 6 6 DTR CTS Clear To Send 5 5 RTS RTS Ready To Send 4 4 CTS RXD Receive Data 3 3 TXD TXD Transmit Data 2 2 RXD Signals are not available on the 6100 Dock 13 25 Pin DSUB Male 25 Pin DSUB Female 1 13 1 14 25 25 14 25 Pin to 25 Pin Cable P N 216 771 XXX ...

Страница 127: ...3 4 RCT RXD Receive Data 2 5 TXD RTS Ready To Send 7 3 CTS CTS Clear To Send 8 6 RTS DSR Data Set Ready 6 7 DTR Data Terminal Ready SG Signal Ground 5 9 GND Chassis Ground shell shell Chassis Ground 8 Terminal Charge out to computer PC Printer shield 1 15 Pin DSUB Female 9 Pin DSUB Female 1 5 6 9 9 15 8 9 Pin to 15 Pin Cable P N 226 016 XXX ...

Страница 128: ...a Terminal Ready 20 2 NC No Connection RTS Ready To Send 4 3 CTS RXD Receive Data 3 5 TXD CTS Clear To Send 5 6 RTS DSR Data Set Ready 6 7 DTR SG Signal Ground 7 9 GND open shell Signal is not available on the 6100 Dock 13 Dock Printer w 6210 Terminal Holder 25 Pin DSUB Male 1 25 14 8 15 Pin DSUB Female 15 9 1 shield 25 Pin to 15 Pin Cable P N 226 162 XXX ...

Страница 129: ...nal mnemonics Printer Communications Connector Pin Outs 15 Pin D Sub 25 Pin D Sub Signal Name Type I O Description 1 NC NC NC No Connection 2 20 DSR Data Set Ready RS 232 IN Printer s DSR 3 4 CTS Clear To Send RS 232 IN Wake up 4 2 RXD Receive Data RS 232 IN Printer s RxD 5 3 TXD Transmit Data RS 232 OUT Printer s TxD 6 5 RTS Ready To Send RS 232 OUT Printer s RTS 7 6 DTR Data Terminal Ready RS 23...

Страница 130: ...determine the problem If none of the listed conditions are indicated by the beep codes and LEDs yet the printer does not perform properly then perform a printer self test Press and hold for several seconds the FORM FEED and SET PAGE buttons at the same time until the printer beeps and all indicator lights come on The lights change throughout the test as it progresses At the end of the self test th...

Страница 131: ...isting of flash write errors and EEPROM block errors Run Time Errors Run time errors can occur during the course of printing These errors are displayed on the LEDs along with beep sequences This causes the printer to stop printing and enter an error state Then beep sequences are emitted LED codes are displayed the error status may be sent to the host depend ing on the protocol and the printer goes...

Страница 132: ... 12 sets of 12 beeps OFF OFF OFF Operating System software failure The most common errors consist of Paper Out Low Battery and Head Jam The other errors listed are of rare occurrences but are provided for good printer diagnostics in the event failures should occur Power On Self Test POST When the printer is reset it performs a POST to verify other reasons the printer might be failing Audible error...

Страница 133: ...formed only run time errors or fatal errors are reported Fatal Errors Two types of fatal errors exist Flash Write Errors and Printer Configura tion Block Errors These errors are extremely rare but measures are built into the printer diagnostics to track possible occurrences Flash Errors Errors related to writing or erasing flash are critical errors These critical errors cause the printer to stop a...

Страница 134: ...ed in the pro gram module Control Program Verification A CRC is performed on the control program which is loaded into writable flash program memory The calculated CRC is compared to the CRC em bedded in the program module The results of this test are printed on the self test report Font Module Verification A CRC is performed on the font modules which are loaded into writable flash font memory The ...

Страница 135: ...ns when the printer beeps and all indicators are lit If the buttons are held too long the self test will not happen and the printer will form feed one page As the self test progresses the indicator lights change Internal tests are performed and a 2 page report is printed This report provides helpful in formation in diagnosing and troubleshooting printer problems When the self test is performed the...

Страница 136: ...nd IrDA See page 31 for additional information Bit Rate on line 18 lists the baud rate for the printer Most application software autobauds so you do not have to select it Bit rate is commonly set to 19200 19 2K or 9600 bps See page 32 for additional information A2D History lines 21 through 25 is the history for voltage measurements and temperature measurements as re corded by the printer Head Jam ...

Страница 137: ...link Software memory errors Corruption in internal memory Llink Software memory errors All other values are informational only Remember that these values are cleared after the self test Sample First Page of Self Test Note Lines 15 18 are factory default printer settings Take note of these lines when reading the self test report yyyyyyyyyyyyyyyyyyyyyyyyyyyyyyyyyyyyyyyyyyy 1 NP6820 2 Copyright 1997 ...

Страница 138: ...5 12345 12345 42 12345 12345 12345 12345 12345 12345 12345 12345 12345 12345 12345 12345 12345 43 12345 12345 12345 12345 12345 12345 12345 12345 12345 12345 Second Page of Self Test Page 2 contains the print pattern used to diagnose printer mechanical be havior The pattern continuously prints the ASCII characters between 33 and 126 decimal inclusive for the entire page or until you cancel the pri...

Страница 139: ...tion see page 32 for instructions Does not print extended char acter set missing font Check line 11 or 12 on the self test re port to see if the NFT0000 MOD file is listed after Font Module Use the 6820 Printer Tool Kit to reload this file or send for hardware repair Printer emits 1 or 2 beeps or blinking green light is the only indicator Printer mechanism does not have ade quate power for printin...

Страница 140: ... feed paper jam or head jam continued Test Move print head manually from side to side Cause If print head resistant Test Remove ribbon cartridge move print head If smooth ribbon is jammed Test Remove ribbon cartridge move print head If still resistant mask spring is bent or damaged is bent or damaged Cause Print head gap adjuster too tight Cause Paper scraps found in printer mechanism or around pl...

Страница 141: ...Most likely If it does not refer to comments in Problems and Solutions above Diagnostic Information Nonvolatile Flash Storage Diagnostic information is stored in flash to support the hardware configu ration both at time of manufacture and in the field This includes record ing the initial configuration changes to hardware and software and various environmental statistics helpful in determining why ...

Страница 142: ...indication of number of times unit is serviced 2 BCD Digits 3 Date of last Repair yy mm dd 6 BCD digits 09 2 Cold Starts since MFG or last repair binary digits 8 bytes 2 Warm Starts since last cold start binary digits 2 Pages printed over life binary digits 10 2 Last high low voltage extremes on 24 volt input over last 50 reports Extremes stored as 8 bit A2D conversions 2 bytes 11 bytes 2 Voltage ...

Страница 143: ...temperature error 2 bytes 2 Total number of temperature errors 2 bytes 40 2 Total number of head jams 2 bytes binary 11 bytes 1 0 No Home detect switch error 1 Home switch engagement error 0 Seeking 1 Printing 0 Left 1 Right 00 Acceleration 01 Constant speed 10 Deceleration 00 250 PPS initialization 01 Low speed 10 High speed 0 reserved bit 0 bit 1 bit 2 bits 3 4 bits 5 6 bit 7 1 Acceleration or d...

Страница 144: ...en IFRAMES received when session is not bound 2 bytes 2 NPCP Bind error count 2 bytes 2 NPCP IPLDUR Invalid presentation layer data unit error count Increments when bad presentation layer command received 2 bytes 60 4 IrDA rxFramesOk total frames received OK 4 bytes 46 bytes 4 IrDA rxFramesCrcErr total frames received with CRC error 4 bytes 4 IrDA rxTotalBytes total Bytes received OK 4 bytes 4 IrD...

Страница 145: ...on continued Total Length Stored as Description Length Field ID 70 1 Zero font selection for codepage 437 0 Ø 1 0 1 byte 6 bytes 1 Autofeed configuration 0 CR 1 LF CR 1 bit 1 Protocol Selection 00h NPCP 20h DTR No Parity 21h DTR ODD Parity 22h DTR EVEN Parity all other values reserved 1 Bit Rate 0 9600 1 19 2k ...

Страница 146: ...Troubleshooting and Diagnostics Chapter 7 130 6820 Series 80 Column Printer User s Manual ...

Страница 147: ...0 Series 80 Column Printer User s Manual Bluetooth Configuration Commands A Configuration of the Bluetooth radio and software is accomplished using the Bluetooth Configuration Commands listed in this appendix ...

Страница 148: ...e character from the set A Z command type is one character for the set 0 9 command payload is variable in length CR is the command terminator The command payload is formed from printable ASCII characters from the code range 0x20 to 0x7E Codes outside of this range are escaped using the percent character followed by two hexadecimal digits The percent character is always represented by the three cha...

Страница 149: ... Bluetooth link is not existent In this case the serial interface looks like a serial port that supports a number of command and control modes Upon reset the unit comes up in Bluetooth Link Inactive State After the first Bluetooth connection the unit goes into Bluetooth Link Active State It stays in this state until the link is lost because the Master shuts it down or there is an out of range cond...

Страница 150: ...l Bluetooth Device Name Command F0 Device Friendly Name CR Definition Device Name String up to 254 bytes long Default 6820 DDEEFF where DDEEFF is from the Bluetooth device ad dress AABBCCDDEEFF Example F01Len s 100 25 serial module CR This sets the name to Len s 100 serial module Set Class of Device Service Field Command S1 Class of Device Service field Description The Class of Device Service CoD ...

Страница 151: ...C0ON CR Become connectable Specify Page Scan Timing Command C1 Page_Scan_Interval Page_Scan_Window CR Description Sets the Page Scan timing parameters Default 4096 18 Example C11024 512 CR Note To enable scanning the values for Interval and Window must be in the range of 18 to 4096 The Window value must be less than the Interval value Both values must be zero to disable scanning Note Page scan tim...

Страница 152: ...t S4 00 NULL PIN code Example S4MyPinCode CR Manage Security Modes This command controls the security access mode and device pairing The modes available are L0 Disable encryption authentication and exclusion L1 Enable authentication L2 Enable encryption and authentication L3 Enable encryption authentication and exclusive Mode L0 allows any remote device to connect Mode L1 require the remote device...

Страница 153: ...cription Displays the firmware build version currently running Example V0 CR Returns v1yyyymmddHHMM CR Note This command responds with the requested data only not the ACK CR Read Local Device Address Command V1 CR Description Displays the local device address Returns v1 xx xx xx xx xx xx CR Note This command responds with the requested data only not the ACK CR Example Sent V1 CR Received v1 00 2C ...

Страница 154: ...list of web links used in this document and their ad dresses as of this publish date they are subject to change without notice by their respective authors S Assigned Numbers Bluetooth Baseband https www bluetooth org foundry assignnumb document baseband S The Bluetooth Specification www bluetooth com dev specifications asp ...

Страница 155: ... Series 80 Column Printer User s Manual Cross Reference Tables B A set of cross reference tables are provided to assist you in locating control codes and escape sequences The default settings are also included ...

Страница 156: ...r Defined 81 Single Byte Character Sets Char Sets User Defined 80 C Cancel Line General Printer Control 65 Carriage Return General Printer Control 65 Channel Clear Vertical Tabs in Channel Tabs and Tab Setting 80 Select Vertical Tab Channel Tabs and Tab Setting 80 Set Vertical Tabs in Channel Tabs and Tab Setting 79 Character Define Intercharacter Space Char Style Text Mode 75 Define User Defined ...

Страница 157: ...ned 84 Delete General Printer Control 65 Double Cancel Double Strike Mode Char Style Text Mode 73 Cancel Double Wide Mode Char Style Text Mode 74 Cancel Double Wide Mode one line only Char Style Text Mode 73 Double Byte Character Sets Char Sets User Defined 80 Select Double Strike Mode Char Style Text Mode 73 Select Double Wide Mode Char Style Text Mode 74 Select Double Wide Mode one line only Cha...

Страница 158: ... Pin Double Density Graphics Mode Graphics Functions 91 Select 9 Pin Single Density Graphics Mode Graphics Functions 90 Print Character Graphics Char Sets User Defined 87 H Half Speed Cancel Half speed Printing General Printer Control 66 Select Half speed Printing General Printer Control 66 Horizontal Clear Horizontal Tabs Tabs and Tab Setting 78 Perform Horizontal Tab Tabs and Tab Setting 78 Set ...

Страница 159: ...ouble Wide Mode one line only Char Style Text Mode 73 Emphasized Mode Cancel Char Style Text Mode 74 Cancel Italic Mode Char Style Text Mode 75 Cancel Subscript Superscript Mode Char Style Text Mode 77 Cancel Underline Mode Char Style Text Mode 77 Select Condensed Mode compressed Char Style Text Mode 72 Select Double Strike Mode Char Style Text Mode 73 Select Double Wide expanded Mode Char Style T...

Страница 160: ...Printer Control 66 Cancel Printing of Codes 128 255 Char Sets User Defined 85 Cancel Unidirectional Printing General Printer Control 68 Enable Printing of Character Graphics Char Sets User Defined 86 Enable Printing of Codes 128 255 Char Sets User Defined 85 Expand Printable Code Area Char Sets User Defined 85 Disable Printing of Character Graphics Char Sets User Defined 87 Print Character Graphic...

Страница 161: ... Mode Char Style Text Mode 73 Select Double Strike Mode Char Style Text Mode 73 Subscript Superscript Cancel Subscript Superscript Mode Char Style Text Mode 77 Select Subscript Mode Char Style Text Mode 77 Select Superscript Mode Char Style Text Mode 76 T Tab Clear Horizontal Tabs Tabs and Tab Setting 78 Clear Vertical Tabs Tabs and Tab Setting 79 Clear Vertical Tabs in Channel Tabs and Tab Settin...

Страница 162: ... Char Sets User Defined 86 Enable Printing of Codes 128 255 Char Sets User Defined 85 Expand Printable Code Area Char Sets User Defined 85 Select Default Character Set Char Sets User Defined 85 Select User Defined Character Set Char Sets User Defined 85 Print Character Graphics Char Sets User Defined 87 V Vertical Clear Vertical Tabs Tabs and Tab Setting 79 Clear Vertical Tabs in Channel Tabs and ...

Страница 163: ... to next line 66 11 0B VT Vertical Tab moves paper to next vertical tab stop 79 12 0C FF Form Feed advances paper to top of next page 65 13 0D CR Carriage Return moves print head to left margin 65 14 0E SO Shift Out selects Double wide Mode one line only 73 15 0F SI Shift In selects Condensed compressed mode 72 16 10 DLE 17 11 DC1 Device Control 1 sets printer online not currently used 18 12 DC2 D...

Страница 164: ...SC 0 Select Default Character Set ESC 1 Select User Defined Character Set ESC NUL k1 k2 s1 d1 d11 Define User Defined Characters ESC m n1 n2 Select Graphics Mode ESC n d1 dn Print Character Graphics ESC 0 Cancel Underline Mode ESC 1 Select Underline Mode ESC c Select Vertical Tab Channel ESC 0 Select 1 8 inch Line Spacing ESC 1 Select 7 72 inch Line Spacing ESC 2 Select 1 6 inch Line Spacing ESC 3...

Страница 165: ...Set ESC S 0 Select Superscript Mode ESC S 1 Select Subscript Mode ESC T Cancel Superscript Subscript Mode ESC U 0 Cancel Unidirectional Printing ESC U 1 Select Unidirectional Printing ESC W 0 Cancel Double Wide expanded Mode ESC W 1 Select Double Wide expanded Mode ESC Y n1 n2 Select High Speed Double Density Graphics Mode ESC Z n1 n2 Select Low Speed Quadruple Density Graphics Mode ESC 0 n1 n2 Se...

Страница 166: ...n Left justification Keyboard printer Enabled Language USA Line Spacing 1 6 inch Margin left 0 Margin right 80 MSB control Disabled NLQ Disabled Page length 11 inch 66 lines with Pica pitch Paper end sensor Enabled Pitch Pica 10 characters per inch Power off sleep timer 10 seconds Printer Code Area Expansion Disabled Printing direction Top down bidirectional Redefinition of graphic modes Disabled ...

Страница 167: ...ults see page 10 for instructions The default settings listed below can be restored to the printer as described in Chapter 4 Using the Configuration Utility Function Default Value Zero print option Zeros are printed with a slash Autofeed configuration CR carriage return added at end of line without line feed Protocol NPCP NORAND Portable Communications Protocol Parity N A for NPCP Bit Rate 19 2K ...

Страница 168: ...Cross Reference Tables Appendix B 152 6820 Series 80 Column Printer User s Manual ...

Страница 169: ...ter These test print jobs originated from running a C program by a person with specific knowledge of how to generate such a report print job The C program demonstrates how a programmer could access the printer font modules within flash memory to select desired character You do not need more than one font module loaded Any ONE of NFT00932 MOD NFT00936 MOD NFT00949 MOD or even NFT00950 MOD Asian fon...

Страница 170: ...6820 Printer The textfile illustrates the use of the Simplified Chinese character set Install the Simplified Chinese character font NFT00936 MOD in the printer flash using the configuration tool to have GB2312 TXT print correctly 1 Use the Microsoft C version 7 00 compiler cl china c link slibce graphics 2 Run CHINA EXE to create GB2312 TXT 3 Copy this text file to the appropriate printer port IBM...

Страница 171: ...lustrates the use of the KSC5601 character set Install the KSC5601 character font NFT00949 MOD in the printer flash using the configuration tool to have KOREA TXT print correctly 1 Use the Microsoft C version 7 00 compiler cl korea c link slibce graphics 2 Run KOREA EXE to create KOREA TXT 3 Copy this text file to the appropriate printer port International Character Set This program generates a te...

Страница 172: ...Printer Font Test Jobs Appendix C 156 6820 Series 80 Column Printer User s Manual ...

Страница 173: ...ndex covers InterComm classes and functions The General Index covers all topics Those in italics are figures those in bold are tables The Files Index is to assist you in locating descriptions for device drivers applica tions utilities batch files or other files within this publication ...

Страница 174: ...e 74 cancel double wide mode one line only 73 select double wide mode 74 select double wide mode one line only 73 E Eight pin graphics functions reassign graphics mode 88 select graphics mode 88 select high speed double density graphics mode 89 select low speed double density graphics mode 89 select low speed quadruple density graphics mode 90 select single density graphics mode 89 Elite pitch sel...

Страница 175: ... page length lines 69 Perforation cancel skip over perforation 72 set skip over perforation 71 Pitch select elite pitch 74 select pica pitch 76 Print position set print position absolute 67 set print position relative 68 Printable expand printable code area 85 Printing cancel half speed printing 66 cancel unidirectional printing 68 disable printing of character graphics 87 disable printing of code...

Страница 176: ...77 Unidirectional printing cancel unidirectional printing 68 select unidirectional one line printing 69 select unidirectional printing 68 User defined characters copy ROM to RAM 84 define user defined characters 84 disable printing of character graphics 87 disable printing of codes 128 255 85 enable printing of character graphics 86 enable printing of codes 128 255 85 expand printable code area 85...

Страница 177: ...onfiguration utility 53 60 connectability 99 default configuration 103 default device name 99 discoverability 99 environment specifications 101 indicators 97 link keys 99 link loss 99 100 master slave 99 modes 96 operation 101 performance range 100 pin states 96 power management flow 98 power on off mechanism 98 query items 100 safety regulatory agency requirements 102 SDP record 99 security 98 se...

Страница 178: ... enabling 53 61 Bluetooth adapter connecting 60 disconnecting 53 get 6820 settings Windows 2000 XP 56 installation Windows 2000 XP 50 Windows 95 98 36 overview of operation Windows 2000 XP 53 setting 6820 printer configuration Windows 2000 XP 56 starting up the program RGPCONF EXE Windows 95 98 37 working memory Windows 2000 XP 53 Windows 95 98 36 Configuration mode 31 autofeed 31 bit rate 32 self...

Страница 179: ...IBM Microsoft compatible Code Page 437 NFT00437 MOD 34 154 International NFT00000 MOD 34 155 JIS Japanese NFT00932 MOD 34 155 KSC5601 Korean NFT00949 MOD 34 155 Turkish NFT00000 MOD 34 Font module verification self test function 118 Fonts copy Windows 2000 XP 58 Windows 95 98 42 erase Windows 95 98 42 sample print jobs 153 save Windows 95 98 43 FORM FEED button 5 Four position screws printer mecha...

Страница 180: ...nds 133 Operation check list 14 inserting the computer 4000 Series 23 600 series 24 61XX Computer 24 62XX Computer 23 700 series 24 CK60 24 internal battery 15 loading paper into printer 20 loading paper tray 18 pinfeed holders 20 21 ribbon cartridge 16 P Page formatting control codes 69 Page layout fanfold paper 92 Paper 7 part numbers 12 Paper head jams 17 Paper adjustments pinfeed holders 20 pr...

Страница 181: ...8 47 Save fonts Windows 95 98 43 Save to printer Windows 95 98 46 SDP record Bluetooth adapter 99 Security Bluetooth adapter 98 Selecting the protocol 31 Self test A2D history 120 actions performed 119 autofeed setting 120 battery voltage 120 bit rate 120 Bluetooth adapter 100 error log 121 explanation of functions A2D check 118 boot block 118 control program 118 font module 118 nonvolatile diagno...

Страница 182: ...hicle battery 3 Verifications communications host computer 115 printer components 114 Vertical tabs 78 clear 79 clear in channel 80 line spacing 70 perform 79 select channel 80 select double wide mode 73 set 79 set in channel 79 Visible moving parts in mechanism 28 W Wall mount printer 2 connectors 4 description 2 dimensions 9 loading compact paper tray 18 Working configuration Windows 2000 XP 53 ...

Страница 183: ...osoft compatible Code Page 437 34 sample test page 154 NFT00932 MOD 153 code page 932 81 JIS Japanese 34 sample test page 155 NFT00936 MOD 153 code page 936 81 GB2312 Chinese simplified 34 sample test page 154 NFT00949 MOD 153 code page 949 81 KSC5601 Korean 34 sample test page 155 NFT00950 MOD 153 Big 5 Traditional Chinese 34 sample test page 154 code page 950 81 NPFL6820 MOD control program Wind...

Страница 184: ...Index 168 6820 Series 80 Column Printers User s Manual ...

Отзывы: