Содержание Active Management Technology v5.0
Страница 32: ...4 Click the to expand the Intel AMT Getting Started section ...
Страница 33: ...5 Click the to expand the Section 1 Provisioning section ...
Страница 34: ...6 Click the to expand the Basic Provisioning without TLS section ...
Страница 37: ...The IP address for the ProvisionServer and Intel SCS are now visible ...
Страница 38: ...9 Select Step 2 Discovery Capabilities ...
Страница 39: ...10 Verify that the setting is Enabled If Disabled click the check box next to Disabled and click Apply ...
Страница 40: ...11 Select Step 3 View Intel AMT Capable Computers ...
Страница 41: ...Any Intel AMT capable computers on the network are visible in this list ...
Страница 42: ...12 Select Step 4 Create Profile ...
Страница 43: ...13 Click the plus symbol to add a new profile ...
Страница 47: ...15 Select the icon with the arrow pointing out to Export Security Keys to USB Key ...
Страница 48: ...16 Select the Generate keys before export radio button ...
Страница 55: ...27 Select Step 7 Monitor Provisioning Process ...
Страница 57: ...28 Select Step 8 Monitor Profile Assignments ...
Страница 60: ...Back to Contents Page ...
Страница 63: ...6 Press y when the following message appears System resets after configuration change Continue Y N ...
Страница 66: ...9 Select Intel ME Features Control and then press Enter ...
Страница 68: ...10 Select Return to Previous Menu and then press Enter ...
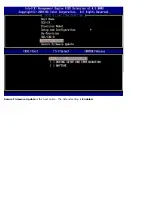
Страница 69: ...11 Select Intel ME Power Control and then press Enter ...
Страница 70: ...Intel ME ON in Host Sleep States is the next option The default setting is Mobile ON in S0 ...
Страница 71: ...12 Select Return to Previous Menu and then press Enter ...
Страница 72: ...13 Select Return to Previous Menu and then press Enter ...
Страница 75: ...6 Select TCP IP and then press Enter 7 Press n when the following message appears DHCP Enable Disable DHCP Y N ...
Страница 76: ...8 Type the domain name into the Domain name field ...
Страница 78: ...11 Select Setup and Configuration from the menu and then press Enter ...
Страница 81: ...14 Select Provisioning Server from the menu and then press Enter ...
Страница 84: ...17 Select Provisioning Server FQDN from the menu and then press Enter ...
Страница 85: ...18 Type the fully qualified domain name FQDN for the provisioning server and press Enter ...
Страница 86: ...19 Select TLS PSK from the menu and then press Enter ...
Страница 89: ...22 Select TLS PKI from the menu and then press Enter ...
Страница 93: ...26 Select Return to Previous Menu and press Enter ...
Страница 94: ...27 Select Return to Previous Menu and then press Enter This returns you to the Intel AMT Configuration menu ...
Страница 96: ...28 Select SOL IDE R and then press Enter ...
Страница 97: ...29 Press y when the following message appears Caution System resets after configuration changes Continue Y N ...
Страница 99: ...For Serial Over LAN SOL IDE R select Enabled and then press Enter ...
Страница 100: ...For IDE Redirection select Enabled and then press Enter ...
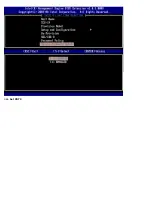
Страница 101: ...Password Policy is the next option The default setting is Default Password Only ...
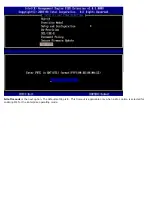
Страница 102: ...Secure Firmware Update is the next option The default setting is Enabled ...
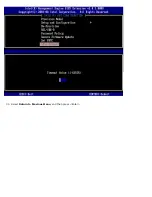
Страница 103: ...Skip Set PRTC ...
Страница 105: ...30 Select Return to Previous Menu and then press Enter ...
Страница 106: ...31 Select Exit and then press Enter ...
Страница 107: ...32 Press y when the following message appears Are you sure you want to exit Y N ...
Страница 111: ...7 Press y when the following message appears System resets after configuration change Continue Y N ...
Страница 114: ...10 Select Intel ME Features Control and then press Enter ...
Страница 116: ...11 Select Return to Previous Menu and then press Enter ...
Страница 117: ...12 Select Intel ME Power Control and then press Enter ...
Страница 118: ...Intel ME ON in Host Sleep States is the next option The default setting is Mobile ON in S0 ...
Страница 119: ...13 Select Return to Previous Menu and then press Enter ...
Страница 120: ...14 Select Return to Previous Menu and then press Enter ...
Страница 123: ...6 Select TCP IP and then press Enter 7 Press n when the following message appears DHCP Enable Disable DHCP Y N ...
Страница 124: ...8 Type the domain name into the field ...
Страница 127: ...13 Press y when The following message appears Caution System resets after configuration changes Continue Y N ...
Страница 129: ...15 For Serial Over LAN select Enabled and then press Enter ...
Страница 130: ...16 For IDE Redirection select Enabled and then press Enter ...
Страница 131: ...17 For Password Policy select Enabled and then press Enter ...
Страница 132: ...Secure Firmware Update is the next option The default setting is Enabled ...
Страница 133: ...18 Skip Set PRTC ...
Страница 135: ...19 Select Return to Previous Menu and then press Enter ...
Страница 136: ...20 Select Exit and then press Enter ...
Страница 137: ...21 Press y when the following message appears Are you sure you want to exit Y N ...


