


30
En
Note
• Make the room as quiet as possible. Background noise and Radio
Frequency Interference (RFI) can disrupt the room measure-
ments. Close windows, televisions, radios, air conditioners, flu-
orescent lights, home appliances, light dimmers, or other
devices. Turn off the cell phone (even if it is not in use) or place
it away from all audio electronics.
• The microphone picks up test tones which played through each
speaker as Audyssey MultEQ
®
XT32 Room Correction and
Speaker Setup run.
• Audyssey MultEQ XT32 Room Correction and Speaker Setup
cannot be performed while a pair of headphones is connected.
1
Turn on the AV controller and the connected TV.
On the TV, select the input to which the AV control-
ler is connected.
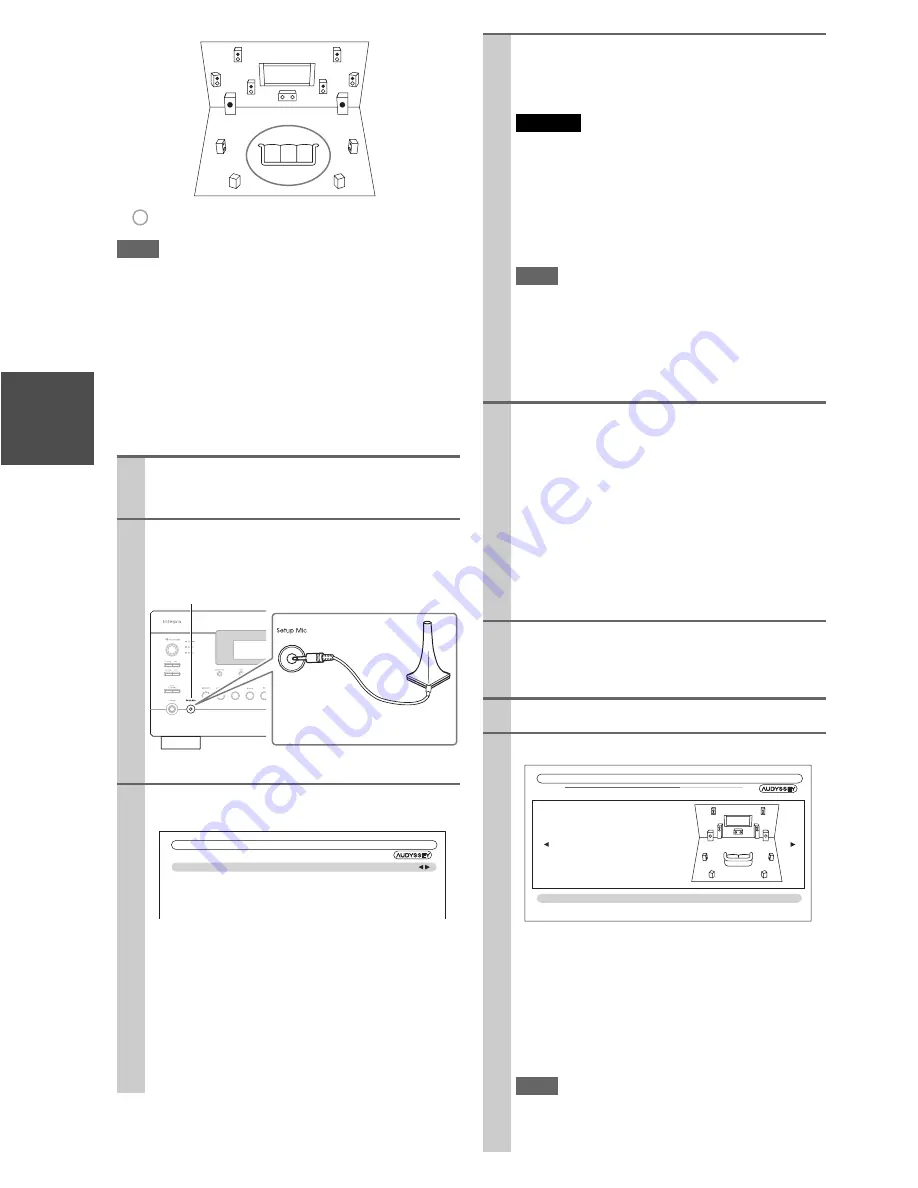
2
Set the speaker setup microphone at the Main Lis-
tening Position
a
, and connect it to the
Setup
Mic
jack.
The speaker setting menu appears.
3
When you’ve finished making the settings, press
Enter
.
• If you change “
Speakers Type(Front)
” or “
Front
High + Front Wide
” setting, refer to “Speaker Set-
tings” for more details (
➔
54
).
• In accordance with the connected speakers, set the
“
Front High / Front Wide Preout
” setting to
“
Front High
” or “
Front Wide
”.
• If you are using a subwoofer(s), select “
1ch
” or
“
2ch
” in the “
Subwoofer
” (
➔
54
). If not, select
“
No
” and skip step 4.
TV
d e
g h
f
c a b
: Listening area
a
to
h
: Listening position
Speaker setup microphone
Setup Mic
jack
MultEQ XT32: Auto Setup
Speakers Type(Front)
Front High + Front Wide
Front High / Front Wide Preout
Subwoofer
Normal
No
Front High
1ch
4
If you use a powered subwoofer(s), adjust the sub-
woofer volume level to 75dB.
Test tones are played through the subwoofer. Use the
volume control on the subwoofer.
Caution
• When the “
Subwoofer
” setting is set to “
1ch
”, the
left-hand subwoofer (
SW1
) alone will be measured.
When the “
Subwoofer
” setting is set to “
1ch
” with two
subwoofers connected, the right-hand subwoofer (
SW2
)
will not be measured and no sound will be output.
• An error will occur if you set “
Subwoofer
” to “
2ch
” with-
out connecting any subwoofers, or with only one sub-
woofer connected.
Note
• If your subwoofer does not have a volume control, disre-
gard the level displayed and press
Enter
to proceed to the
next step.
• If you set the subwoofer’s volume control to its maximum
and the displayed level is lower than 75 dB, leave the sub-
woofer’s volume control at its maximum and press
Enter
to proceed to the next step.
5
Press
Enter
.
Audyssey MultEQ XT32 Room Correction and
Speaker Setup starts.
Test tones are played through each speaker as
Audyssey MultEQ XT32 Room Correction and
Speaker Setup runs. This process takes a few min-
utes. Please
refrain from talking
during measure-
ments and
do not stand
between speakers and the
microphone.
Do not disconnect the speaker setup microphone dur-
ing Audyssey MultEQ XT32 Room Correction and
Speaker Setup, unless you want to cancel the setup.
6
Place the setup microphone at the next position,
and then press
Enter
.
Audyssey MultEQ XT32 performs more measure-
ments. This takes a few minutes.
7
When prompted, repeat step 6.
8
Use
q
/
w
to select an option, and then press
Enter
.
The options are:
`
Save
:
Save the calculated settings and exit
Audyssey MultEQ XT32
Room Correction and
Speaker Setup
.
`
Cancel
:
Cancel Audyssey MultEQ XT32
Room Correc-
tion and Speaker Setup
.
Note
• You can view the calculated settings for the speaker con-
figuration, speaker distances, and speaker levels by using
e
/
r
.
TV
MultEQ XT32: Auto Setup
Subwoofer
2ch
Front
40Hz
Center
40Hz
Surround
100Hz
Front Wide
None
Front High
100Hz
Surround Back
120Hz
Surround Back Ch
2ch
Save
Cancel
- - Review Speaker Configuration - -
Содержание DHC-80.2
Страница 1: ...AV Controller DHC 80 2 Instruction Manual...
Страница 114: ...114 En Memo...
Страница 115: ...115 En Memo...


