


51
NS-24D510NA15 Insignia 24" LED TV
www.insigniaproducts.com
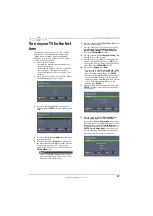
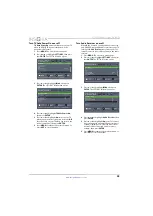
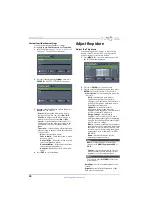
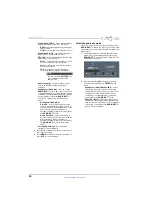
•
Contrast
—Adjusts the brightness of the light
areas of the picture.
•
Color
—Adjusts the color intensity of the
picture. A low setting may make the color look
faded. A high setting may make the color look
artificial.
•
Tint
—Adjusts the color balance of the picture.
Use this control to make skin tones look more
natural.
•
Sharpness
—Adjusts the color detail of
images. If you set this control too high, dark
images may appear with light or white edges.
•
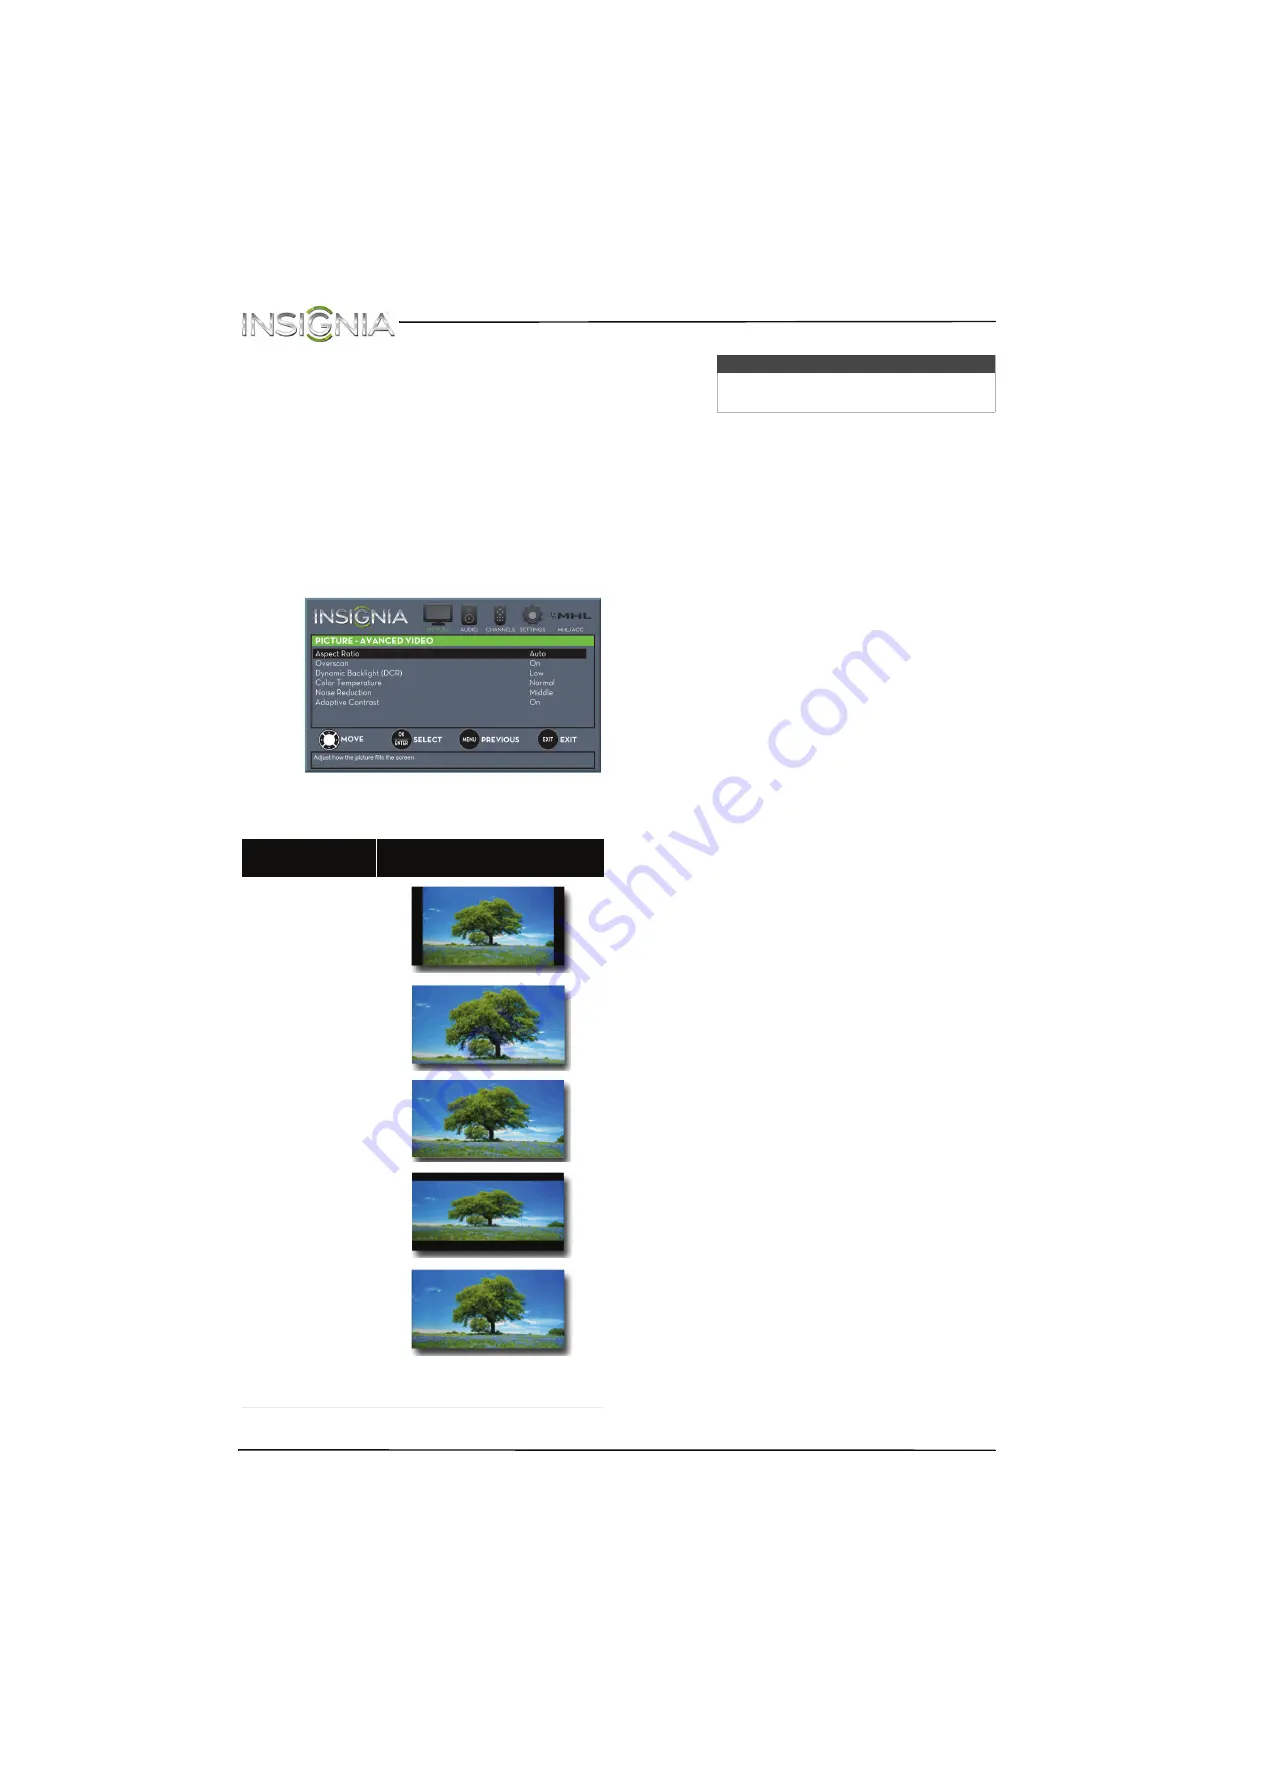
Advanced Video
—Opens the
PICTURE · ADVANCED VIDEO
menu where you
can adjust additional video options.
•
Aspect Ratio
—Adjusts how the picture
fills the screen. You can select:
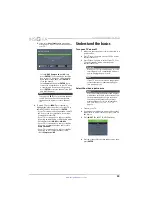
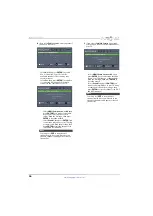
•
Overscan
—Extends text and images past
the screen edges to hide edge artifacts.
You can select
On
or
Off
.
•
Dynamic Backlight (DCR)
—Enhances the
contrast ratio between light and dark areas
of the picture. You can select
Off
,
Low
, or
High
.
•
Color Temperature
—Selects the color
temperature. You can select
Cool
(to
enhance the blues),
Normal
, or
Warm
(to
enhance the reds).
•
Noise Reduction
—Selects the noise
reduction mode to reduce picture noise
(snow). You can select
Off
,
Low
,
Middle
, or
High
.
•
Adaptive Contrast
—Automatically
adjusts picture detail and brightness. You
can select
On
or
Off
.
•
Reset Picture Settings
—Resets all picture
settings to factory mode.
4
Press
W
or
X
to adjust the option, or press
S
or
T
to select a setting.
5
Press
MENU
to return to the previous menu, or
press
EXIT
to close the menu.
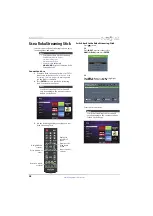
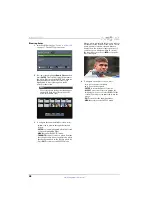
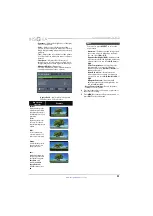
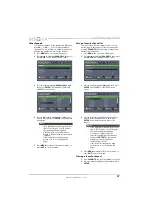
Aspect ratio
options
Example
Normal:
Displays the image in the
original aspect ratio. Black
bars appear if the image is
not in the widescreen (16:9)
aspect ratio.
Zoom:
Expands the image to fill
the screen. The top and
bottom of the image may be
cropped.
Wide:
Use this option to view
content recorded in a 16:9
(wide-screen) aspect ratio.
Cinema:
Stretches the image at the
edges, but keeps a clear
image in the center.
Auto:
Automatically adjusts the
image based on the screen
size and the TV program.
Note: Auto
is only
available when
Auto
Aspect Ratio
in the
CHANNELS
menu is set to
On
.
Note
You can also press
ASPECT
to select the
aspect ratio.


