background image

5

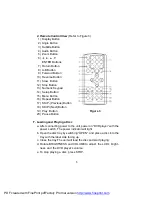
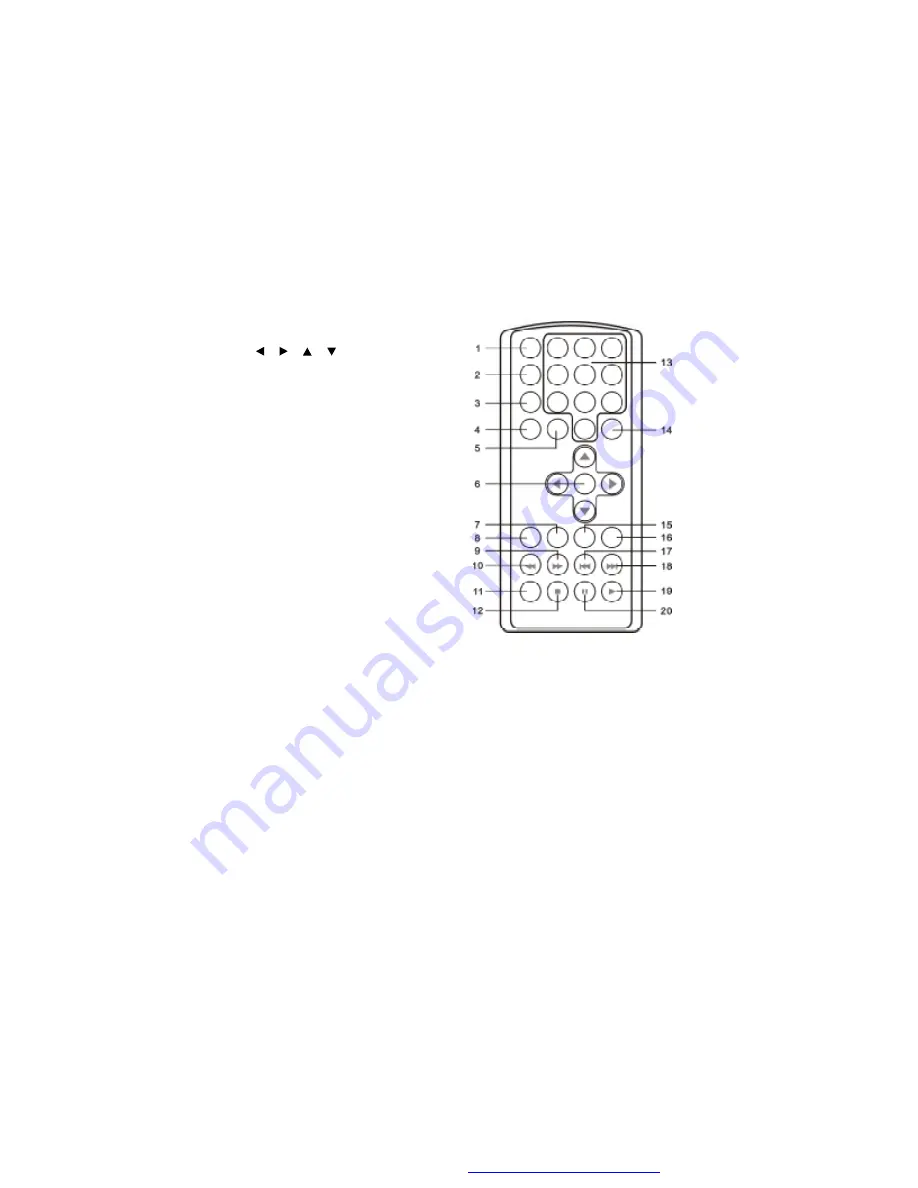
2. Remote Control View 

(Refer to Figure 3)

1)  Display Button
2)  Angle Button
3)  Subtitle Button
4)  Audio Button
5)  Zoom Button

6)  


     ENTER Buttons
7)  Return Button
8)  A-B Button
9)  Forward Button

10)  Reverse Button
11)  Slow  Button
12)  Stop Button
13)  Numeric Keypad
14)  Setup Button
15)  Menu Button
16)  Repeat Button
17)  SKIP- (Previous) Button
18)  SKIP+(Next) Button
19)  Play  Button

Figure 3

20)  Pause Button

F. Loading and Playing a Disc

a. After connecting power to the unit, power on 

DVD player

 with the

power switch. The power indicator will light.

b. Open the disc tray by switching 

OPEN

, and place a disc into the

tray with the label side facing up.

c. Close the tray.The unit will load the disc and start playing.
d. Rotate BRIGHTNESS and VOLUME to adjust  the LCD

s bright-

ness and  the DVD player

s volume.

e. To stop playing a disc, press STOP.

PDF created with FinePrint pdfFactory Pro trial version 

http://www.fineprint.com

Содержание IS-PD101351

Страница 1: ...PORTABLE 9 LCD MONITOR AND DVD PLAYER Owner s Manual IS PD101351 PDF created with FinePrint pdfFactory Pro trial version http www fineprint com ...

Страница 2: ...yright protection technology must be authorized by Macrovision Corporation and is intended for home and other limited view ing uses only unless otherwise authorized by Macrovision Corporation Reverse engineering or disassembly is prohibited 2 Apparatus Claims of U S Patent Nos 4 631 603 4 577 216 4 819 098 and 4 907 093 licensed for limited viewing uses only PDF created with FinePrint pdfFactory P...

Страница 3: ...Playing a Disc 5 G Setup 6 H Basic Operation 12 I Menu 13 J Display 13 K Playing Audio CDS 19 L Playing MP3 Discs 21 M Playing JPG file 23 N Connecting to a TV or another monitor 24 O Specifications 25 P Rechargeable Battery Installation and Use 25 Q Troubleshooting 28 PDF created with FinePrint pdfFactory Pro trial version http www fineprint com ...

Страница 4: ...not expose this appliance to rain or moisture Do not place the set on an unstable cart stand tripod bracket or table to prevent it from falling Keep the unit away from strong magnets heat sources direct sunlight excessive dust If the unit is brought directly from a cold to a warm location mois ture may condense inside the unit When you move it from a cold to a warm location wait for about one hour...

Страница 5: ... use liquid cleaners or aerosol cleaners Use a cloth lightly dampened with water for cleaning the exterior of the system only 6 Disc Do not use irregularly shaped discs such as heart or star shaped discs as they may cause the unit to malfunction Do not stick paper tape or glue on the disc Do not expose the disc to direct sunlight or heat sources Do not touch the surface of disc Handle the disc by ...

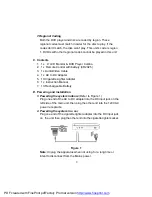
Страница 6: ... 1 x Instruction Manual 7 1 X Rechargeable Battery D Powering and installation 1 Powering the system indoors Refer to Figure 1 Plug one end of the AC to DC adapter into the DC input jack on the left side of the main unit then plug the other end into the 120V AC power receptacle 2 Powering the system in a car Plug one end of the cigarette lighter adapter into the DC input jack on the unit then plug...

Страница 7: ...tton 7 Up Button 8 Right Button 9 Play OK Button 10 Left Button 11 Down Button 12 DC 9V Input Jack 13 AV Jack 14 AV in out SW 15 Power On Off Switch 16 Power LED 17 Remote Control Sensor 18 Open Switch 19 Brightness Up Down Control 20 Volume Up Down Control 21 Headphone Jack 1 22 Headphone Jack 2 PDF created with FinePrint pdfFactory Pro trial version http www fineprint com ...

Страница 8: ... Play Button Figure 3 20 Pause Button F Loading and Playing a Disc a After connecting power to the unit power on DVD player with the power switch The power indicator will light b Open the disc tray by switching OPEN and place a disc into the tray with the label side facing up c Close the tray The unit will load the disc and start playing d Rotate BRIGHTNESS and VOLUME to adjust the LCD s bright ne...

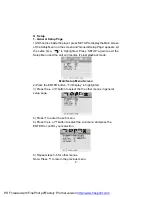
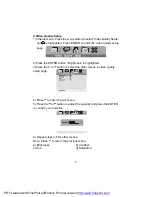
Страница 9: ...ll resume it s last playback mode Main Setup Menu Screen 2 Press the ENTER button TV Display is highlighted 3 Press the or button to select the the other menus in general setup page 4 Press to enter the sub menu 5 Press the or button to select the sub menu and press the ENTER to confirm your selection 6 Repeat steps 3 5 for other menus Note Press to return the previous menu PDF created with FinePr...

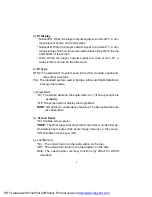
Страница 10: ...ddle East among other places c Angle Mark On The screen will show the angle mark icon If an angle option is available Off The screen will not display the Angle Mark NOTE Not all discs contain above features The above features are disc dependent d Screen Saver On Enables screen saver NOTE The DVD player will enter the Screen Saver mode after ap proximately five minutes if the same image remains on ...

Страница 11: ...ghlighted 3 Press the or button to select the other menus in video quality setup page 4 Press to enter the sub menu 5 Press the or button to adjust the quantity and press the ENTER to confirm your selection 6 Repeat steps 3 5 for other menus Note Press to return the previous menu a Brightness b Contrast c Hue d Saturation PDF created with FinePrint pdfFactory Pro trial version http www fineprint c...

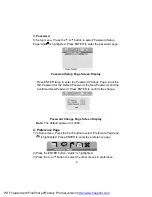
Страница 12: ...New Password and the Confirmed New Password Press ENTER to confirm the change Password Change Page Screen Display Note The default password is 3308 4 Preference Page 1 In Setup menu Press the or button to select Preference Page and is highlighted Press ENTER to enter the preference page 2 Press the ENTER button Audio is highlighted 3 Press the or button to select the other menus in preference PDF ...

Страница 13: ...ress to return the previous menu a Audio b Subtiltle c Disc Menu Note Language and subtitle selection is only available for discs that are recorded in the above listed languages If the selected language is not available the player will play and display on the screen the original recorded language contained in the disc PDF created with FinePrint pdfFactory Pro trial version http www fineprint com ...

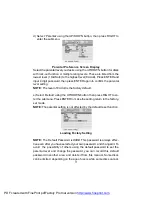
Страница 14: ...P DOWN button then press RIGHT to en ter the submenu Press ENTER to make the setting return to the factory set mode NOTE The parental setting is not affected by the default reset function Loading Factory Setting NOTE The Default Password is 3308 This password is always effec tive even after you have selected your own password and changed it To avoid the possibility of others using the default pass...

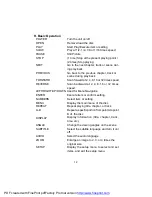
Страница 15: ...ting Select item or setting Display the main menu of the disc Repeat playing title chapter or track Repeat a specific portion from pointAto point B of the disc Display information title chapter track time etc Change the viewing angles on the scene Select the subtitle language and turn it on off Select the audio language Enlarge an image to 2 3 or 4 times the original size Display the setup menu to...

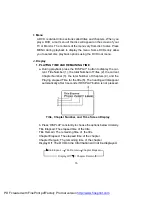
Страница 16: ...current Chapter Number 3 the total Number of Chapters 4 and the Playing elapsed Time for the title 5 The heading will disappear automatically after 3 seconds if DISPLAY button is not pressed Title Chapter Number and Time Screen Display b Press DISPLAY constantly to choose the options below circularly Title Elapsed The elapsed time of the title Title Remain The remaining time of the title Chapter E...

Страница 17: ...n Display 3 SUBTITLE During disc playback press SUBTITLE to select the subtitle language you desire with the current Subtitle Language Number 1 and the total Number of Subtitle Languages 2 displayed If there are mul tiple languages press SUBTITLE again to select another subtitle lan guage To turn subtitles OFF press the SUBTITLE button until Sub title Off is displayed The Subtitle display will dis...

Страница 18: ...udio Language Screen Display Some DVDs only allow access to this function through the DVD menu 5 ZOOM During playback press ZOOM to enlarge the picture by 2x 3x or 4X with the current zoom multiple 1 Press zoom one time the picture will be enlarged 2X 2 Press zoom a second time the picture will be enlarged 3X 3 Press zoom a 3rd time the picture will be enlarged 4X 4 Press zoom a 4th time the pictu...

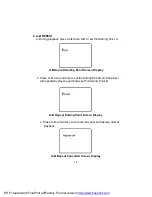
Страница 19: ...a second time to set the Ending Point B and the player will repeatedly play the part between Point A and Point B A B Repeat Ending Point Screen Display c Press A B a third time to cancel A B repeat and resume normal playback A B Repeat Cancelled Screen Display PDF created with FinePrint pdfFactory Pro trial version http www fineprint com ...

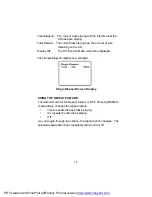
Страница 20: ...n audio CD press the DISPLAY button constantly on the remote to view time information The options below appear on screen display circularly to show you what information is available using this function CD Display Mode Single Elapsed The current track playing and playing time of that track will display on the screen Single Remain The current track playing and the amount of time left Single Elapsed ...

Страница 21: ...y as a example Single Elapsed Screen Display USING THE REPEAT FEATURE The default mode for the Repeat feature is OFF Pressing REPEAT consecutively changes the repeat options Track repeats the track that is playing All repeats the disc that is playing Off As you toggle through the options the repeat option changes The selected repeat option loops repeatedly until you turn it off PDF created with Fi...

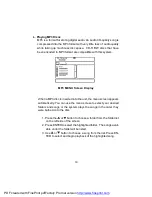
Страница 22: ...u screen appears automatically You can use the menu screen to select your desired folders and songs or the system plays the songs in the order they were burned onto the disc 1 Press the or button to choose a folder from the folder list on the left side of the screen 2 Press ENTER to select the highlighted folder The songs avail able under the folder will be listed 3 Use or button to choose a song ...

Страница 23: ...f a specific folder Folder normal playback As you toggle through the options the repeat mode changes The selected repeat mode loops repeatedly until you turn it off NOTICE icon in front of a file name indicates that this is a folder not an MP3file MP3 icon in front of a file name indicates that this is a MP3 file Note Due to the company s policy of constant improvement and technical refinement the...

Страница 24: ...be different refresh mode below WIPE TOP WIPE BOTTOM WIPE LEFT WIPE RIGHT DIAGONAL WIPE LEFT TOP DIAGONAL WIPE RIGHT TOP DIAGONAL WIPE LEFT BOTTOM DIAGONAL WIPE RIGHT BOTTOM EXTEND FROM CENTER H EXTEND FROM CENTER V COMPRESS TO CENTER H COMPRESS TO CENTER V WINDOW H WINDOW V WIPE FROM EDGE TO CENTER 7 When previewing the file pressing ANGLE SUBTITLE AUDIO NUMBER AB RETURN REW FF SLOW a hand icon w...

Страница 25: ...and connect the other end to the AUDIO INPUT jacks on your TV or Monitor through an optional RCA output cable white left channel red right channel yellow video Figure 4 Note Optional wired headphone may be used with the unit Simply plug in the headset to either Headphone 1 jack or Headphone 2 jack on the right side of the DVD Plugging into Headphone jack 1 disables the internal speakers PDF create...

Страница 26: ...ies feature high storage capacity and low level of degradation This means the Ni Mh batteries do not have Memory Effect and thus can be recharged safely regardless of whether the battery is fully or only partially discharged Please fully charge the bat tery prior to first use NOTE When the DVD player is used with the battery as a power source ensure that the battery has been charged for at least e...

Страница 27: ...echarge regard less of whether you plan to use battery or not in order to maximize battery life 2 Recharge efficiency will degrade when environmental tempera tures drop below 50o F 10o C or exceed 95o F 35o C 3 Please remove battery from the player and store it properly if the player is not to be used for long time During this period please recharge the battery at least once two months to avoid ir...

Страница 28: ...s into position The lock position is indicated by a click The unit will fit snugly to the player Figure 5 Installing the DVD Player Battery Removing the Battery Pack 1 First make sure the player is in Power Off mode 2 Press the release button on the side of battery 3 Pull the battery out of the rear flank Figure 6 Removing the DVD Player Battery PDF created with FinePrint pdfFactory Pro trial vers...

Страница 29: ... the moment 4 You ve requested a title or chapter number that is out of range Can t advance through a movie The icon appears on screen SOLUTION PROBLEM No sound or distorted sound Picture is distorted The disc might be damaged Try another disc It is normal for some distortion to appear during forward or reverse scan Some discs have sections that prohibit rapid scanning or title and chapter skip If...

Страница 30: ...sc with the label side facing up Check the type of disc you put into disc tray This DVD only plays digital video discs audio CDs and MP3s Both the unit and the disc are coded by region If the regional codes don t match the disc can t be played This DVD is Region Number 1 The disc is dirty Clean it Condensation has formed Allow player to dry out Disc won t play Play starts but then stops immediatel...

Отзывы: