SCHEDULE SETUP
Digital Video Recorder
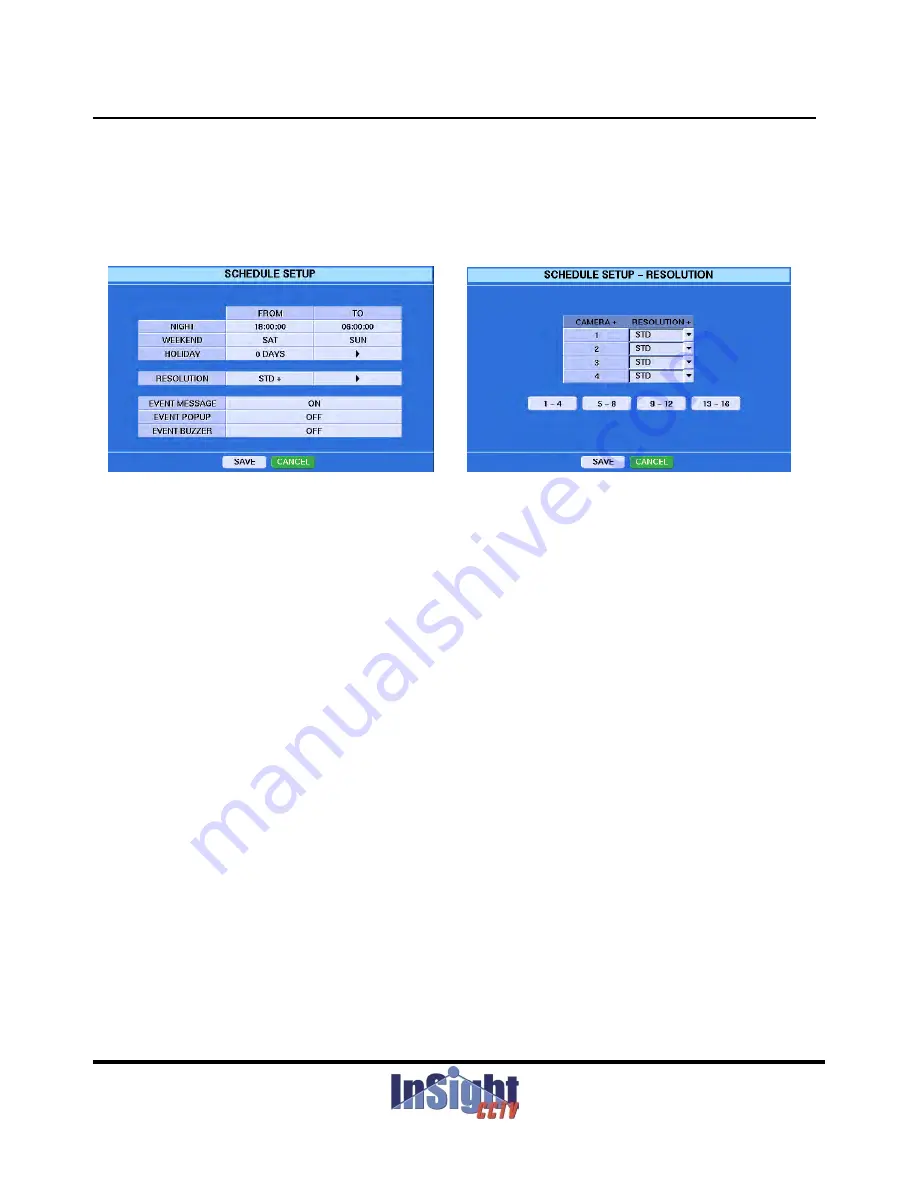
Highlight SCHEDULE SETUP in the main menu and press the enter button. The SCHEDULE SETUP
screen appears.
Figure 61 – SCHEDULE SETUP. Figure 62 – SCHEDULE SETUP – RESOLUTION.
You can set up the night time period by highlighting the boxes beside NIGHT and pressing the enter button.
NOTE: The day time period is changed automatically, according to the setting of the night time.
You can set up weekend by pressing the boxes beside WEEKEND and add or delete holidays in the
HOLIDAY SETUP menu by highlighting the
▶
button in the HOLIDAY heading and pressing the enter
button.
You can select the resolution between standard, high and highest by highlighting the box beside
RESOLUTION and pressing the enter button.
If you want to change the resolution of certain cameras, press the
▶
button in the RESOLUTION heading.
y
g
, p
▶
g
CAUTION: Your changes in the main SETUP screens are applied to every channels. If you want to
change certain details, enter into the sub-menu by highlighting the detail(
▶
) button and pressing
the enter button.
NOTE: Whenever changing the resolution, it affects the recording speed on Time Record Setup.
Y
t
ff th EVENT MESSAGE
th
EVENT POPUP t f ll
d EVENT
You can turn on or off the EVENT MESSAGE on the screen, EVENT POPUP to full screen and EVENT
BUZZER.
NOTE: When turning off the EVENT MESSAGE, your DVR doesn’t display the characters of events.
(Motion
Æ
“M”, Video Loss
Æ
“V”, Alarm
Æ
“A”)
NOTE: When turning on the EVENT POPUP, the event screen will be popped up to the full screen
whenever being triggered.
69
ST Series
g
gg
Содержание EDVR
Страница 2: ...InSight EDVR User s Manual 2 ST Series ...


