SERVICE MANUAL
57
4.3 Refrigerant Charging
Pre-charging
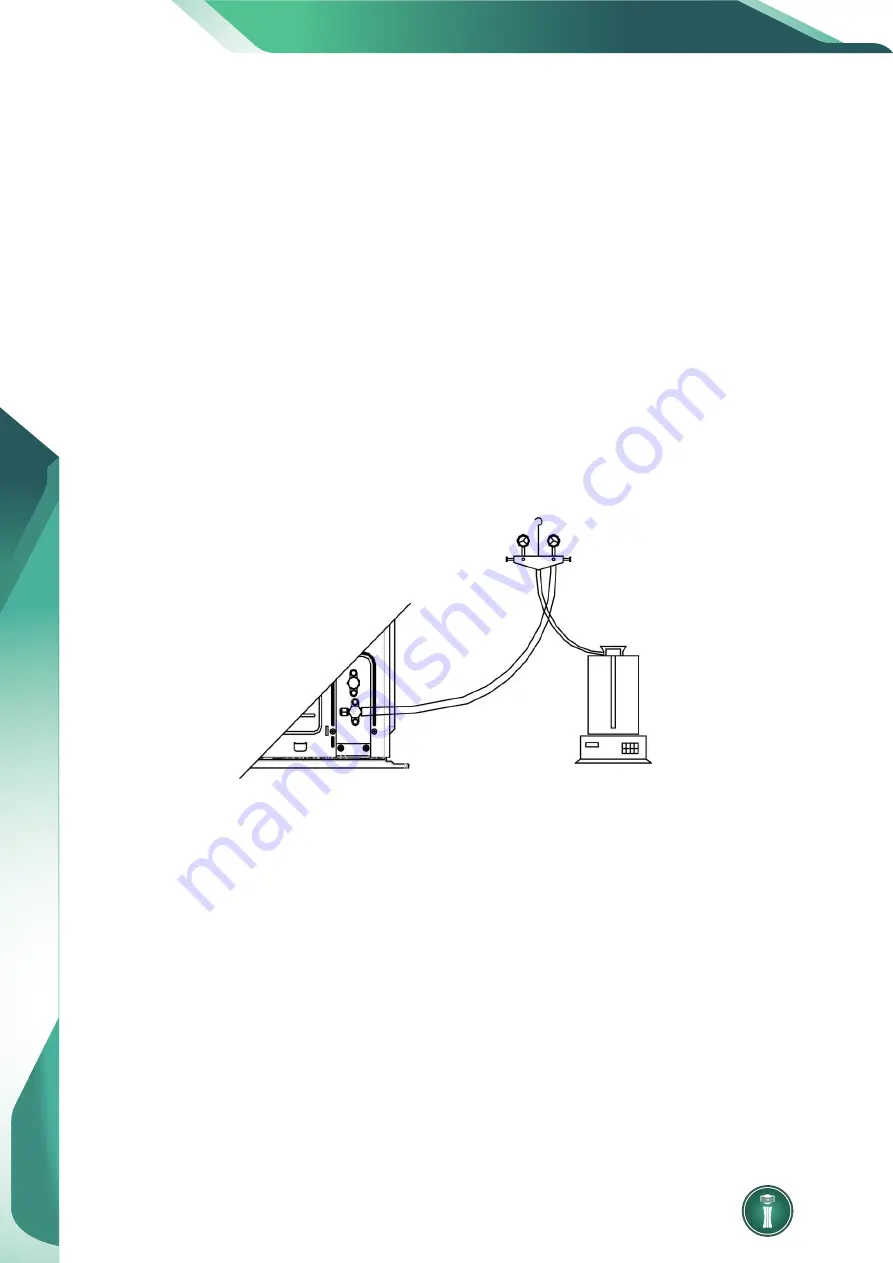
Step 1: Connect the high pressure gauge line to the valve of liquid pipe and connect the low pressure gauge
line to the valve of gas pipe. Connect the middle gauge line to the vacuum pump. Power on the vacuum pump
and perform vacuum drying.
Step 2: After vacuum drying, close the high and low pressure gauge valves. Then remove the middle gauge
line from the connector of vacuum pump. Then connect to the refrigerant tank.
Step 3: Loosen the middle gauge line from the connector of pressure gauge to a proper extent and slightly
open the valve of refrigerant tank. Evacuate the middle gauge line. Then tighten up the connector again and
completely open the valve of refrigerant tank at the same time.
Step 4: Keep the refrigerant tank erect and put it on an electronic scale. Record the current weight as m1.
Step 5: Open the high pressure gauge valve (Keep the low pressure gauge valve closed). Then charge
refrigerant into the system. Meanwhile, record the weight of refrigerant tank as m2.
Step 6: m1-m2=m. If m equals to the required charging quantity M, close the valve of refrigerant tank at once.
Then move to step 8.
Step 7: If you can’t continue to charge refrigerant into the system and the quantity of charged refrigerant is
less than the required charging quantity, then record the current quantity of charged refrigerant:
m=m1-m2
m`=M-m
The remaining charging quantity is: m`=M-m
Step 8: After charging, remove the pressure gauge.
Содержание Inverter FLEX24 DEV24H2R18
Страница 9: ...6 SERVICE MANUAL 2 Control 2 1 Operation Mode 2 1 1 Cooling Mode ...
Страница 10: ...2 1 2 Heating Mode SERVICE MANUAL 7 ...
Страница 18: ...Model SEV3060H2R18 3 1 2 Wiring Diagrams of IDUs Model DEV24H2R18 DEV36H2R18 SERVICE MANUAL 15 ...
Страница 19: ...Model DEV48H2R18 DEV60H2R18 16 SERVICE MANUAL ...
Страница 27: ...SEV2040H2R18 SEV4060H2R18 24 SERVICE MANUAL ...
Страница 30: ...Troubleshooting SERVICE MANUAL 27 ...


