10
R
e
v
is
ió
n
: 0
5
R
e
f.:
M
A
N
U
_
V
B
Z
1
6
/0
2
/2
0
1
7
These models defrost with every cycle of the compressor. The water generated is routed to a
pan on the rear of the unit and is evaporated by the heat given off by the compressor.
Important:
If the thermostat is set too cold, the compressor will be running continuously and the
evaporator will become blocked by ice.
•
Before introducing food into the cabinet, it is advisable to leave it empty while in operation until it
reaches the working temperature. Once this has been reached, you can proceed to load the
equipment.
•
When introducing food, enough space must be left between the goods to enable air circulation.
•
Never allow the goods to prevent doors from closing.
•
Do not exceed the maximum weight per shelf of 55 lb.
•
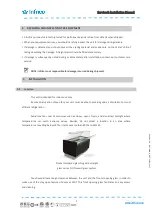
Do not obstruct the fan with the load and assure that this never exceeds the maximum load level
determined. The load must therefore always be situated underneath the fan.
•
Never put hot food in the cabinet.
•
Do not leave food inside the unit when it is going to remain shut down either from a power outage or
fault in the equipment.
•
If the cabinet is going to remain shut down for prolonged periods, try to leave it unplugged, empty,
clean and with door ajar.
•
Food or drinks may be well wrapped or enclosed in airtight containers to avoid odours inside the unit.
•
Remove gelato products every night and store them inside a regular freezer, to allow proper defrost
cycle and cleaning on the equipment.
Cleaning the cabinet
To clean the cabinet, the following instruction should be followed:
•
Disconnect the unit from the power supply and remove all food product from inside.
•
Open all doors and allow the cabinet to reach room temperature. Remove all accessories and clean
them with a baking soda or mild soap and warm water solution. Dry all the accessories completely
with a soft clean cloth.
•
Once the cabinet has reach room temperature, wash the entire cabinet inside and out with a baking
soda or mild soap and warm water solution. Rinse thoroughly with clear water and dry with a soft
8.3
Loading product
9
MAINTENANCE, CARE AND CLEANING
9.1
Cleaning procedure

