background image

Page 50

if This Happens...

Try This...

icon/ 
Button

reference 
(Link or document)

There is NO sound is coming 
from external connected 
speakers or device.

Verify that:

•  The speakers are connected properly and that the 

speaker power switch is turned on.

•  An audio cable is correctly installed between an 

external device and the display.

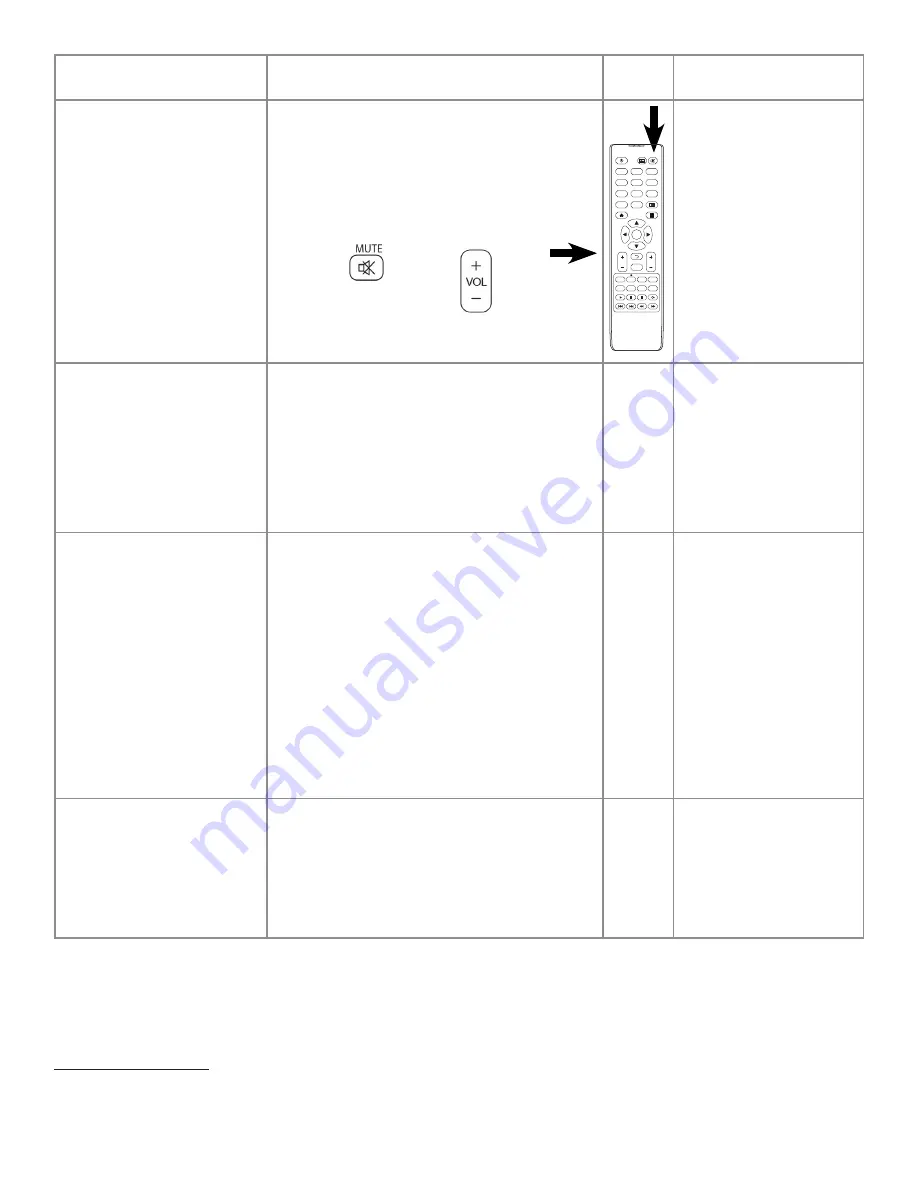
•  "Mute" is not active; test the Mute button on the 

remote. 


•  The volume is turned up.   


Note: 

An HDMI® 1.3 (or higher) source and source 

device is required to hear audio via the HDMI cable.


AUDIO                           INFO        ZOOM

  POWER              

SCREENSHOT 

 MUTE

    ABC                DEF               GHI

JKL              MNO               PQR

2

1

3

6

5

4

7

8

9

FREEZE

0

STU              VWX                 YZ-

HOME                                  MENU

OK

PLAY         PAUSE        STOP      ROTATE

PREV         NEXT         BACK        SPEED

IMAGE                            SYS         STEREO

SOURCE

VOL

CH

 F1

  CHLIST

See "Connecting to Other 
Devices" on page 11.

See "Adjusting Volume 
Without Using the On Screen 
Display Menus" on page 
24.

There is No sound is coming from 
internal speakers.

Verify that: 

•  The volume is turned up.
•  The sound has not been muted, from remote 

control. (See above.)

•  Verify the playback has not been paused and that 

the video’s audio has not been muted, 
for video viewing.

See "Adjusting Volume 
Without Using the On Screen 
Display Menus" on page 
24.

The On Screen Display Menus 
don't display.

Verify that: 

•  There is a PC correctly connected.
•  The PC is selected as the source.
•  You are not trying to access the On Screen 

Display Menus from the Home Screen.

•  If you are trying to access the Picture Mode 

settings or the Sound Mode settings, set the 
menu (title bar) to "User."

See "Selecting an Advanced 
Function Option Using Touch 
Control" on page 33.

See "Selecting an On Screen 
Display Menu" on page 38.

See "Adjusting Display 
Picture, Using the On Screen 
Display Menu" on page 40.

See "Adjusting the Sound 
Mode Using the On Screen 
Display Menu" on page 41.

PC and Display do not recognize 
each other.

My device isn't communicating 
with the Display.

Change the EDID setting, under the Settings Menu in 
the On Screen Display.

See "Understanding On 
Screen Display Menu 
Selections" on page 34.

See "Adjusting Display 
Settings Using the On Screen 
Display Menu" on page 43.

For additional troubleshooting support, please contact:
InFocus Corporation - Technical Support
6

AM

-5

PM

 PST

877-388-8385
www.infocus.com/support

Содержание INF8630AG

Страница 1: ...INF8630AG INF8630eAG Hardware Guide 009 1752 00...

Страница 2: ......

Страница 3: ...vices 11 Side Panel Ports 11 Front Panel Ports 14 Working With the Remote 15 Understanding the Remote Buttons 15 Installing Remote Batteries 16 Operating the Remote 16 Treatment of the Remote Display...

Страница 4: ...e 31 Working with Total Touch Control Advanced Functions Menu 32 Understanding Total Touch Control Advanced Functions Menu 32 Selecting an Advanced Function Option Using Touch Control 33 Working With...

Страница 5: ...5 of the FCC Rules These limits are designed to provide reasonable protection against harmful interference when the equipment is operated in a commercial environment This equipment generates uses and...

Страница 6: ...RNING Securely attach this display to the floor wall per installation instructions Tipping shaking or rocking the machine may cause injury or death Use only properly rated wall and stand mounting hard...

Страница 7: ...ound terminal Ground Class 1 display Use a surge protected power strip Do not overload wall outlets Do not use the display with the power cord near water for instance near a bathtub washbowl kitchen s...

Страница 8: ...damage the display Wash hands after handling the cables supplied with this display Do not use hard objects or press forcibly on the display screen Do not twist the display Do not use harsh chemicals...

Страница 9: ...er Cord Varies by Country WHAT S INCLUDED Styli Remote Control Batteries Optional Combo Guide Warranty Safety Certificate of Conformity HDMI USB Cable A to B Quick Start Guide 009 1724 XX 009 1740 XX...

Страница 10: ...duce heat Do not place the display in direct sunlight humid greasy or dusty places or in places where the display may come into contact with rain smoke or steam Protect display from environmental haza...

Страница 11: ...Light and Sensor Optional PC Ports Panel Back and Side AV OUT Y Pb Pr AV IN L IN R IN USB3 0 USB3 0 USB2 0 SPDIF TOUCH USB1 TOUCH USB2 TOUCH USB3 TOUCH USB4 OPS PC USB RS232 IN RS232 OUT PC USB MEDIA...

Страница 12: ...ower cord to an AC outlet Note Depending on your country you may need to check the proper voltage of the outlet and product requirements CAUTION Operate the display from the power source indicated on...

Страница 13: ...o get touch control Touch USB port 4 should be used with HDMI port 4 or any of the other video imputes VGA component composite Touch USB 3 Connect a A B cable between this type B port and your compute...

Страница 14: ...ed component RCA video cable from the display to an external device such as a DVD player HD device or Laser Disc player Pr signal Pb Connect Blue component RCA video cable from the display to an exter...

Страница 15: ...t a HDMI cable from the display to a HDMI external device HDMI Out Connect an HDMI cable from this port to an HDMI Input port on another display This will mirror the content of this display to the 2nd...

Страница 16: ...ill mute the internal speakers Mic Connect a 3 5 mm microphone or cable for audio input Overrides audio from all other sources when connected PC USB Connect a USB 2 0 device to the OPS module Media US...

Страница 17: ...Menu features OK Confirms the operation Enter Volume Up Increases the audio volume Volume Down Decreases the audio volume Back Returns the user to the previous menu Source Displays the Source Selectio...

Страница 18: ...nd within a horizontal and vertical angle of 30 degrees of the sensor see picture 30 30 TREATMENT OF THE REMOTE DISPLAY AND BATTERIES Remote and Display Batteries Keep remote dry if the remote control...

Страница 19: ...hoices each menu title bar must be set to User Volume Increases or decreases the volume Buttons have same functionality as those on remote Navigation These buttons can also serve as navigation tools f...

Страница 20: ...CONNECTING THE DISPLAY TO A PC Connecting To the Optional PC In the Bay On Back Of Panel Infocus sells a PC that can be installed in the bay In addition PCs can be purchased from other venders that ca...

Страница 21: ...llow the schematic drawing below to hook up an external PC Note Remember to disconnect the display from power before you connect disconnect it from the PC HDMI 1 Under Display Ports PC Ports HDMI 2 HD...

Страница 22: ...umbered Front Panel Ports PC USB MEDIA USB TOUCH USB HDMI Under Panel Ports HDMI1 HDMI2 HDMI3 HDMI OUT LAN HDMI4 MHL VGA PC AUDIO HDMI VGA 3 Connect the A to B USB cable to the USB Type A jack on the...

Страница 23: ...play in the connection pop up window on your PC Note The pop up window usually displays with signal strength bars and identifies the wifi signals in your area Usually it is accessed by clicking the si...

Страница 24: ...cting AC Power on page 10 The system has access to power 2 Turn ON the Power Switch on the back of the display The system power turns on 3 Press the Power Button on the remote The display power turns...

Страница 25: ...n does not Press the Power Button on the bottom right side of the front of the display 2 Turn OFF the Power Switch on the back of the display The system power turns off The red LED on the front of the...

Страница 26: ...ton on the remote to increase or decrease the volume The volume changes Press the Arrow buttons on the lower right of the display to increase or decrease the volume Touch the Volume button on the Tota...

Страница 27: ...er right of display can also be used to assist you in navigation and selection Understanding the Total Touch Control Menu Options The table below defines the base Total Touch Control Menu icons which...

Страница 28: ...ntrol button lower right of display Note Total Touch Control button enables and disables touch gestures for the display Repeated presses of the Total Touch Control button will toggle between enabling...

Страница 29: ...cription VGA Video Graphics Array Under Panel Ports Connect Video Media Device AV Composite Side Panel Ports Connect to DVD Component Connect to component devices OPS Open Plug able Standard PC PC Bay...

Страница 30: ...Menu Options The Total Touch Control Menu Icons display 2 Tap Source The Source Menu Options display 3 Tap the source icon that shows the port that is connected to your desired source Any source icon...

Страница 31: ...n you access source options with the remote control your choices appear at the bottom of the screen Here they are Source Icon Icon Name Location Description VGA Video Graphics Array Under Panel Ports...

Страница 32: ...I selection is blank it s on panel front HDMI 1 4 Connect to an external PC or other HDMI device Note Connect to the USB port on the front of the panel Note If you want to choose an external computer...

Страница 33: ...d To select a new source with the remote control follow these steps Step Do This Press Location Result 1 Press Source on the Remote The Source Menu Options display at the bottom of the screen Note The...

Страница 34: ...rsion Software Version Preferences Language English US and Chinese Keyboard Configure Auto Caps Sound on Key Press Voice Input Key Text Correction Show Correction Personal Add Accessory Bluetooth Comp...

Страница 35: ...the either side of the display to reveal the Total Touch Control Menu Options The Total Touch Control Menu Icons display 2 Tap the Advanced Function Menu icon The Advanced Function Menu options displa...

Страница 36: ...e and Settings Mode Picture Mode Menu Option Function Picture Mode Controls which settings are accessible and the overall look of the display screen Choose the picture mode which best fits your source...

Страница 37: ...sity of the colors of the images on the display PC Image Mode Adjusts timing of an analog PC signal Color Temperature Adjusts the color temperature Warm 7500K Cool 13 000K Nature 10 000K Zoom Mode Cha...

Страница 38: ...left display speakers SPDIF Output Computability mode for audio output to other connected devices This setting allows you to choose the appropriate type of audio data for your device Raw Outputs raw...

Страница 39: ...gged into the HDMI port Note Your device must support Consumer Electronics Control CEC HDMI EDID Version HDMI Extended Display Identification Data Allows you to choose the version of HDMI that is comp...

Страница 40: ...p Do This Press Location Result 1 Press the Menu button on the remote Note The remote Menu button is active when viewing one of the video input sources The remote Menu button doesn t work from the Hom...

Страница 41: ...buttons on your remote to scroll though menu selections then press OK One of the three On Screen Display Menus is selected Picture Mode Sound Mode or Setting Mode Use the panel buttons to scroll thou...

Страница 42: ...atedly until the setting reads User Note This menu displays several options It is necessary for this setting to be set to User for adjustments to be available The Picture Mode is set to User 2 Choose...

Страница 43: ...the On Screen Display Menu To adjust the display sound level follow the instructions for choosing an On Screen Display Menu Understanding On Screen Display Menu Selections on page 34 Make sure that a...

Страница 44: ...tions on page 34 Low Pitch High Pitch and Balance Your selection highlights A sliding scale with bar line appears on your chosen setting SPDIF Output Your selection highlights Use the panel buttons to...

Страница 45: ...ode Menu and follow these steps Step Do this Tap or Press Location Result 1 Choose a setting to adjust Menu Time MHL Auto Switch Light Sensor HDMI_CEC HDMI EDID Version Boot Source Restore to Default...

Страница 46: ...tegory includes Network System Sounds Apps Storage Reset and About Category Icon Name Function Network Wi fi Toggles Wi fi On and Off Connects to available networks Gives status and information on net...

Страница 47: ...tion on how much storage space is taken by Apps Photos etc It also tells User how much storage space is available Factory Data Reset Allows you to reset the system default settings to the factory spec...

Страница 48: ...display a 24 hour clock Language Language English Chinese Keyboard Current Keyboard Android Keyboard layout loaded Allows Users to download a different Android on screen keyboard layout Configure Key...

Страница 49: ...ons Unknown Sources Toggles On and Off Allows Disallows Users to install apps from places other than trusted sources Note For Example A trusted source would be the Google Play Store An un trusted sour...

Страница 50: ...the input signal is compatible with the display See Power Source Power Cord Plugs on page 5 See Understanding Source Touch Control Icons on page 27 Display says No Signal Display is looking for a con...

Страница 51: ...rd Plugs on page 5 Remote functions are not working properly Verify that The display is turned on press Power button on the remote The remote batteries are situated correctly in the remote and that th...

Страница 52: ...not been paused and that the video s audio has not been muted for video viewing See Adjusting Volume Without Using the On Screen Display Menus on page 24 The On Screen Display Menus don t display Ver...

Страница 53: ...ty Periods vary depending on your product model and the country of purchase To review the warranty period associated with your product model please refer to the product specifications information on w...

Страница 54: ...than a representative of InFocus or an InFocus Authorized Service Provider ASP or your own installation of customer installable parts as instructed by InFocus h to a product or part that has been mod...

Страница 55: ...NG AN IMPLIED WARRANTY OR CONDITION MAY LAST SO THE LIMITATIONS OR EXCLUSIONS DESCRIBED BELOW MAY NOT APPLY TO YOU THIS WARRANTY GIVES YOU SPECIFIC LEGAL RIGHTS AND YOU MAY ALSO HAVE OTHER RIGHTS THAT...

Страница 56: ...any time You may be responsible for shipping and handling charges if the product cannot be serviced in the country in which service is requested If you seek service in a country that is not the count...

Отзывы: