HQ Infinity Service Manual
| 95
8.
Carefully remove the main control board and place it on a grounded ESD mat or in an
ESD-safe container.
To install the main control board
1.
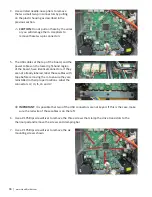
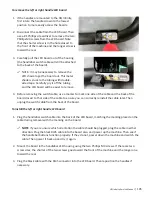
Check the thermal pad that the drive transistors clamp onto at the bottom of the board area of the
casting. If there is any damage to the thermal pad, or if metal shavings are embedded in the thermal
pad, the pad(s) should be replaced.
2.
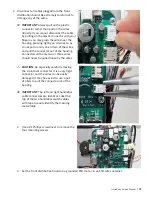
Use a #1 Phillips screwdriver to loosely attach the main control board to the casting with the six
mounting screws. The drive transistors and large capacitors should be at the bottom.
3.
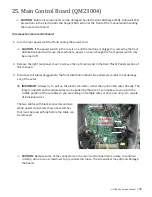
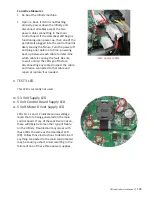
Use the three longer clamp screws and the
clamping bar to clamp the drive transistors
to the thermal pad. Snug these screws firmly,
being careful not to over tighten. If the
clamping bar begins bending, the screws are
too tight.
4. Firmly tighten the main control board screws.
5.
Attach the cables as shown.
6.
Attach the rear right panel. (See
To install the rear plastic panels
in section 21,
Rear Plastic Panels
.)
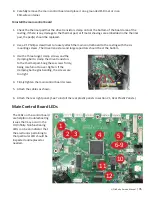
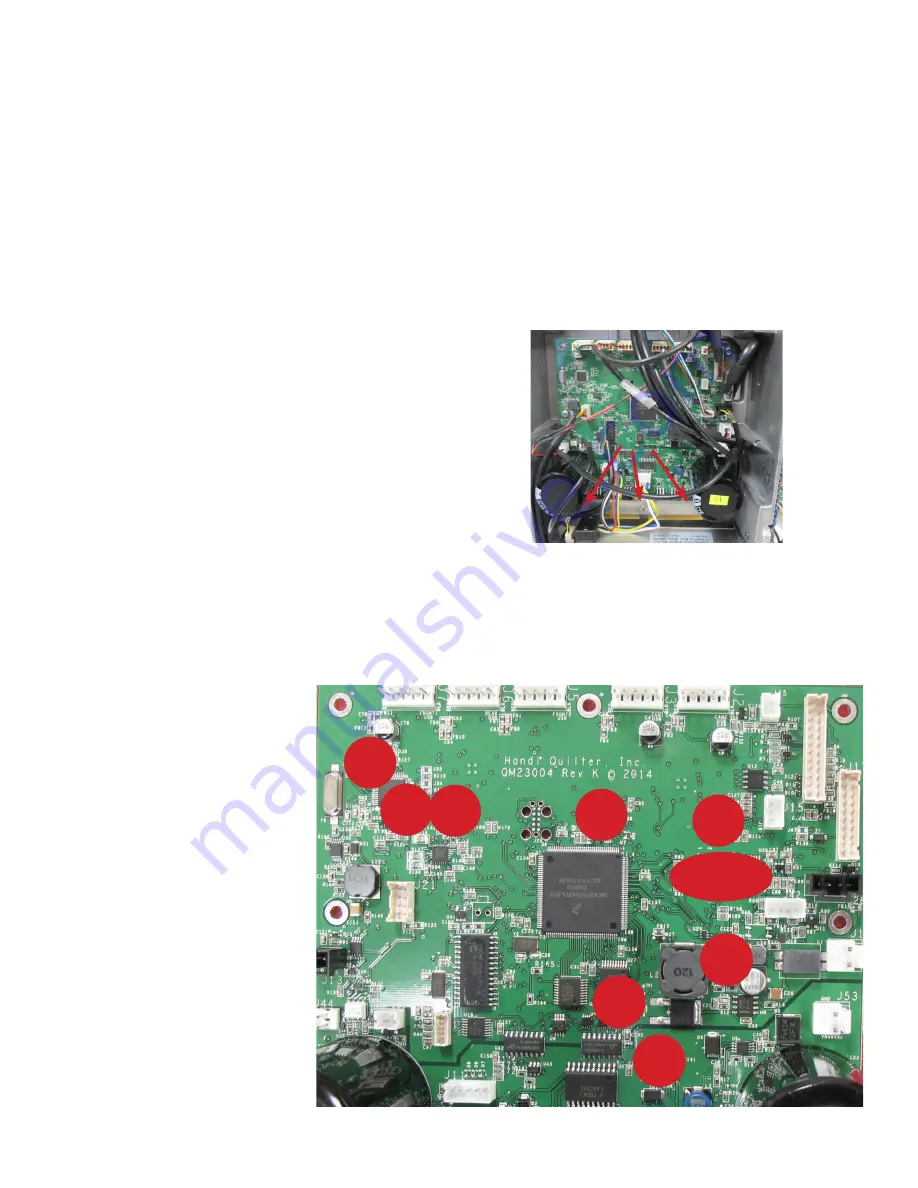
Main Control Board LEDs
The LEDs on the control board
are helpful in troubleshooting
issues that may occur in the
HQ Infinity. Nonfunctioning
LEDs can be an indicator that
the electronics pertaining to
that particular LED should be
inspected and replaced as
needed.
1
2 3
4
5
6-9
10
11
12

