background image

 IMER INTERNATIONAL S.p.A.

MIX 120 PLUS

12

The machine is also equipped with a guard on its outlet to prevent ac-
cess to the mixing area (ref.11,  g.1).

8. TRANSPORT

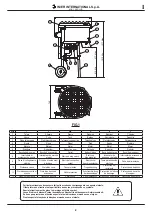
Use the machine’s handles ( g.4) to move it; these must be pulled out 
one at a time:
1. grasp a handle (ref.1,  g.4) and remove its locking pin (ref.2,  g.4).
2. Pull the handle (ref.1,  g.4) fully upwards.
3. Fit the locking pin (ref.2,  g.4).

Repeat with the other handle.
The mixer may also be moved with its four wheels ( g.5).

 - Before moving the mixer in this way, make sure the tank 

guard safety hook (ref.12, fi g.1) is engaged.

When lifting with a hoist or similar equipment, hook a four-point harness 
into the holes on the frame ( g.3). Make sure the harness has arms of 
at least 1500 mm.

 - Each arm of the harness must be rated for loads greater than 

the total weight of the mixer.

 - Always pull out its power plug before moving the mixer.

9. INSTALLATION

Unpack the machine.
The machine is supplied with its legs removed, these must be assem-
bled:
1. Fit the wheels into the rear legs and lock them with their cotters.
2. Raise the mixer and  t the front and rear legs; lock the legs at the 
desired height with their lock pins. Follow the layout given in  g.9.

The height of the mixer should enable easy unloading into the wheelbar-
row used to move the mixed product around the worksite.

 - Place the mixer on a stable, level surface (max slope 5°, see 

fi g.2), so that it doesn’t sink into the ground or tip over when run-
ning.

 - Leave at least 2 m clearance around the machine for handling 

materials and product.

10. ELECTRICAL MAINS CONNECTION

 - Make certain that a residual current device and miniature 

circuit breaker are installed on the electrical power line.

10.1 Connecting versions with motor 230V/50Hz

Ensure that the supply voltage corresponds to machine dataplate speci-
 cations. At full load it must be between 205V and 240V.

 - To supply the machine it is necessary to use a 2-pole + 

ground cable in order to ensure the machine's connection to the 
site's equipotential system.

10.2 Connecting versions with motor 110V/50Hz

Ensure that the supply voltage corresponds to machine dataplate speci-
 cations. At full load it must be between 95V and 130V.

 - To supply the machine it is necessary to use a 2-pole + 

ground cable in order to ensure the machine's connection to the 
site's equipotential system.

10.4 Sizing the power supply cable

The power supply line must be suitably sized to prevent voltage drops.
Do not use cable winders. The electric cable wire size must take into 
account the operating currents and length of the line to avoid excessive 
voltage drops (table 4).

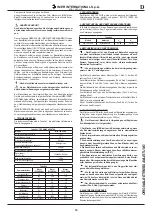
Table 4

Model

Type of motor

Cable (mm²)

1.5

2.5

4.0

MIX 120 PLUS

230 V

9 A

0 ÷ 19

20 ÷ 32

33 ÷ 50

Cable

length (m)

110 V

15 A

0 ÷ 12

13 ÷ 19

20 ÷ 30

The power supply cables used on the site must have an outer jacket that 
is resistant to crushing, wear and weather (e.g. H07RN-F).

 - For the conformity of the power supply, see CEI-64-8 (harmo-

nisation of CENELEC HD384).

11. COMMISSIONING THE MACHINE

Before connecting the machine to the electrical mains, ensure that all 
safety devices are  tted and are in perfect condition, that the extension 
cord is in good condition and that the plugs and sockets (of the type 
protected against jets of water) are not wet.
Connect the mains power cable to the plug on the electrical panel. Start 
the mixer with the switch on the cabinet (ref.8,  g.1).

 - The motor is protected against overloads by a thermal cu-

tout. It stops the machine automatically if it overheats. Alloow the 
motor to cool down before starting it up again.

12. EMERGENCY - STOP

 - In case of emergency, stop the machine by pressing the 

emergency button. Then pull out its power plug. To start again, 
reconnect the power plug and turn the power switch to "1".

13. OPERATION

For best mixing results and regular operation, the mixer must be instal-
led on a level surface.

 - Check that the machine stops as soon as the tank guard is 

opened.

The machine must be started when the tank is empty.

 - Do not start the machine when it is fully loaded.

The tank guard is equipped with bag breaker blades to facilitate using 
premixed product. Load the mix components alternately, in the amounts 
required for the type of product, so as to reduce mixing time as far as 
possible.

 - Load the material with the blades turning.

 - Only load the specifi ed products into the tank.

 - Do not insert your hands or tools into the tank when the 

blades are turning.

 - Do not fi ll the tank beyond its mixing capacity (table 1).

Ruin the machine for as long as it takes to obtain an even mix of the 
right consistency.
Empty the tank with the blades turning by opening its outlet by hand.
To do this, pull the lever (ref.1,  g.6), for its full stroke, to position B.
To close the outlet, return the lever (ref.1,  g.5) to position A.

 - Make sure to place a container under the outlet before you 

empty out the tank.

If any of the mix is left inside the tank for further use, the blades must 
be left turning until it is used. We recommend leaving the mix inside the 
tank as little as possible once it has reached the right consistency.

13.1 Blades jam while running

It may occur that the machine stops mixing because the mix is too den-
se.
To unjam the blades, proceed as follows:
1. Switch the machine off by setting the power switch (ref.8,  g.1) to 
"0".
2. Invert the direction of rotation of the blades by setting the switch 
(ref.8,  g.1) to "2".
3. Wait for a short time (5-10 seconds); then switch the machine off by 
setting the power switch (ref.8,  g.1) to "0".
4. Restore normal operation by turning the power switch (ref.8,  g.1) 
to "1".

 - The machine only runs properly with the power switch set to 

"1" (blades turn clockwise)

14. MAINTENANCE

 - Maintenance must be done by adequately trained personnel, 

after switching off the machine, disconnecting it from the power 
supply and emptying the tank.

 - Make sure the guards/safety equipment are always functio-

nal and in good condition.

Every two months of operation, check:

GB

Содержание 1194300

Страница 1: ...94303 3228947 R0 2015 I MESCOLATRICE Manuale di uso manutenzione e ricambi F MELANGEUSE Manuel utilisation entretien pieces de rechange GB MIXER Operating maintenance spare parts manual D MISCHER Handbuch für Bedienung Wartung und Ersatzteile E MEZCLADORA Manual de uso mantenimiento y recambios P MISTURADOR Manual de utilização manutenção e peças sobresselentes ...

Страница 2: ...chement électrique Electrical connection socket Elektrischer Anschlussstecker Toma para conexión eléctrica Ficha de alimentação 10 Protezione vasca Protection cuve Tank protection Trogabdeckung Proteccion del recipiente Protecção do depósito 11 Protezione bocchetta di scarico Protection bouche d évacuation Outlet protection Schutzverkleidung der bodenklappe Proteccion de la boca de descarga Protec...

Страница 3: ... EN 12100 1 2 2005 EN 60204 1 2006 3 LIVELLO EMISSIONE SONORA E VIBRAZIONI TRASMESSE In tabella 3 è riportato il livello di pressione sonora misurato all orec chio dell operatore a vuoto LPA e delle vibrazioni trasmesse durante il lavoro Tabella 3 Modello Tipo di motore LpA Aeq MIX 120 PLUS Elettrico 86 dB 2 m s2 4 DESCRIZIONE E FUNZIONAMENTO La mescolatrice è destinata all impiego nei cantieri ed...

Страница 4: ...ll impian to equipotenziale di cantiere 10 4 Dimensionamento cavo di alimentazione La linea dell alimentazione elettrica deve essere adeguatamente dimen sionata per evitare cadute di tensione Evitare l impiego di avvolgitori Il dimensionamento dei conduttori del cavo di alimentazione elettrica deve tener conto delle correnti di funzionamento e della lunghezza della linea per evitare eccessive cadu...

Страница 5: ... le 4 viti rif 3 g 7 che bloccano il supporto del motore elet trico e tirare la cinghia rif 5 g 7 per mezzo della vite rif 4 g 7 se la tensione della cinghia è corretta applicando una forza di circa F 1 5 Kg al centro del tratto libero della cinghia la freccia dovrà risultare circa f 5 mm g 8 Non tirare eccessivamente la cinghia altrimenti si riduce la sua vita e quella dei cuscinetti del motore e...

Страница 6: ...un corretto collegamento Il cavo di alimentazione dalla spina al quadro è interrotto Cambiare il cavo Un lo elettrico all interno del quadro è staccato Collegare di nuovo Un lo elettrico all interno della morettiera motore è staccato Collegare di nuovo Il necorsa è guasto Sostituire il necorsa L interruttore è guasto Cambiare l interruttore È intervenuto il dispositivo di protezione termica Attend...

Страница 7: ...ondensateur F 50 Ø 55x94 50 Ø 55x94 100 Ø 50x120 2 NORMES DE PROJET Le mélangeur MIX 120 PLUS a été conçu et fabriqué en appliquant les normes harmonisées suivantes EN 12151 2008 EN 12100 1 2 2005 EN 60204 1 2006 3 NIVEAU D ÉMISSION SONORE ET VIBRATIONS TRANSMISES Le tableau 3 indique le niveau de pression acoustique mesuré à vide à l oreille de l opérateur NPA et les vibrations transmises durant ...

Страница 8: ...ve pleine Utiliser un câble 2 pôles terre pour alimenter la machine en énergie électrique et la brancher à l installation équipotentielle de chantier 10 4 Dimensionnement du câble d alimentation La ligne de l alimentation électrique doit être opportunément dimension née pour éviter les chutes de tension Éviter de recourir à des enrouleu rs Les dimensions des conducteurs du câble d alimentation éle...

Страница 9: ...élec trique et tirer la courroie réf 5 g 7 au moyen de la vis réf 4 g 7 en cas de tension correcte de la courroie à l application d une force d environ F 1 5 Kg au centre du segment libre de la courroie la èche devra être à peu près égale à f 5 mm g 8 Ne pas trop étirer la courroie pour ne pas réduire sa durée de vie ainsi que celle des coussinets du moteur électrique et du réducteur 6 Au terme de...

Страница 10: ...dement correct Le câble d alimentation qui va de la che au panneau s est détaché Remplacer le câble Un l électrique s est détaché à l intérieur du bornier du moteur Raccorder de nouveau Un l électrique s est détaché à l intérieur du bornier du moteur Raccorder de nouveau Le capteur de n de course est en panne Remplacer le capteur de n de course L interrupteur de mise en marche est défectueux Rempl...

Страница 11: ...ISE LEVEL AND VIBRATIONS Table 3 gives the sound pressure level of the machine measured at the ear of the operator when running empty LPA and vibrations transmitted when it is operating Table 3 Model Type of motor LpA Aeq MIX 120 PLUS Electric 86 dB 2 m s2 4 DESCRIPTION AND OPERATION The mixer is intended for use on construction sites for mixing a wide range of fine grained materials both wet and d...

Страница 12: ...e g H07RN F For the conformity of the power supply see CEI 64 8 harmo nisation of CENELEC HD384 11 COMMISSIONING THE MACHINE Before connecting the machine to the electrical mains ensure that all safety devices are tted and are in perfect condition that the extension cord is in good condition and that the plugs and sockets of the type protected against jets of water are not wet Connect the mains po...

Страница 13: ...rectly tensioned tighten down the 4 bolts ref 3 g 7 7 Reinstall the belt guard ref 2 g 7 with its bolts Check the belt tension again after the rst 4 hours of operation with the new belts and repeat the check every 18 20 hours 14 4 Removing the outlet guard 1 Undo the bolts ref 20 g 1 and remove the guard ref 24 g 1 2 To re t the guard ref 24 g 1 align its holes with the mount holes and reinstall t...

Страница 14: ... MIX 120 PLUS wurde unter Anwendung der folgenden harmonisierten Normen geplant und gebaut EN 12151 2008 EN 12100 1 2 2005 EN 60204 1 2006 3 GERÄUSCHPEGEL UND ÜBERTRAGENE VIBRATIONEN In Tabelle 3 sind der am Ohr des Bedieners gemessene Schalldruckpe gel im Leerlauf LPA und der Pegel der während der Arbeit übertrage nen Vibrationen angegeben Tabelle 3 Modell Motortyp LpA Aeq MIX 120 PLUS Elektromot...

Страница 15: ...it Motor 110V 50Hz Prüfen ob die Versorgungsspannung mit den Daten auf dem Typen schild der Maschine übereinstimmt Bei voller Last muss die Spannung zwischen 95 V und 130 V liegen Zur Spannungsversorgung der Maschine ist ein 2 poliges Kabel mit Erdleiter erforderlich um den Anschluss an die Potentia lausgleichanlage der Baustelle zu garantieren 10 4 Bemessung des Netzkabels Die elektrische Zuleitu...

Страница 16: ...e 4 Schrauben Pos 3 Abb 7 mit denen die Halterung des Elektro motors befestigt ist lockern und den Riemen Pos 5 Abb 7 mithilfe der Schraube Pos 4 Abb 7 herausziehen Wenn die Riemenspannung korrekt ist muss der Durchhang bei Anwendung einer Kraft von ca F 1 5 kg in der Mitte des freien Riemenabschnitts ca f 5 mm Abb 8 betragen Den Riemen nicht zu stark anziehen sonst verkürzt sich seine Lebensdauer...

Страница 17: ...kt Korrekt anschließen Kabel vom Stecker zur Schalttafel ausgesteckt Kabel ersetzen Ein Draht des Motor Klemmenkastens ist gelöst Erneut anschließen Ein Draht des Motor Klemmenkastens ist gelöst Erneut anschließen Endschalter defekt Endschalter ersetzen Gangschalter defekt Schalter auswechseln Die Schutzabdeckung des Mischtrogs ist offen Schutzabdeckung schließen Thermo Sicherung angesprochen Eini...

Страница 18: ...6 3 NIVEL DE EMISIÓN SONORA Y VIBRACIONES TRANSMITIDAS En la Tabla 3 gura el nivel de presión sonora medido en el oído del operador en vacío LPA y de las vibraciones transmitidas durante el trabajo Tabla 3 Modelo Tipo de motor LpA Aeq MIX 120 PLUS Electrico 86 dB 2 m s2 4 DESCRIPCIÓN Y FUNCIONAMIENTO La mezcladora está destinada al empleo en obras de con strucción para mezclar una amplia gama de m...

Страница 19: ...ble de alimentación La línea de alimentación eléctrica debe estar adecuadamente dimen sionada para evitar caídas de tensión Evitar el empleo de enrolladores Las dimensiones de los conductores del cable de alimentación eléctrica deben ser adecuadas para las corrientes de funcionamiento y para la longitud de la línea a n de evitar caídas excesivas de tensión tabla 4 Tabla 4 Modelo Tipo de motor Cabl...

Страница 20: ...aproximadamente f 5 mm g 8 No tire demasiado de la correa para evitar reducir la vida útil tanto de la correa como de los cojinetes del motor y del reductor 6 Después de tensar la correa apriete los 4 tornillos ref 3 g 7 7 Monte la protección de la correa ref 2 g 7 y fíjela con los tornillos 14 3 Sustitución de las correas 1 Apague el motor y desconecte la clavija de la alimentación eléctrica 2 Qu...

Страница 21: ...able en la tabla de bornes del motor está desconectado Volver a conectarlo Un cable en la tabla de bornes del motor está desconectado Volver a conectarlo Final de carrera averiado Sustituir el nal de carrera El interruptor de puesta en marcha está averiado Sustituir el interruptor El dispositivo de seguridad térmico está conectado Esperar unos minutos e intentarlo de nuevo Protección de la cuba ab...

Страница 22: ...NORMAS DO PROJECTO O misturador MIX 120 PLUS foi concebido e fabricado em conformi dade com as seguintes normas harmonizadas EN 12151 2008 EN 12100 1 2 2005 EN 60204 1 2006 3 NÍVEL DE EMISSÃO SONORA E VIBRAÇÕES TRANSMITIDAS Na tabela 3 indica se o nível de pressão sonora medido no ouvido do operador em vazio LPA e as vibrações transmitidas durante o trabal ho Tabela 3 Modelo Tipo de motor LpA Aeq ...

Страница 23: ...alimentação eléctrica deverá ter um tamanho adequado para evitar quebras de tensão Evitar o uso de enroladores O tamanho dos condutores do cabo deve ter em conta as correntes de funcionamento e o comprimento da linha a m de evitar excessivas quedas de tensão tab 4 Tabela 4 Modelo Tipo de motor Cabo mm 1 5 2 5 4 0 MIX 120 PLUS 230 V 9 A 0 19 20 32 33 50 Comprimento do cabo m 110 V 15 A 0 12 13 19 2...

Страница 24: ...correia excessivamente pois reduz o seu tempo útil e a dos rolamentos do motor eléctrico e do redutor 6 No nal da tensão apertar os 4 parafusos ref 6 g 7 7 Voltar a colocar a protecção da correia ref 2 g 7 com os respec tivos parafusos 14 3 Substituir as correias 1 Desligar o motor e retirar a cha de alimentação eléctrica 2 Retirar a protecção da correia ref 2 g 7 desaparafusando os pa rafusos ref...

Страница 25: ...Substituir o cabo Um o eléctrico no interior do quadro está desligado Ligar de novo Um o eléctrico no interior do quadro de bornes do motor está desligado Ligar de novo O batente está avariado Substituir o batente O interruptor está avariado Substituir o interruptor O dispositivo de protecção térmica foi activado Aguardar alguns minutos e voltar a tentar A protecção do depósito está aberta Fechar ...

Страница 26: ...IMER INTERNATIONAL S p A MIX 120 PLUS 26 5 MAX F f Fig 2 Fig 3 Fig 8 Õ Ö 1 2 Õ Fig 4 Fig 5 AÙB 1 4 2 1 3 5 Fig 6 Fig 7 ...

Страница 27: ...IMER INTERNATIONAL S p A MIX 120 PLUS 27 Fig 9 4 1 2 3 6 5 1 ...

Страница 28: ...IMER INTERNATIONAL S p A MIX 120 PLUS 28 TAV 1 4 12 14 15 20 20 24 25 28 31 26 27 1 29 16 30 3 34 3 5 18 11 19 6 23 28 13 10 7 21 9 8 7 16 33 2 22 17 32 36 35 ...

Страница 29: ...ADOR CONDENSADOR 230V 50HZ 40 MF 450V For Australia Version 3227231 230V 50HZ 50 MF 450V 3231505 230V 60HZ 50 MF 450V 3229797 110V 50HZ 100 MF 450V 20 3227870 VITE VIS BOLT SCHRAUBE TORNILLO PARAFUSO TRILOB TEFR 5739 M8X16 Z 21 3234510 TELAIO CHÂSSIS FRAME RAHMEN BASTIDOR CHASSIS 22 3229559 BOCCHETTA DI SCARICO BOUCHE D ÉVACUATION OUTLET BODENKLAPPE BOCA DE DESCARGA BOCAL DE DRENAGEM 23 3229566 GA...

Страница 30: ...IMER INTERNATIONAL S p A MIX 120 PLUS 30 TAV 2 24 9 11 13 15 16 17 18 20 21 22 23 10 11 5 2 14 12 7 1 8 4 19 3 6 25 25 25 ...

Страница 31: ...2 DIFFUSORE DIFFUSEUR DIFFUSER VERTEILERDÜSE DIFUSOR DIFUSOR 14 3234511 PROTEZIONE VASCA PROTECTION CUVE TANK PROTECTION TROGABDECKUNG PROTECCION DEL RECIPIENTE PROTECÇÃO DO DEPÓSITO 15 3229588 PALA ESTERNA PALE EXTERNE OUTER BLADE ÄUSSERE SCHAUFEL PALA EXTERNA PALA EXTERIOR 16 3229594 PALA INTERNA PALE INTERNE INNER BLADE INNERE SCHAUFEL PALA INTERNA PALA INTERIOR 17 3229602 VASCA CUVE TANK BECKE...

Страница 32: ...19 5 2229310 LINGUETTA LANGUETTE KEY FEDER LENGÜETA LINGUETA 6X6X30 6 3226385 RIDUTTORE REDUCTEUR GEAR BOX GETRIEBE REDUCTOR REDUTOR 7 3227870 VITE VIS BOLT SCHRAUBE TORNILLO PARAFUSO TRILOB TEFR 5739 M8X16 Z 8 3228113 MOTORE MOTEUR MOTOR MOTOR MOTOR MOTOR 230V 50HZ 3228164 230V 60HZ 3229827 110V 50HZ 9 3228121 PULEGGIA POULIE PULLEY RIEMENSCHEIBE POLEA ROLDANA 230V 50HZ 110V 50HZ 3229795 230V 60H...

Страница 33: ... GEAR ZAHNRAD ENGRANAJE ENGRENAGEM 15 3208979 PULEGGIA POULIE PULLEY RIEMENSCHEIBE POLEA ROLDANA 16 3226386 CARCASSA RIDUTTORE CARCASSE RÉDUCTEUR GEAR BOX CASING GETRIEBEGEHÄUSE CARCASA REDUCTOR CORPO DO REDUTOR 17 2227320 ANELLO ARRESTO BAGUE D ARRET STOP RING SPERRING ANILLO DE TOPE ANEL DE PARAGEM E 20 18 3209799 ALBERO ARBRE SHAFT WELLE EJE EIXO 19 2224340 RONDELLA RONDELLE WASHER UNTERLEGSCHE...

Страница 34: ...A1 KM1 A2 12 11 IM1 13 14 KM1 TM1 FCS CELESTE CELESTE MARRONE 3 VIOLA P1 4 GIALLO 5 ARANCIO 3 2 R1 F1 5x20 1A 33Kohm 10W C1 SPINA MOBILE 2P T 16A PROTEZ IP67 1 MARRONE 6 BIANCO 7 BIANCO 2 CELESTE N CELESTE L MARRONE U MARRONE IM1 INVERTITORE DI MARCIA V1 CELESTE U1 MARRONE V2 NERO U2 ROSSO V CELESTE MOTORE ELETTRICO TAV 6 SCHEMA ELETTRICO SCHÉMA ÉLECTRIQUE WIRING DIAGRAM SCHALTBILD ESQUEMA ELÉCTRI...

Страница 35: ...GO D INSTALLAZIONE LIEU D INSTALLATION PLACE OF INSTALLATION INSTALLATIONSORT LUGAR DE INSTALACIÓN VERIFICA PARTI DELLA MACCHINA ESSAIS PARTIES DE LA MACHINE MACHINE PART TESTS ABNAHME DER MASCHINENKOMPONENTEN PRUEBA DEL PARTES DE LA MÁQUINA RISULTATI ANNOTAZIONI E FIRMA DEL COMPILATORE RÉSULTATS ANNOTATIONS ET SIGNATURE DU PRÉPOSÉ RESULTS NOTES AND SIGNATURE OF COMPILER ERGEBNISSE NOTIZEN UND UNT...

Страница 36: ...GO D INSTALLAZIONE LIEU D INSTALLATION PLACE OF INSTALLATION INSTALLATIONSORT LUGAR DE INSTALACIÓN VERIFICA PARTI DELLA MACCHINA ESSAIS PARTIES DE LA MACHINE MACHINE PART TESTS ABNAHME DER MASCHINENKOMPONENTEN PRUEBA DEL PARTES DE LA MÁQUINA RISULTATI ANNOTAZIONI E FIRMA DEL COMPILATORE RÉSULTATS ANNOTATIONS ET SIGNATURE DU PRÉPOSÉ RESULTS NOTES AND SIGNATURE OF COMPILER ERGEBNISSE NOTIZEN UND UNT...

Страница 37: ...un des nos centre assistance autorisé il faut que soient approuvées par les techniciens du Service Assistance de Imer International Spa pour autoriser la réparation La garantie n est pas approuvé dans les cas suivants Dans le cas dont la réparation ou le remplacement des pièces soit effectué dans un centre assistance pas autorisé Dans le cas dont le défaut soit du à l utilisation des pièces de rec...

Страница 38: ... verursachten Schäden an den Elektrokomponenten Etwaige Streitfragen fallen unter die Zuständigkeit des Gerichtshofs Siena Außenstelle Poggibonsi Italien CONDICIONES DE GARANTIA El servicio en garantía tiene que ser pedido al centro de asistencia Imer autorizado más cercano la lista se puede pedir á todos nuestro revendedores y se encuentra en el sitio web www imergroup com en el área de Service a...

Страница 39: ......

Отзывы: