Ilumen
4
Installation Manual Ilumen PID Box Mini v1.3
2.3
S
AFETY PRECAUTIONS
2.3.1
E
LECTRIC SHOCK
When the Ilumen PID Box Mini is in operation, voltage will be present. Prior to maintenance
work on the PV plant switch off the Ilumen PID Box Mini.
When you want to change the arrangement of the Ilumen PID Box Mini you must switch off the
Ilumen PID Box Mini 20 minutes prior to making any changes.
2.3.2
E
LECTROSTATIC DISCHARGE
Never operate the Ilumen PID Box Mini when not properly installed or when the components
are not closed properly. Always make sure the grounding of the Ilumen PID Box Mini is done
correctly.
3
S
COPE OF DELIVERY
1.
1
x
Ilumen PID Box Mini
2.
1
x
DC power supply
3.
1
x
Power cord (EU plug)
4.
4
x
Rubber feet
5.
2
x
Mounting bracket
6.
4
x
Screw for mounting bracket
7.
1
x
Installation manual
4
P
RODUCT DESCRIPTION
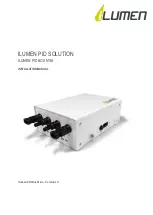
The Ilumen PID Box Mini is placed between the inverter and the solar array strings. The power
of the strings goes through the PID Box, entering on one side and leaving on the other. This
means the Ilumen PID Box Mini is placed in series between the PV panels and the inverter. You
can use one Ilumen PID Box Mini per 2 MPP trackers.
5
M
OUNTING
5.1
M
OUNTING LOCATION REQUIREMENTS
The installation site must be freely and safely accessible at all times without the
necessity for any auxiliary equipment.
The mounting location should be inside a rain- and windproof location.
Do not place the Ilumen PID Box Mini in a dusty environment.
The ambient temperature must be between -25 and 60°C.
Normally the PID Box Mini is installed right below the inverter.
The ideal placement is on a flat surface. Special rubber feet can be placed under the PID
Box Mini to prevent scratching of any surface. To use the wall brackets of the Ilumen PID
Box Mini they must lie flush with the mounting surface.


