background image

22

CLIMATISEUR 

PORTATIF

ARTICLE


#0416711

Date d’achat

Idylis

®

 est une marque de commerce déposée de LF, LLC. 

Tous droits réservés.

Numéro de série

Des questions, des problèmes, des pièces manquantes? Avant de retourner l’article au 

détaillant, appelez notre service à la clientèle au 1 800 643-0067, entre 8 h et 18 h (HNE), 

du lundi au jeudi, ou entre 8 h et 17 h (HNE) le vendredi.

JOIGNEZ VOTRE REÇU ICI

AB12309

Lowes.com 

Содержание 0416711

Страница 1: ...e Date Idylis is a registered trademark of LF LLC All Rights Reserved Questions problems missing parts Before returning to your retailer call our customer service department at 1 800 643 0067 Monday Thursday 8 a m 6 p m EST Friday 8 a m 5 p m EST ATTACH YOUR RECEIPT HERE AB12309 Lowes com ...

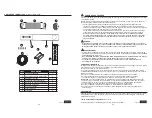
Страница 2: ...8 Care and Maintenance 15 Troubleshooting 16 Warranty 17 Replacement Parts List 18 PACKAGE CONTENTS PART DESCRIPTION QUANTITY A Air Outlet 1 B Signal Receptor 1 C Control Panel 1 D Castor 1 E Handle 1 F Air Intake Evaporator 1 G Water Outlet Drain 2 H Power Supply Cord 1 I Air Exhaust 1 F A D C B E G H I Lowes com Lowes com ...

Страница 3: ...e power supply cord to an electrical outlet The power supply cord has two buttons located on the head of the plug One button is marked TEST and the other is marked RESET Press the TEST button you will hear a click as the RESET button pops out Press the RESET button you will hear a click as the button engages The power supply cord is now energized and supplying electricity to the air conditioner on...

Страница 4: ...the air exhaust I on the rear side of the unit and the other end of the exhaust hose into the opening in the window panel O 4 6 Hardware Used M 1 2 Screws included 3 L O L O M N O Window Electrical outlet 5 Screws come attached Vertical Window Screws come attached Horizontal Window N N REAR OF UNIT K K I J O O O x4 Lowes com Lowes com 1 Insert tube adapter L through the back of the hole in the win...

Страница 5: ... be shown in the temperature display area of the control panel 2 Press the MODE button until the COOL indicator light illuminates on the control panel Each depression of the MODE button will advance to a different mode setting Cool Dehumidifier Fan Heat 3 Press the appropriate increase or decrease buttons to select a suitable operating temperature setting Temperature settings are adjustable betwee...

Страница 6: ...rain cover 5 Ensure the rubber seal ring is properly seated in the end of the hose 6 Connect the drain hose P to the water outlet drain G 7 Tighten the drain cover clockwise onto the rear of the unit 8 Place the opposite end of the drain hose into a floor drain or other basin OPERATING INSTRUCTIONS DEHUMIDIFIER Note During dehumidifier mode the exhaust hose does not have to be vented outdoors When...

Страница 7: ...ify Fan Heat 4 Select the fan speed setting 5 The time you selected will appear in the LED display While the Air Conditioner is on Auto Off 1 Press the Timer button and the adjacent Auto Timer display will illuminate 2 Use the Up Down arrows to select a delayed Off Time of up to 24 hours 3 Follow the steps 3 4 and 5 the same as above REMOTE CONTROL Control Buttons 1 Power 2 Mode 3 Fan Speed 4 On O...

Страница 8: ...onsult the dealer or an experienced radio TV technician for assistance OPERATING INSTRUCTIONS 14 15 CARE AND MAINTENANCE CAUTION Before cleaning or servicing this unit disconnect from any electrical supply outlet 1 DO NOT use gasoline benzene thinner or any other chemicals to clean this unit as these substances may cause damage to the finish and deform plastic parts 2 NEVER attempt to clean the un...

Страница 9: ...om whom your unit was purchased or contact your nearest authorized manufacturer service depot where service must be performed by a qualified service technician If service is performed on the unit by anyone other than an authorized service depot or the unit is used for commercial application all obligations of manufacturer under this warranty shall be void Boundaries of In Home Service If the appli...

Страница 10: ...ustomer service department at 1 800 643 0067 8 a m 6 p m EST Monday Thursday 8 a m 5 p m EST Friday 18 19 PART DESCRIPTION PART 37 FAN CASING A5301 590 A 22 38 BLOWER WHEEL A5304 310 A 22 39 FAN MOTOR LS 23T3 6P A3002 220 40 FAN CASING A5301 600 A 22 A7304 130 41 SCREEN 42 CAPACITOR 8uF 250V FOR FAN MO TOR 29 A2509 130 43 COVER A6101 510 AF 11 44 CONTROL BOARD A2516 750 45 FIXTURE A5812 570 AF 11 ...

Страница 11: ...s reserved 1 2 3 4 5 6 7 8 9 10 11 12 13 14 15 16 17 18 19 20 21 22 23 24 25 26 27 28 29 30 31 32 33 34 35 36 37 38 39 40 41 42 43 44 45 46 47 48 49 50 51 52 53 54 55 56 57 58 59 60 61 62 63 64 65 66 67 68 69 70 71 72 73 74 75 76 77 Accessories 20 21 Lowes com Lowes com ...

Страница 12: ...C Tous droits réservés Numéro de série Des questions des problèmes des pièces manquantes Avant de retourner l article au détaillant appelez notre service à la clientèle au 1 800 643 0067 entre 8 h et 18 h HNE du lundi au jeudi ou entre 8 h et 17 h HNE le vendredi JOIGNEZ VOTRE REÇU ICI AB12309 Lowes com ...

Страница 13: ... Entretien 36 Dépannage 37 Garantie 38 Liste des pièces de rechange 39 CONTENU DE L EMBALLAGE PIÈCE DESCRIPTION QUANTITÉ A Sortie d air 1 B Récepteur de signaux 1 C Panneau de commande 1 D Roulette 1 E Poignée 1 F Entrée d air évaporateur 1 G Sortie d eau 2 H Cordon d alimentation 1 I Évacuateur d air 1 F A D C B E G H I Lowes com Lowes com ...

Страница 14: ... Vous trouverez deux boutons sur la tête de la fiche du cordon Ces boutons sont appelés TEST Essai et RESET Réinitialisation Appuyez sur le bouton TEST vous entendez un déclic au moment où le bouton RESET se soulève Appuyez sur le bouton RESET vous entendez un autre déclic alors que le bouton s enfonce Le cordon d alimentation est maintenant sous tension et il fournit de l électricité au climatise...

Страница 15: ...é du tuyau d évacuation J à l évacuateur d air I situé à l arrière du climatiseur et insérez l autre extrémité dans l ouverture du panneau de fenêtre O 4 6 Quincaillerie utilisée M 1 2 Vis incluses 3 L O L O M N O Fenêtre Prise de courant 5 Vis préassemblées Fenêtre verticale Vis préassemblées Fenêtre horizontale N N ARRIÈRE DU CLIMATISEUR K K I J O O O x 4 Lowes com Lowes com 1 Insérez l adaptate...

Страница 16: ...TEUR pour allumer le climatiseur La plus récente température réglée s affiche dans la zone d affichage de la température du panneau de commande 2 Appuyez sur la touche MODE jusqu à ce que le voyant de CLIMATISATION s allume sur le panneau de commande Chaque pression sur la touche MODE change le mode sélectionné Climatisation Déshumidification Ventilation Chauffage 3 Sélectionnez une température de...

Страница 17: ...rtie d eau G 7 Vissez le capuchon de vidange dans le sens des aiguilles d une montre à l arrière du climatiseur 8 Placez l autre extrémité du tuyau de vidange dans un siphon de sol ou un bassin Bouchon en caoutchouc souple Capuchon de vidange MODE D EMPLOI DÉSHUMIDIFICATION Remarque En mode Déshumidification il n est pas nécessaire que le tuyau d évacuation amène l air à l extérieur Lorsque vous u...

Страница 18: ...ification Ventilation Chauffage 4 Sélectionnez la vitesse du ventilateur 5 Le délai choisi s affiche à l écran ACL Lorsque le climatiseur est en marche arrêt automatique 1 Appuyez sur la touche Minuterie L indicateur de minuterie adjacent s allume 2 Utilisez les touches Plus et Moins pour sélectionner un délai d arrêt pouvant aller jusqu à 24 heures 3 Suivez les étapes 3 4 et 5 ci dessus TÉLÉCOMMA...

Страница 19: ...rimenté MODE D EMPLOI 35 36 ENTRETIEN MISE EN GARDE Débranchez le climatiseur de la prise de courant avant de le nettoyer ou de l entretenir 1 N utilisez PAS d essence de benzène de diluant ni tout autre produit chimique pour nettoyer le climatiseur car ces substances peuvent endommager le fini et déformer les pièces en plastique 2 Ne tentez JAMAIS de nettoyer le climatiseur en versant de l eau di...

Страница 20: ...uez avec le détaillant qui vous a vendu le climatiseur ou avec l atelier de réparation autorisé le plus près la réparation sera effectuée par un technicien qualifié Si le climatiseur est réparé par une personne autre qu un technicien d un atelier de réparation autorisé ou s il est utilisé à des fins commerciales toutes les obligations du fabricant prévues par la présente garantie sont annulées Lim...

Страница 21: ...vice à la clientèle au 1 800 643 0067 entre 8 h et 18 h HNE du lundi au jeudi ou entre 8 h et 17 h HNE le vendredi 39 40 PIÈCE DESCRIPTION No DE PIÈCE 37 BOÎTIER DU VENTILATEUR A5301 590 A 22 38 ROUE DU VENTILATEUR A5304 310 A 22 39 MOTEUR DU VENTILATEUR LS 23T3 6P A3002 220 40 BOÎTIER DU VENTILATEUR A5301 600 A 22 A7304 130 41 ÉCRAN 42 CONDENSATEUR 8 uF 250 V POUR MOTEUR DU VENTILATEUR 28 A2509 1...

Страница 22: ...droits réservés 1 2 3 4 5 6 7 8 9 10 11 12 13 14 15 16 17 18 19 20 21 22 23 24 25 26 27 28 29 30 31 32 33 34 35 36 37 38 39 40 41 42 43 44 45 46 47 48 49 50 51 52 53 54 55 56 57 58 59 60 61 62 63 64 65 66 67 68 69 70 71 72 73 74 75 76 77 Accessoires 41 42 Lowes com Lowes com ...

Страница 23: ... LLC Todos los derechos reservados Preguntas problemas piezas faltantes Antes de volver a la tienda llame a nuestro Departamento de Servicio al Cliente al 1 800 643 0067 de lunes a jueves de 8 a m a 6 p m hora estándar del Este y los viernes de 8 a m a 5 p m hora estándar del Este ADJUNTE SU RECIBO AQUÍ AB12309 Lowes com ...

Страница 24: ...iento 57 Solución de problemas 58 Garantía 59 Lista de piezas de repuesto 60 CONTENIDO DEL PAQUETE PIEZA DESCRIPCIÓN CANTIDAD A Salida de aire 1 B Receptor de señal 1 C Panel de control 1 D Rueda 1 E Manija 1 F Entrada de aire Evaporador 1 G Desagüe de salida de agua 2 H Cable de suministro de electricidad 1 I Salida de aire 1 F A D C B E G H I Lowes com Lowes com ...

Страница 25: ...tran en el cabezal del enchufe Un botón está marcado TEST PRUEBA y el otro RESET RESTABLECER Presione el botón TEST el botón RESET saltará y escuchará un clic Presione el botón RESET y escuchará un clic que indica que el botón se engancha Ahora el cable de suministro de electricidad está energizado y suministra electricidad al aire acondicionado en algunos productos también se indica mediante una ...

Страница 26: ...66 3 20 pulg Luego instale un extremo de la manguera de escape J a la salida de aire I en la parte posterior de la unidad y el otro extremo de la manguera de escape en la abertura del panel de ventana O 4 6 Aditamentos utilizados M 1 2 Tornillos incluidos 3 L O L O M N O Ventana Tomacorriente 5 N N PARTE POSTERIOR DE LA UNIDAD K K I J O O O x4 1 Inserte el adaptador de tubería L a través del orifi...

Страница 27: ...peratura establecida más reciente se mostrará en el área de visualización de la temperatura del panel de control 2 Presione el botón MODE MODO hasta que la luz indicadora COOL FRÍO se ilumine en el panel de control Vuelva a presionar el botón MODO para avanzar a un ajuste de modo diferente Frío Deshumidificador Ventilador Calor 3 Presione los botones de aumento o disminución correspondientes para ...

Страница 28: ...a de desagüe P al desagüe de salida de agua G 7 Apriete la cubierta del desagüe girandola en dirección de las manecillas del reloj en la parte posterior de la unidad 8 Coloque el extremo opuesto de la manguera de desagüe en un drenaje de suelo u otro recipiente Tapón de goma suave Cubierta de desagüe INSTRUCCIONES DE FUNCIONAMIENTO DESHUMIDIFICADOR Nota durante el modo de deshumidificador la mangu...

Страница 29: ... Calor 4 Seleccione el ajuste de velocidad del ventilador 5 El tiempo que haya seleccionado aparecerá en la pantalla LED Cuando el aire acondicionado está encendido Apagado automático 1 Presione el botón Temporizador y se iluminará la pantalla del temporizador automático adyacente 2 Utilice las flechas arriba abajo para seleccionar un retraso del tiempo de apagado de hasta 24 horas 3 Siga los paso...

Страница 30: ...o TV INSTRUCCIONES DE FUNCIONAMIENTO 56 57 CUIDADO Y MANTENIMIENTO PRECAUCIÓN Antes de limpiar o realizar mantenimiento a esta unidad desconecte el equipo de cualquier tomacorriente 1 NO utilice gasolina benceno disolvente ni otros productos químicos para limpiar este aparato ya que estas sustancias pueden causar daños en el acabado y las piezas de plástico se deforman 2 NUNCA intente limpiar la u...

Страница 31: ...e la sección Límites del Servicio a Domicilio a continuación Póngase en contacto con el concesionario al que le compró la unidad o póngase en contacto con su depósito autorizado de servicio del fabricante autorizado más cercano donde el servicio debe realizarlo un técnico de servicio calificado Si el servicio lo realiza en la unidad cualquier persona que no sea de un depósito de servicio autorizad...

Страница 32: ...io al Cliente al 1 800 643 0067 de 8 a m a 6 p m hora del Este de lunes a jueves y de 8 a m a 5 p m hora del Este los viernes 60 61 PIEZA DESCRIPCIÓN PIEZA 37 MARCO DEL VENTILADOR A5301 590 A 22 38 RUEDA DEL SOPLADOR A5304 310 A 22 39 MOTOR DEL VENTILADOR LS 23T3 6P A3002 220 40 MARCO DEL VENTILADOR A5301 600 A 22 41 MALLA A7304 130 42 CAPACITOR 8 uF 250 V PARA EL MOTOR DEL VENTILADOR 29 A2509 130...

Страница 33: ...chos reservados Accesorios 62 63 1 2 3 4 5 6 7 8 9 10 11 12 13 14 15 16 17 18 19 20 21 22 23 24 25 26 27 28 29 30 31 32 33 34 35 36 37 38 39 40 41 42 43 44 45 46 47 48 49 50 51 52 53 54 55 56 57 58 59 60 61 62 63 64 65 66 67 68 69 70 71 72 73 74 75 76 77 Lowes com Lowes com ...

Отзывы: