6
7
ASSEMBLY INSTRUCTIONS
ASSEMBLY INSTRUCTIONS
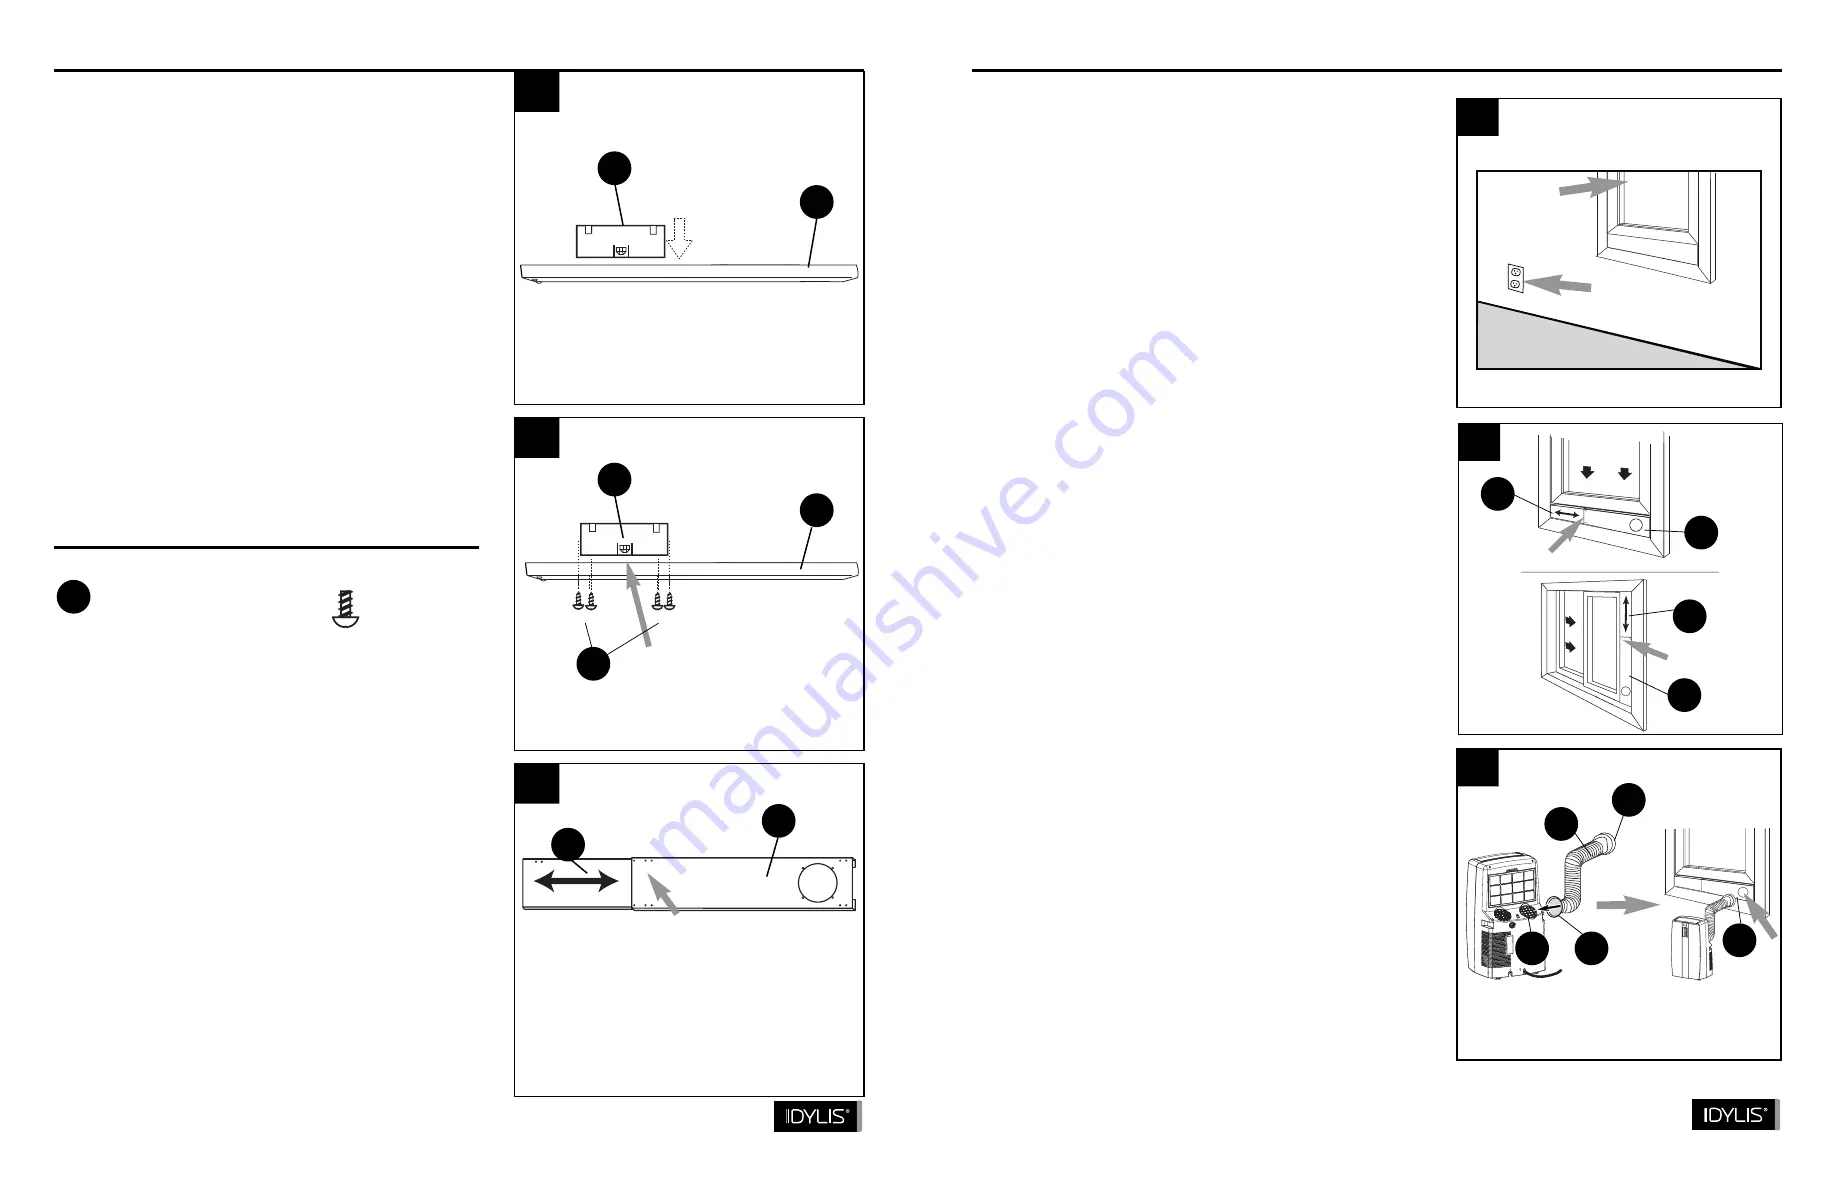
4. Select a suitable location for the unit, making
sure you have access to an electrical outlet.
5. Install the window panel by expanding it to fit
the length of the window and fully tightening the
pre-assembled screws in the middle.
6. Attach an exhaust nozzle connector (K) to each
side of the exhaust hose (J). (The exhaust hose
has a min. length of 21 13/20 in. when
unstretched and a max. length 66 3/20 in.)
Then, install one end of the exhaust hose (J) to
the air exhaust (I) on the rear side of the unit
and the other end of the exhaust hose
into the
opening in the window panel (O).
4
6
Hardware Used
M
1
2
Screws (included)
3
L
O
L
O
M
N
O
Window
Electrical outlet
5
Screws come attached
Vertical Window
Screws come attached
Horizontal Window
N
N
REAR OF UNIT
K
K
I
J
O
O
O
x4
Lowes.com
Lowes.com
1. Insert tube adapter (L) through the back of the hole
in the window panel (O).
2. Using the 4 screws (M) supplied, secure the tube
adapter (L) from the front of the window panel
(O).
3. Insert window panel extension (N) into the window
panel (O).
Lightly
tighten the pre-assembled screws
in the window panel to hold the extension in place.
14mm x 6mm Screws
(assembly required)


