※
FINGER006 SERIES QUICK INSTALLATION GUIDE
14
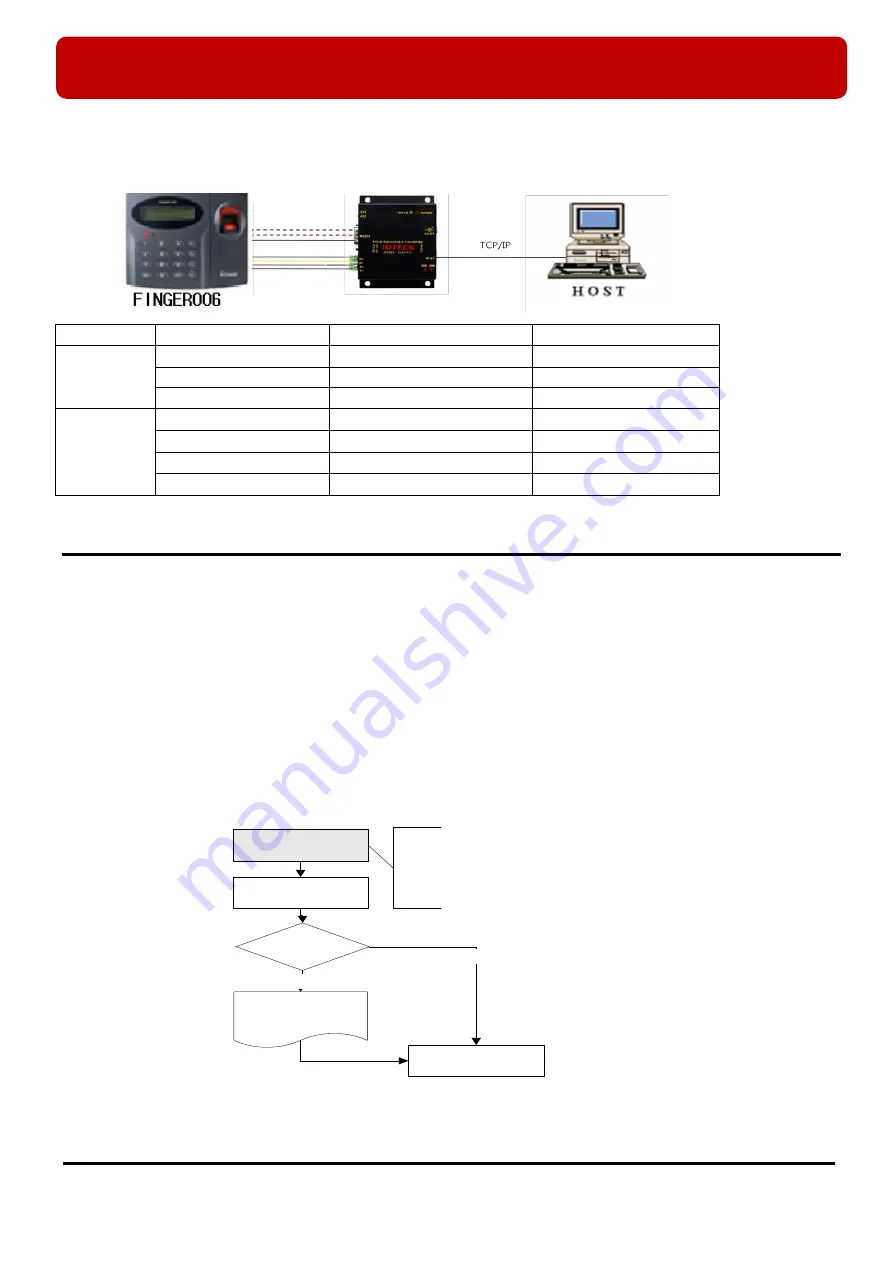
6.3 TCP/IP Converter (External Version)
When you use the TCP/IP converter, choose only one converter between RS232 and RS422.
Figure: TCP/IP Converter between FINGER006s and the Host PC
7. Basic Setting
* As long as there is not mention, contents below are applied to FINGER006, IP-FINGER006, FINGER006SR equally.
7.1 Initialization of FINGER006
You must initialize the system prior to first installation or when you can’t get into setting mode because of malfunctions
etc.
Once power is supplied to the
FINGER006
, press the initialization switch in the back of the
FINGER006
unit. Then, the
LCD will first display “
Initialize OK? 1: Yes 0: No
”. Press
<1>
key if you want to initialize the system or
<0>
to cancel
the initialization procedure. After all the initialization process is completed, the system will be operating in the normal
mode and the LCD will display “
FINGER006 [F1], MM/DD hh : mm : ss
”.
INTERFACE
FINGER006
ILAN422
LINE COLOR
RS232
TX (CON2)
RX (RS232 DSUB9)
BLACK+WHITE
RX (CON2)
TX (RS232 DSUB9)
RED + WHITE
GND(CON2)
GND
BLACK
RS422
TX+ (CON3)
RX+ (RS422 CONNECTOR)
GRAY
TX- (CON3)
RX- (RS422 CONNECTOR)
YELLOW
RX+ (CON3)
TX+ (RS422 CONNECTOR)
BROWN
RX- (CON3)
TX- (RS422 CONNECTOR)
BLUE
<1> KEY?
“
SYSTEM
INITIALIZED!!!
”
Power ON
Initialize OK?
1: Yes 0: No
Normal Operation
Yes
No
Press and hold the initialization button.
Apply +12V DC power to the FINGER006.
Release the button when the LCD displays
“
Initialize OK?
”


