


Part 1 - Getting Started
14
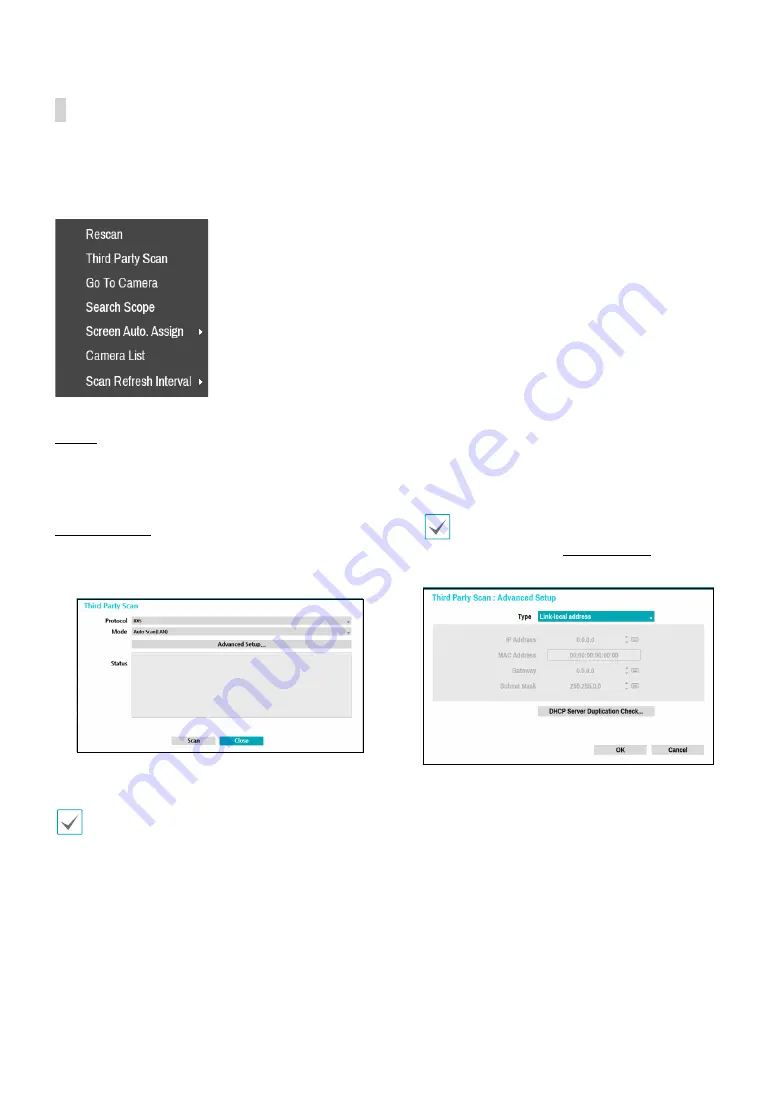
Camera Scan Button
You can scan and search and register cameras that were
not detected automatically or third party cameras.
Pressing the
Scan
button displays the following sub-
menu.
Rescan
Scans for DirectIP™ cameras that were not scanned
automatically.
Third Party Scan
Scans for IDIS Open cameras that do not support
automatic scan feature.
●
Protocol
: Select the protocol used by the camera (or
video encoder) you wish to search for.
•
Some functions may not be supported for the
third-party cameras depending on their protocol
and model.
●
Mode
: Select the scan mode.
–
Auto Scan (LAN)
: Lists cameras in a LAN
environment. If
Auto Scan (LAN)
fails to recognize
a camera, try using
IP Address Scan
instead.
–
IP Address Scan
: Enter the IP address of a
camera. The NVR scans for the camera matching
the specified address. If you enter IP address’s
range, the NVR scans for cameras falling under
the specified address’s range. By specifying an IP
address, you can also specify which port to use with
the Remote Admin feature. It is recommended that
the camera not be networked via DHCP (Dynamic
Host Configuration Protocol). If the camera is
networked via DHCP, connection to the camera may
not be made properly depending on changes in the
external network environment.
●
Advanced Setup:
If the camera is networked but
not scanned, use this setup. This setup allows you to
change the network setting of the NVR’s VIDEO IN
port which is camera’s network environment. Check
the camera’s network setting first before you use this
setup.
Make sure that this setting does not conflict with
the WAN setting. For more information on the
WAN setting, refer to
–
Link-local address:
Indicates the default IP
address.


