Concord CX -
Installation
19
INSTALLATION
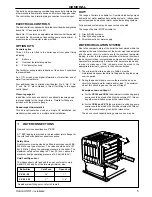
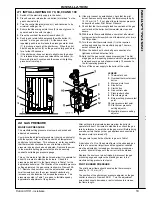
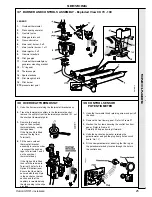
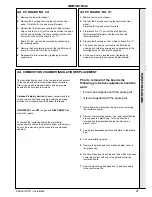
21 INITIAL LIGHTING CX 70, 80, 90 AND 100
8.
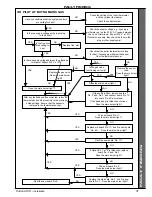
If the pilot cannot be established, check that the pilot
burner flame correctly envelops the thermocouple tip by
10 - 13 mm (
1/2
"). If not, adjust the pilot burner pressure
as described under ‘Pilot Burner Pressure’.
9.
Check that the thermocouple lead connections at the gas
control and at the boiler limit thermostat are clean and
secure.
10.
With the pilot flame established, ensure that all external
system controls (time switch, room thermostat, etc.) are in
the ON position.
11.
Turn the control thermostat knob (1) to the required
setting and switch on the electricity supply. The main
burner will now light.
12.
When the boiler has lit check all gas connections for
tightness with leak detection fluid.
13.
Note that the gas control opens progressively. The first
stage gives a low opening pressure which is progressively
increased over a period of approximately 10 seconds to
the full operating pressure.
14.
Turn off the power supply to the boiler at the mains.
22 GAS PRESSURE
MANIFOLD PRESSURE
The manifold setting pressure must now be checked and
adjusted as necessary.
Commence the adjustment procedure (running on pilot only)
with the system cold, on full load and with all temperature
controls set at maximum. This will ensure, as far as possible,
that thermostatic shutdown does not interfere whilst the
pressure is being checked and adjusted. Remove the screw
in the manifold setting pressure test point and securely
connect a suitable gas pressure gauge.
Turn on the mains to light the boiler and allow it to operate for
about 15 minutes to stabilise the burners. Check the
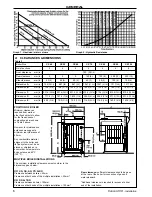
pressure and adjust it to the figure shown in Table 1 for the
appropriate boiler size. The location of the manifold pressure
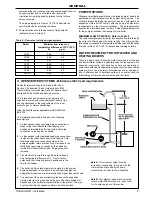
setting adjuster on the gas control is shown in Frames 20 &
21. Remove the dust cover over the adjuster and, using a
small screwdriver, turn the screw beneath clockwise to
increase or anti-clockwise to decrease the pressure. The
pressures quoted in Table 1 are given to facilitate speedy
approximate adjustment of the gas rate.
After setting to the indicated pressure allow the boiler to
operate for about 15 minutes to stabilise then check the gas
rate by reference to a watch and the gas meter. (Before doing
so make certain that any other gas appliances connected to
the same meter are turned off).
The gas rate for each size of boiler is given in Table 1.
A deviation of ± 2% of the quoted figure in the observed gas
rate is of no practical importance but any greater variation
must be adjusted by increasing or decreasing pressure as
required, by small steps, until the correct rate is obtained.
Replace the dust cover when finished, disconnect the gas
pressure gauge and replace the blanking screw in the
manifold setting pressure test point.
PILOT BURNER PRESSURE
The pilot burner flame should envelop the thermocouple
head by 10 - 13 mm (
1/2
").
The position of the pilot burner pressure adjuster on the gas
control is shown in Frames 20 & 21. Turn the adjustment
screw clockwise to decrease, or anti-clockwise to increase,
the flame length.
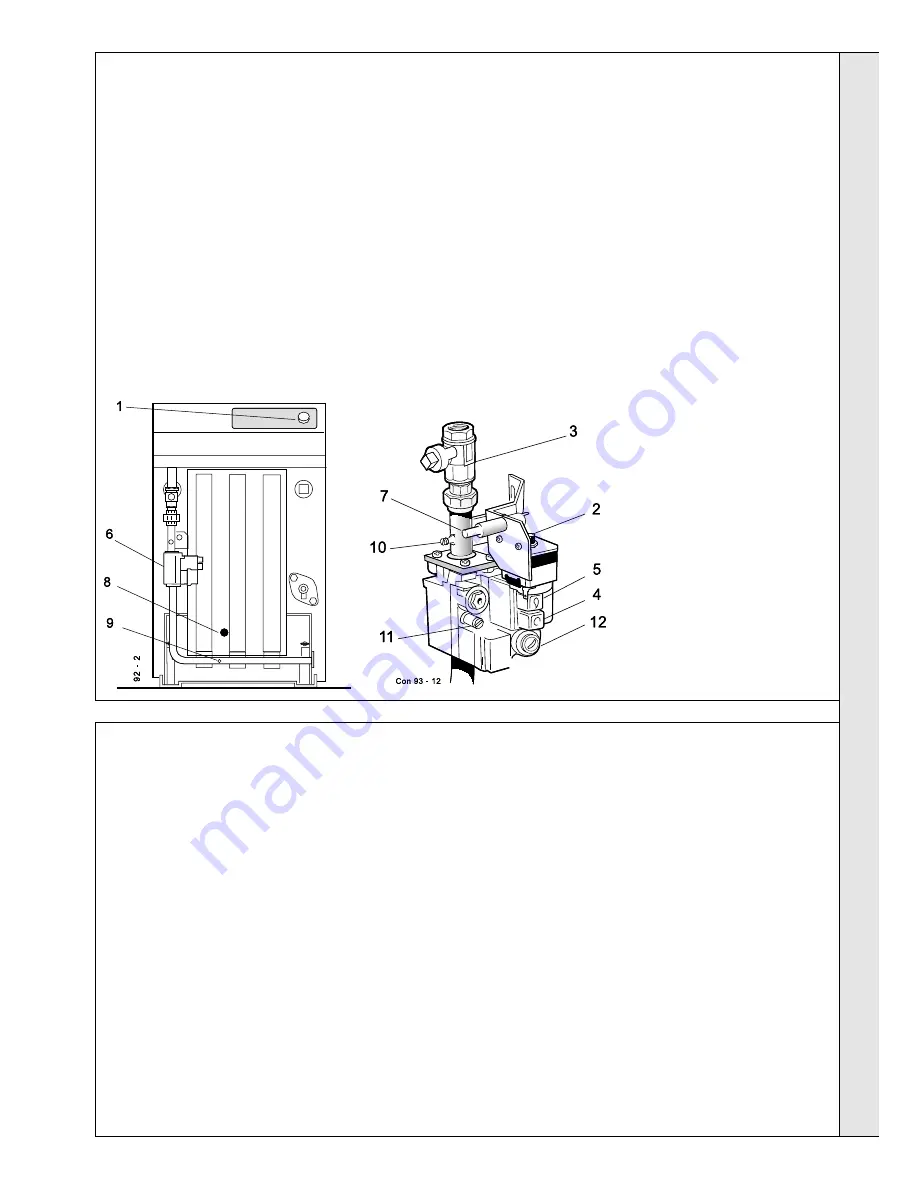
LEGEND
1.
Thermostat knob
2.
Overheat thermostat reset
button
3.
Main gas inlet cock
4.
Stop button
5.
Start button
6.
Gas control valve
7.
Piezo igniter button
8.
Pilot viewing hole
9.
Burner setting pressure test
point
10.
Inlet pressure test point
11.
Pilot burner pressure
setting adjuster
12.
Manifold pressure setting
adjuster
INST
ALLA
TION
1.
Switch off the electricity supply to the boiler.
2.
Press down and release the red button (4) marked * on the
gas control valve (6).
3.
Turn the control thermostat knob (1) anti-clockwise to its
minimum setting at No. 1.
4.
Ensure that the main gas inlet cock (3) is open (groove in
square head in line with the pipe).
5.
Press the overheat thermostat reset button (2).
6.
Push in and retain fully depressed the white button (5),
marked * on the gas control (6). At the same time
repeatedly push in and release the piezo generator knob
(7) to produce a spark at the pilot burner. When the pilot
has lit keep the button (5) on the gas valve fully pushed in
for a further 20 seconds.
7.
If the pilot burner does not remain alight when the button
(5) is released then press and release the red button (4).
Now wait at least 3 minutes and then repeat the lighting
procedure from step 5.
Содержание Concord CX40
Страница 1: ......

