


______________________________________________________________________
Co
Brite
User Manual
14
4
Getting Started
This section contains more in-depth information on how to setup the remote interfaces on a host
PC and basic principles of the laser.
4.1
Connection of Hardware
•
Connect optical fibers to the laser output ports or make sure that no laser radiation can
be uncontrollably emitted by the unit.
•
Connect the power supply of the unit using the supplied Power Cord and switch on the
unit using the switch located at the back of the unit.
•
Wait for the unit to finish initializing. For DX4, the procedure is completed when the
startup screen showing the ID Photonics logo is cleared and the laser parameters are
shown. For DX1, the procedure is completed when the Power LED stops flashing. Now
proceed with Software installation as described below.
4.2
Ethernet connection
This section covers connectivity using Ethernet, skip it if you plan on using USB.
The default IP address is 192.168.0.1, DHCP off. If you plan to connect using the Ethernet
interface make sure the host PC is within the same subnet as the CoBrite Ethernet Interface
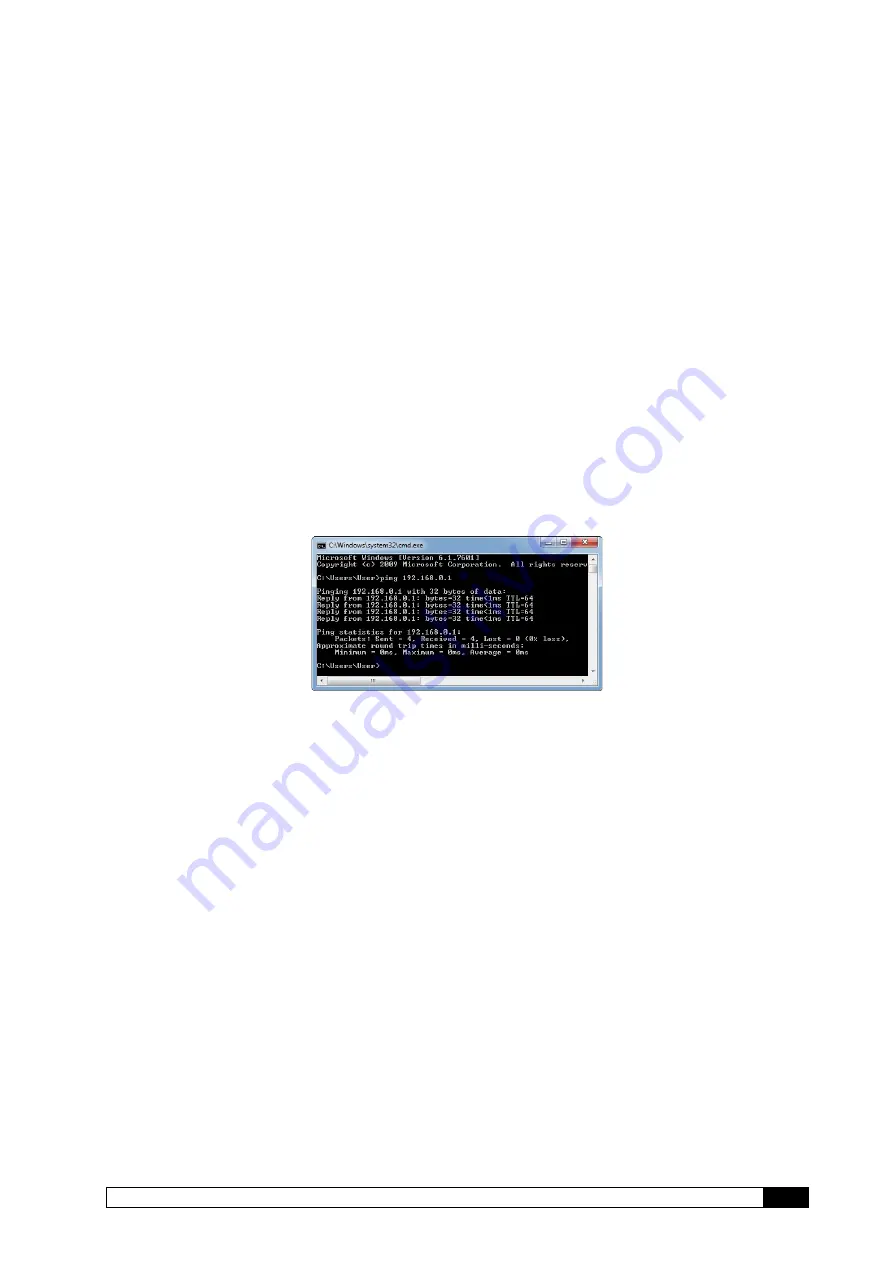
(The PC IP Address is 192.168.0.x then). The connectivity can be tested by opening a
command shell (type “cmd” in windows search field and hit <enter>, a “black window with a
DOS shell should open) and executing the command “ping 192.168.0.1”.
If you do wish to change the IP settings and do not have remote access to the unit follow either
of the following sections depending on the type of chassis:
4.2.1
CoBriteDX
Use the local touch panel and press “Device Setup”. Then press “Network setup” and configure
the interface accordingly. Note that this change will require a reboot (soft reset of the unit) to
become effective.
4.2.2
CoBriteDX2
If you do wish to change the IP settings of the unit, we recommend first connecting via USB and
changing the IP settings via USB connection.
Note that changing the IP address requires the user to be connected with user level 1 or higher.
Send the command “pass IDP” or enter the password “IDP” in the GUI to elevate the user level
to 1. This change will require a reboot (soft reset of the unit) to become effective.
4.2.3
Opening a remote connection via Ethernet
The device supports a session based remote access on Port #2000.
Start the terminal program “putty.exe” supplied with the unit or use any other terminal program.
Set the following parameters in Putty and open the connection:


