


6
MENU SCREEN
6-2
For only the Portable Ten-key type, Portable Simple
key type, or Mobile LCD type transceivers, the user
can open the “Menu” screen using the [Menu] key�
In the “Menu” screen, the items are categorized�
Depending on the presetting, the user can select
various functions and set the transceiver settings in
the “Menu” screen�
L
The “Menu” screen has 2 display types: Icon type
and List type� In this operating guide, the Icon type
is used for the main illustration�
D
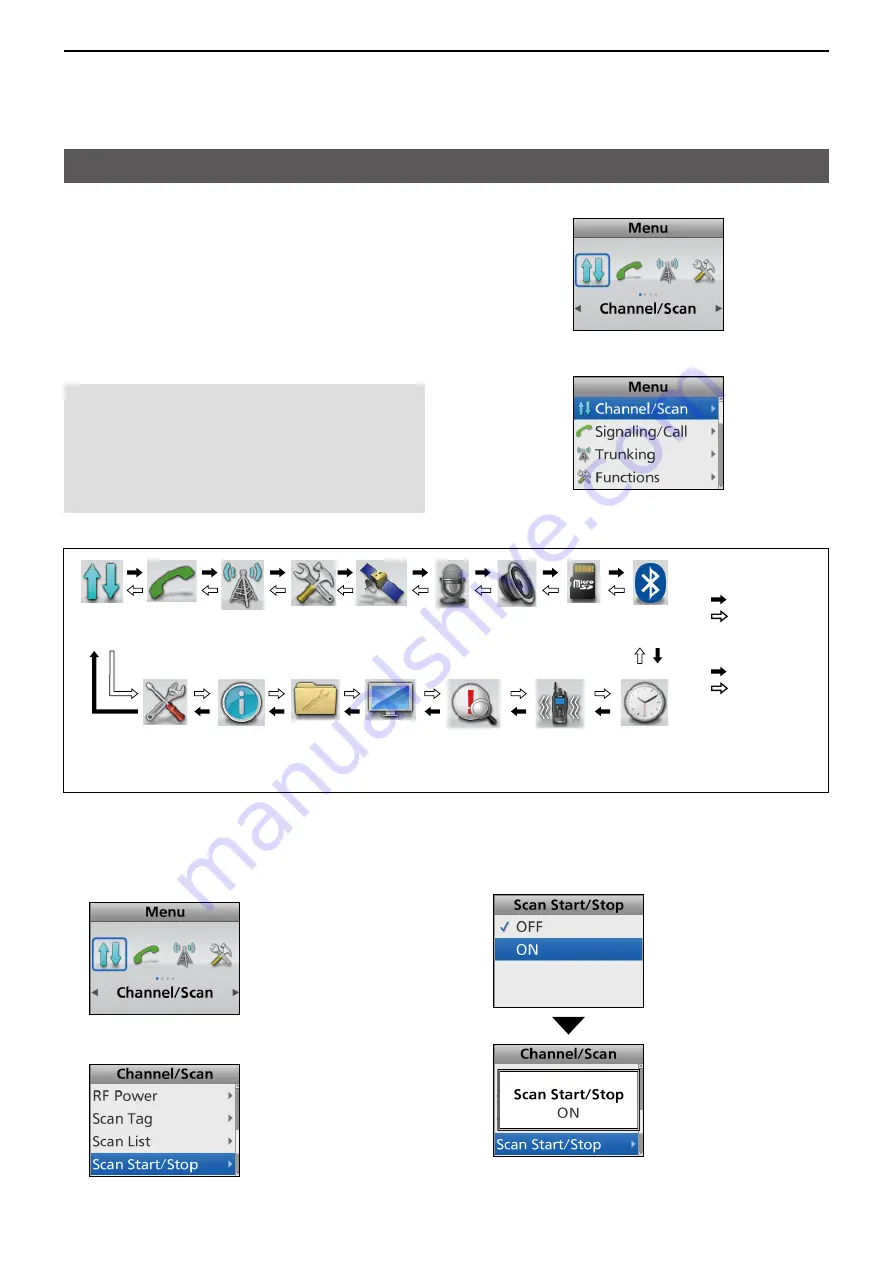
Using the Menu screen
Example: Starting a Scan
1� Push [Menu] to display the Menu screen�
2� Push [Left] or [Right] to select “Channel/Scan,”
then push [OK]�
3� Push [Up] or [Down] to select “Scan Start/Stop,”
then push [OK]�
4� Push [Up] or [Down] to select “ON,” then push
[OK]�
•
The Scan starts�
5� Hold down [Back] for 1 second to return to the
standby screen�
NOTE:
The language displayed on the “Menu”
screen is set to English by default, but a dealer
can change it to another language using the
programming software�
In this case, the item names are displayed on the
screen in the language set by the dealer, instead of
English�
z
Categories
“Menu” screen
Icon type
List type
Menu screen description
Bluetooth
Functions
SD Card
Audio
Setting
Voice Rec
GPS
Channel
/Scan
Trunking
Signaling
/Call
Display
Clock
Vibration
Sensor
Utility
Control
Head
Information
Icon type
: Push [Right]
: Push [Left]
List type
: Push [Down]
: Push [Up]
* May be displayed depending on the transceiver type�
*
*


