background image


57

8


Appendix: Factory Default Setup 

8.1


General  

z

  When HDD is full

Overwrite 

z

 IP 

Address

192.168.1.108 

z

 Subnet 

Mask

255.255.255.0 

z

 Gateway

192.168.1.1 

z

 Domain 

Server

10.1.0.2 

z

 Http 

Port

80 

z

 TCP 

Port

37777 

z

 Channel

z

 Protocol

NONE 

z

 Address

z

 Baud 

rate

9600 

z

 Video 

format

PAL 

8.2


Schedule 

z

 Channel

z

 Week

Week of current set-time  

z

 Start 

time

0:0 

z

 End 

time

24:0 

z

 Record

Yes 

z

 Motion 

Detection

No 

z

 Alarm

No 

8.3


Video  

z

 Channel

z

 Frame 

Rate

25 

z

 Data 

Stream

CBR 

z

 Quality

z

 Compression 

algorithm

H.264 

z

 Resolution

CIF 

z

 Channel 

Display

Yes 

z

 Time 

Display

Yes 

z

  Alarm when video loss occurs

No 

z

  Network Transmission Protocol

Monitor

TCP   Playback

TCP 

8.4


Alarm 

z

 Alarm 

port

z

 Alarm 

type

Normal Open 

z

  Record channel 1

No 

z

  Output port 1

No 

z

 Start 

time

0

z

 End 

time

0

z

 SMS

No 

Содержание F4X5

Страница 1: ...F4X5 Indoor Series Fixed Network Camera User s Manual...

Страница 2: ...CS Camera 13 3 1 1 Suitable lens 13 3 1 2 About Auto Iris Lens 13 3 2 Lens Installation 13 3 3 Remove Lens 14 3 4 Real Panel 14 3 4 1 I O Port RS485 Pin Distribution 15 3 4 2 I O socket 15 3 4 3 Alarm...

Страница 3: ...26 5 4 4 Volume Adjustment 26 5 4 5 Alarm Settings 26 5 4 6 Net Data Flux 27 5 4 7 Full screen 27 5 4 8 Video Zoom 27 5 4 9 PTZ Control 28 5 5 Search 30 5 6 Configure 31 5 6 1 Load and Save Configura...

Страница 4: ...13 Auto Maintenance 50 5 7 14 About 50 5 8 Un install web control 50 6 Pro Enterprise Surveillance System 51 6 1 Log in 51 6 2 Enable Monitor 52 6 3 Add New Device 53 7 Auto Search IP Tool 55 8 Append...

Страница 5: ...ress violent vibration or water splash are allowed during transportation storage and installation 3 Installation Keep upwards Handle with care Do not apply power to the Network Camera before completin...

Страница 6: ...video information and take corresponding measures via client end You can use this Network Camera alone or you can use in a network and configure network client end Please refer to the following layou...

Страница 7: ...30f s NTSC 25f s PAL in all resolutions z Support dual stream function z Support network on site listening broadcast and audio talk z Support hot swap SD card storage compatible with SDHC z Support 80...

Страница 8: ...work Max support 10 users to implement real time network monitor Tcp output capability 75Mbps Udp output capability 85Mbps Video Standard Supported PAL 625 Line 50f s NTSC 525 Line 60f s Encode Capabi...

Страница 9: ...w Motion Detection Take 16 19 pix as a macro unit Support 1620 detection zones Sensitivity value ranges from 0 to 100 Dual stream 1 ch D1 20FPS 1 ch CIF 20FPS Audio Audio Talk Within 200ms Audio Liste...

Страница 10: ...t 1 ch output Local alarm network alarm input 2 ch input Event Management Activate alarm via motion detection or external input Please enable pre record function when activating the alarm Upload video...

Страница 11: ...y to IEEE802 3af standard DC12V power supply RESET Support hardware software Watchdog reset Watch dog max support 35 seconds for HI3510 Port ESD protection Alarm input port Analog video output port 12...

Страница 12: ...d alarm notice remotely Alarm input can connect with various peripheral equipments z Provide prompt or alarm option when encounter video loss z Reserve 9M for you to record and backup audio and video...

Страница 13: ...orts DC servo auto iris lens When you want to connect with auto lens you need to select a suitable lens plug not provided to replace the original one in the lens cable z Dismantle the plug in the lens...

Страница 14: ...an not adjust properly when it is Figure 3 3 3 3 Remove Lens 1 Unplug lens cable from the auto lens shutter connector 2 Turn lens counter clockwise and dismantle it Figure 3 4 3 4 Real Panel The netwo...

Страница 15: ...IP camera to the cable network network indication light becomes red Reset Operation You can click RESET button to restore factory default setup After the power indication light became green press thi...

Страница 16: ...Figure 2 4 In the main menu from configuration to alarm setup you need to set alarm type as arm input normal open See chapter 5 6 5 You can refer to Figure 3 7 for al Figure 3 7 Please refer to Figure...

Страница 17: ...etwork camera please make sure current SD card is not in protection mode otherwise it may result in error loss or card damage Warning Our SD file system is not compatible with MS Windows OS you need t...

Страница 18: ...ndependent IP address for each camera Figure 3 11 z Public Network Install the network camera in the LAN and then you need a PC in the same IP section of the camera Now you can set PPPoE or use specif...

Страница 19: ...19 4 Operation Flow Diagram 4 1 Operation after Your First Time Installation Please follow the operation flows below after you first installation For your reference only...

Страница 20: ...e asking you whether install Network Camera web control webrec cab or not Please click OK you can see system begins auto installation After logged in you can modify default IP address subnet mask and...

Страница 21: ...et See Figure 4 Figure 4 1 Click custom level the interface is shown as below See Figure 4 2 Please set as below z Set initialize and script ActiveX controls not marked as safe as enable or prompt z S...

Страница 22: ...back to Figure 4 1 click sites button system pops up the following dialogue box See Figure 4 3 Figure 4 3 Click advanced button system pops up the following dialogue box See Figure 4 4 Click add butto...

Страница 23: ...23 Figure 4 4...

Страница 24: ...eed to disable user account control and then reboot the device 5 2 Login and Logout Open IE and input Network Camera address in the address column For example if your camera IP is 192 168 1 108 then p...

Страница 25: ...5 3 5 3 Go to Real time Monitor Mode After you logged in the menu bar is shown as below See Figure 5 4 Click 1 to view current video Figure 5 4 Or you can right click mouse and then click real time mo...

Страница 26: ...lder The saved file is named as recording starting time year month day minute second channel number recording end time year month day minute second such as 20060405084519 1 060405084523 dav Captured i...

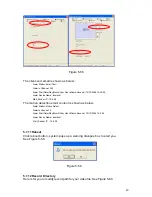
Страница 27: ...v in system32 folder Figure 5 11 Click net data flux you can view current data flux See Figure 5 12 5 4 6 Net Data Flux Figure 5 12 switch to full screen display mode 13 You can select corresponding d...

Страница 28: ...trator for proper rights Left key zoom in Right key zoom out Left key zoom out Right key zoom in SIT is 3D positioning button Around SIT are eight PTZ directions keys Left key turn dark Right key turn...

Страница 29: ...Figure 5 16 Alarm Activation Setup When alarm occurs you can enable PTZ activation See Figure 5 17 Figure 5 17 Page Switch Click the page switch button You can see an interface is shown as in Figure 5...

Страница 30: ...can select one or more files to download to your local PC The playback bar is shown as below See Figure 5 20 1 Save 2 Stop 3 Snapshoot 4 Fast Backward 5 Play 6 Pause 7 Fast play 8 Hide 9 Full screen...

Страница 31: ...5 21 z General z Record z Image z Alarm z Video detection z Network Figure 5 21 5 6 1 Load and Save Configuration 5 6 1 1 Save configuration Click export configuration button in Figure 22 You can save...

Страница 32: ...Ok button and then select file of extension name CFG Now you have updated system setup Figure 5 23 5 6 2 General Click general button the interface is shown as below See Figure 5 24 Here you can sele...

Страница 33: ...t several periods in different channels and on various date See Figure 5 26 Please follow the steps listed below Here we want to set for Sunday z Select channel number from the dropdown z Click the se...

Страница 34: ...other channels z Click Save button system goes back to Figure 5 26 Please click Save button again to exit Figure 5 26 Figure 5 27 5 6 4 Image Click image button the interface is shown as below See Fi...

Страница 35: ...ies different bandwidth and the transmission image qualities are also different Among them level 6 needs the widest bandwidth and can reveal the best image quality Please note you setup here only appl...

Страница 36: ...system can pop up alarm information in local host pc screen z Email Once you enable this function system will send out email to you when alarm occurs z Record select the corresponding record channel...

Страница 37: ...vent type Here you can select detection type motion detection video loss detection and camera mask detection z Channel select the channel to set motion detection z Enable you can draw a before the che...

Страница 38: ...lay the alarm for specified period after alarm completes The value range from 10s to 300s z Prompt system can pop up alarm information in local host screen z Email Once you enable this function system...

Страница 39: ...fixed IP in the internet and there is the DDNS software running in this PC In other words this PC is a DNS domain name server In network DDNS input your PPPoE name you get from you IPS and server IP...

Страница 40: ...or alarm record status that is to say IP camera local end shall be in the corresponding type and has the content Set FTP server address port and dir name See Figure 5 37 FTP Server Figure 5 37 z File...

Страница 41: ...files z Period 1 and period 2 you can set two periods for one each channel z System file name is shown as in Figure 5 38 Figure 5 38 Figure 5 39 5 7 Assistant In the main interface click assistant bu...

Страница 42: ...ish It needs to reboot before modification becomes activated 5 7 2 User Manage Here is for you to manage users and user groups See Figure 5 41 upper level is group level and click to see the whole gro...

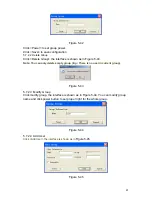
Страница 43: ...43 Note You can only delete empty group E g There is no user in current group Figure 5 43 5 7 2 3 Modify Group Click modify group the interface is shown as in Figure 5 44 You can modify group name and...

Страница 44: ...z Shut down shut down machine z Replay replay recorded video file z Record record video file z Backup backup video file z PTZ Control Control Pan tilt z Account user management z System information c...

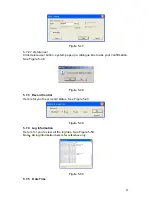
Страница 45: ...sk your confirmation See Figure 5 48 Figure 5 48 5 7 3 Record Control Here is for you to set record status See Figure 5 49 Figure 5 49 5 7 4 Log Information Here is for you to view all the log files S...

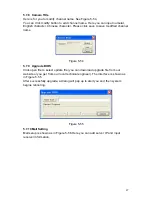
Страница 46: ...e 5 52 Here you can select video priority between real time and fluency You can also enable or disable system audio function In audio touring monitoring you can enable disable auto Interval you can se...

Страница 47: ...l name Figure 5 54 5 7 9 Upgrade BIOS Click open file to select update file you can download upgrade file from our website or you get from our local technical engineer The interface is shown as in Fig...

Страница 48: ...ck modify button the interface is shown as in Figure 5 57 Here you can select current user and modify its IP information Figure 5 57 You can enable send email function in the motion detection interfac...

Страница 49: ...otion detection email content is shown as below Alarm Matter Motion Detect AlarmIn Channel 2 Alarm Start Date Day Month Year Hour Minute Second 12 12 2006 15 5 36 Alarm Device Name localhost Mail_Send...

Страница 50: ...14 About Here is for you to view current version BIOS version device name user name IP See Figure 5 62 Figure 5 62 5 8 Un install web control There are three ways for you to un install web control z...

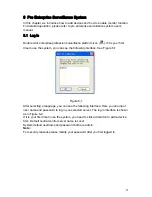
Страница 51: ...ystem you can see the following interface See Figure 6 1 Figure 6 1 After selecting a language you can see the following interface Here you can input user name and password to log in you selected serv...

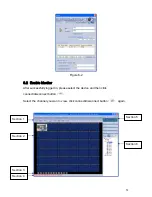
Страница 52: ...or After successfully logged in please select the device and then click connect disconnect button Select the channel you wan to view click connect disconnect button again Section 1 Section 2 Section 3...

Страница 53: ...Please note system only supports one window in full screen Here we recommend resolution 1024 768 Select a device name and then click connect disconnect button you can connect current device to networ...

Страница 54: ...54 Add organization structure Add device Figure 6 5...

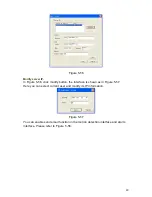
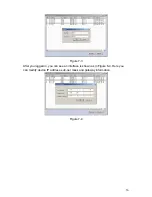
Страница 55: ...view device IP address port sub net mask and gateway information Figure 7 1 In Figure 6 1 double click one IP address you can see a web interface See Figure 6 2 Figure 7 2 In Figure 6 1 select one IP...

Страница 56: ...56 Figure 7 3 After you logged in you can see an interface is shown as in Figure 6 4 Here you can modify device IP address sub net mask and gateway information Figure 7 4...

Страница 57: ...Channel 1 z Week Week of current set time z Start time 0 0 z End time 24 0 z Record Yes z Motion Detection No z Alarm No 8 3 Video z Channel 1 z Frame Rate 25 z Data Stream CBR z Quality 4 z Compress...

Страница 58: ...cord Type Has no relationship with network z Contrast 7 z Brightness 10 z R Gain 32 z B Gain 32 8 8 Assistant setup z Language English z User management There are two levels Administrator User name 88...

Отзывы: