Updating the firmware with the Ethernet port - Service only
Note: The drive uses a limited version of FTP protocol to communicate on the Ethernet interface. Use a simple, command-line FTP session, such as the DOS command
line, to communicate with the drive.
1. Obtain the current drive firmware from the web.
2. Connect an Ethernet patch cable to the drive's Ethernet interface and to a computer. To meet electromagnetic immunity requirements, a shielded Ethernet cable is
required.
3. Create an FTP session between the drive and the computer. The drive 's IP address: 169.254.0.3
4. At the user prompt, type
guest
and press Enter.
5. At the password prompt, press Enter. No response is needed.
6. Type
bin
to set the communication mode to binary.
7. Type
put <firmware name>
to transfer the firmware to the drive. Replace
<firmware name>
with the actual firmware name. The drive resets automatically
when the transfer is complete and the FTP session closes.
8. After the drive resets, the new firmware is loaded on the drive.
9. Remove the Ethernet patch cable from the drive's Ethernet interface and the computer.
Maintenance functions
Refer to this section for information on diagnosing and maintaining your tape drives.
The drive can:
Run diagnostics
Test write and read functions
Test a suspect tape cartridge
Update firmware
Complete other diagnostic and maintenance functions
The drive must be in Maintenance mode to complete these functions.
Attention: Maintenance functions cannot be run concurrently with read or write operations. While in maintenance mode, the tape drive does not accept host interface
commands from the server. The tape drive does accept LDI or RS-422 commands.
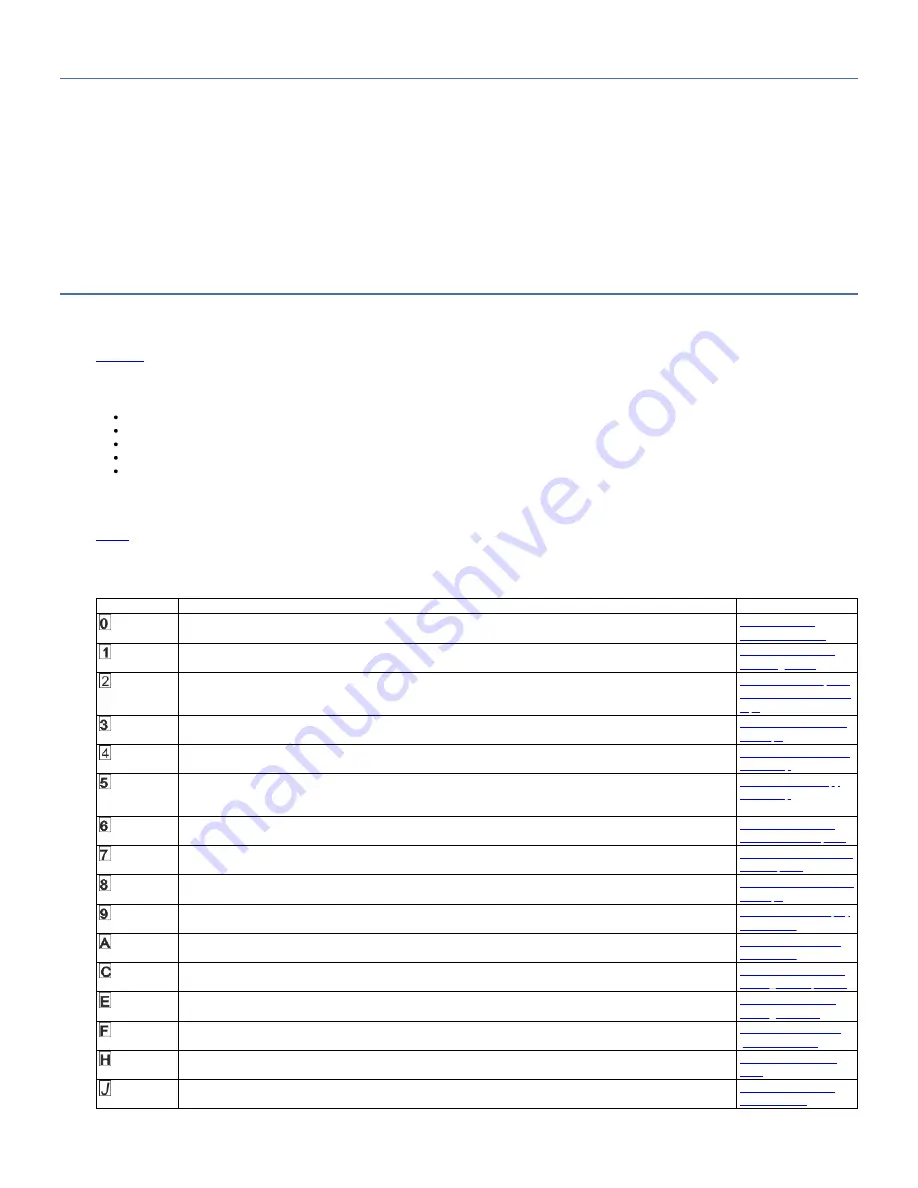
describes each diagnostic and maintenance function that the drive can complete, gives the function code that appears on the Single-character Display (SCD), and
directs you to the instructions for completing the function. Use a customer-supplied scratch (blank) data cartridge for diagnostic testing. The diagnostic and maintenance
functions are not supported on the WORM and partitioned data tape cartridges.
Table 1. Diagnostic and maintenance functions
Function Code
Diagnostic or Maintenance Function
Instructions Location
Exit Maintenance Mode: Causes the drive to become available for reading and writing data.
Function code 0:
Maintenance mode
Run Drive Diagnostics: Runs tests to determine whether the drive can properly load and unload cartridges, and read and
write data.
Function code 1: Run
drive diagnostics
Update Tape Drive Firmware from FMR Tape: Loads updated firmware from a field microcode replacement (FMR) tape.
Function code 2: Update
drive firmware from FMR
tape
Create FMR Tape: Copies its field microcode replacement (FMR) data to a customer-supplied scratch (blank) data cartridge.
Function code 3: Create
FMR tape
Force a Drive Dump: Completes a memory dump of data (also known as saving a microcode trace).
Function code 4: Force a
drive dump
Copy Drive Dump: Copies data from a drive memory dump (captured by using Function Code 4) to the beginning of a
customer-supplied scratch (blank) data cartridge, copies a drive memory dump to flash memory, or erases a memory dump
from flash memory.
Function code 5: Copy
drive dump
Run Host Interface Wrap Test: Checks the circuitry from and to the connector.
Function code 6: Run
host interface wrap test
Run RS-422 Wrap Test: This test causes the drive to run a check of the circuitry and connector for the RS-422 interface.
Function code 7: Run RS-
422 wrap test
Unmake FMR Tape: Erases the FMR data on a customer-supplied scratch (blank) data cartridge and rewrite the cartridge
memory on the tape. This action turns the cartridge into a valid customer-supplied scratch data cartridge.
Function code 8: Unmake
FMR tape
Display Error Code Log: Displays the last 10 error codes, one at a time (the codes are ordered; the most recent is presented
first and the oldest 10th) is presented last).
Function code 9: Display
error code log
Clear Error Code Log: Erases the contents of the error code log.
Function code A: Clear
error code log
Insert Cartridge into Tape Drive: This function cannot be selected by itself, but is a part of other maintenance functions
(such as Run Tape Drive Diagnostics and Create FMR Tape) that require a tape cartridge to be loaded.
Function code C: Insert
cartridge into tape drive
Test Cartridge & Media: Completes tests to ensure that a suspect cartridge and its magnetic tape are acceptable.
Function code E: Test
cartridge & media
Write Performance Test: Completes tests to ensure that the drive can read from and write to tape.
Function code F: Write
performance test
Test Head: Completes tests to ensure that the tape drive's head and tape-carriage mechanics are working correctly.
Fast Read/Write Test: Completes tests to ensure that the drive can read from and write to tape.
Function code J: Fast
read/write test
IBM TS22xx - TS2290, TS2280, and TS2270
93
Содержание TS2290
Страница 1: ...IBM TS22xx TS2290 TS2280 and TS2270 IBM...


