4.
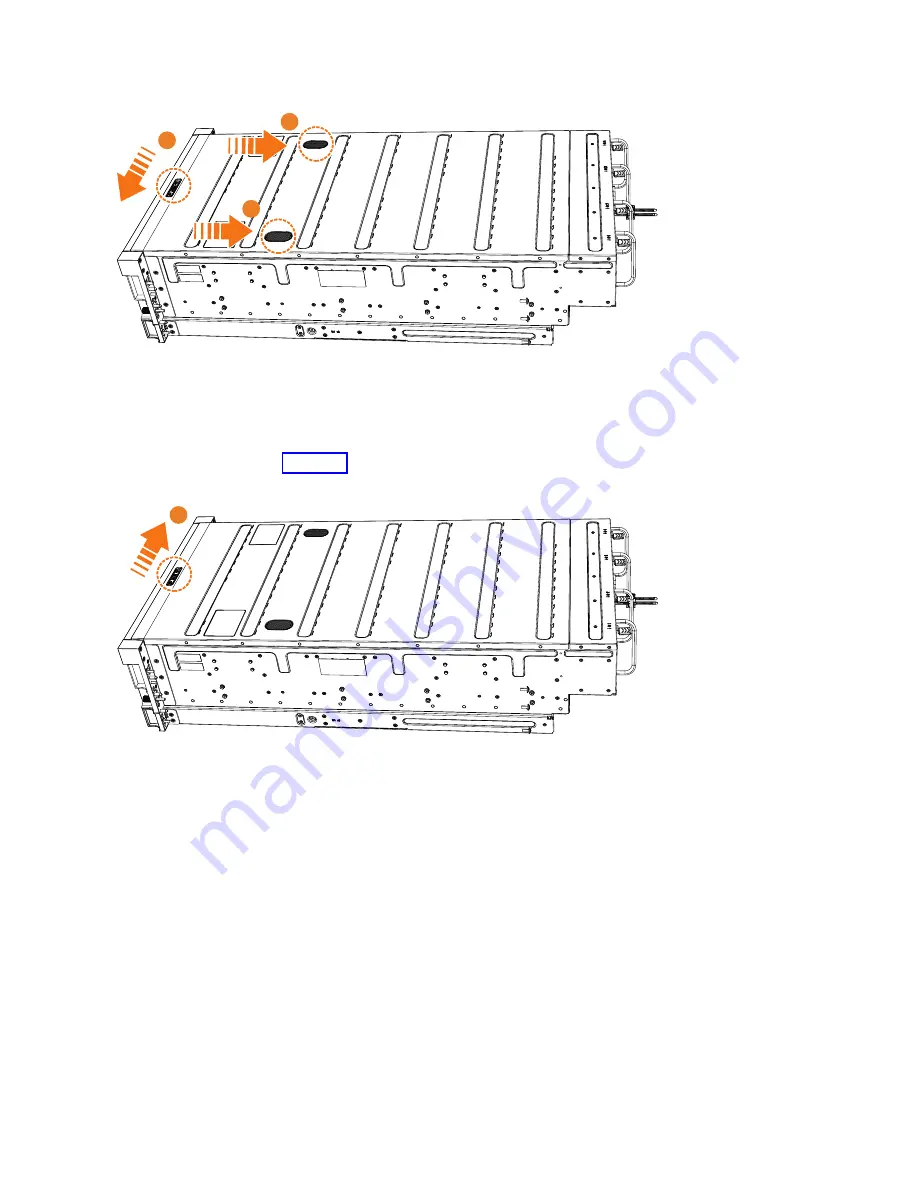
Verify that the cover correctly engages the cover release latch and all of the
inset tabs on the expansion enclosure.
5.
Lock the cover into position by sliding the release lever
▌4▐
, as shown in
Installing or replacing a drive: 2076-92F
Use the following procedure to install a drive for the first time or to replace a
faulty drive in a 2076-92F expansion enclosure with a new one received from FRU
stock.
Before you begin
Important:
v
You can replace a drive assembly without powering off the expansion enclosure.
However, to maintain operating temperature, do not keep the cover off an
operational enclosure for more than 15 minutes. The reduction in airflow
through the enclosure might cause the enclosure or its components to shut down
to protect from overheating.
v
Ensure that the drive that you are replacing is not a spare or a member of an
array. The drive status is shown in Pools > Internal Storage in the management
GUI. If the drive is a member of an array, follow the fix procedures in the
2
svc00985
3
3
Figure 59. Replacing the 2076-92F top cover
4
svc01046
Figure 60. Locking the top cover
Chapter 2. Installing the Storwize V7000 Gen2 and Storwize V7000 Gen2+ hardware
69
Содержание StorVize V7000 Gen2
Страница 8: ...viii Storwize V7000 Gen2 and Gen2 Quick Installation Guide ...
Страница 24: ...xxiv Storwize V7000 Gen2 and Gen2 Quick Installation Guide ...
Страница 36: ...12 Storwize V7000 Gen2 and Gen2 Quick Installation Guide ...
Страница 166: ...142 Storwize V7000 Gen2 and Gen2 Quick Installation Guide ...
Страница 174: ...150 Storwize V7000 Gen2 and Gen2 Quick Installation Guide ...
Страница 176: ...152 Storwize V7000 Gen2 and Gen2 Quick Installation Guide ...
Страница 184: ...160 Storwize V7000 Gen2 and Gen2 Quick Installation Guide ...
Страница 187: ......
Страница 188: ...IBM Printed in USA GC27 6500 08 ...


