


1.
Locate the connector at the end of the SAS cable that is to be removed from the
expansion enclosure.
2.
Grasp the connector by its blue tag. Pull the tag.
3.
Release the connector and slide it out of the SAS port.
4.
Repeat steps 2 and 3 on the other end of the SAS cable.
Replacing a SAS cable
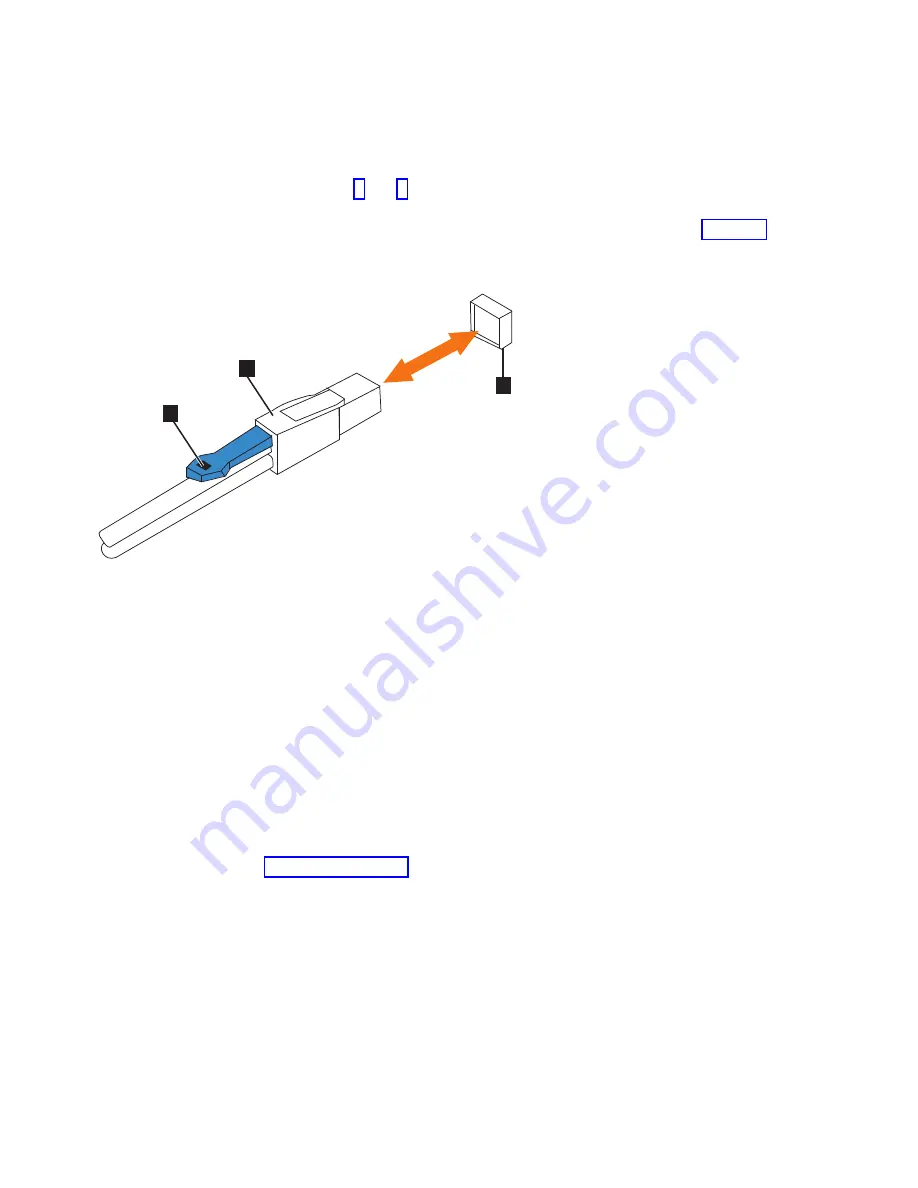
5.
Ensure that the SAS connector is oriented correctly, as shown in Figure 78. The
blue tab must face towards the top of the enclosure canister.
6.
Insert the SAS cable into the SAS port until you hear or feel a click. When the
cable is successfully inserted; you cannot disconnect the cable without pulling
on the blue tag.
Connecting to a Storwize V7000 node
7.
Connect the SAS cable to the SAS port with blue tab above the connector (that
is, facing towards the top of the node).
You will hear or feel a click when the cable is successfully inserted; you cannot
disconnect the cable without pulling on the blue tag.
8.
Route the SAS cables through the cable management arms, as shown in
Figure 79 on page 87.
3
svc00988
2
1
▌1▐
Blue pull tab
▌2▐
SAS cable
▌3▐
SAS port
Figure 78. Correct orientation for SAS cable connectors
86
Storwize V7000 Gen2 and Gen2+: Quick Installation Guide
Содержание StorVize V7000 Gen2
Страница 8: ...viii Storwize V7000 Gen2 and Gen2 Quick Installation Guide ...
Страница 24: ...xxiv Storwize V7000 Gen2 and Gen2 Quick Installation Guide ...
Страница 36: ...12 Storwize V7000 Gen2 and Gen2 Quick Installation Guide ...
Страница 166: ...142 Storwize V7000 Gen2 and Gen2 Quick Installation Guide ...
Страница 174: ...150 Storwize V7000 Gen2 and Gen2 Quick Installation Guide ...
Страница 176: ...152 Storwize V7000 Gen2 and Gen2 Quick Installation Guide ...
Страница 184: ...160 Storwize V7000 Gen2 and Gen2 Quick Installation Guide ...
Страница 187: ......
Страница 188: ...IBM Printed in USA GC27 6500 08 ...


