IBM RS/6000 7024 E Series Скачать руководство пользователя страница 90

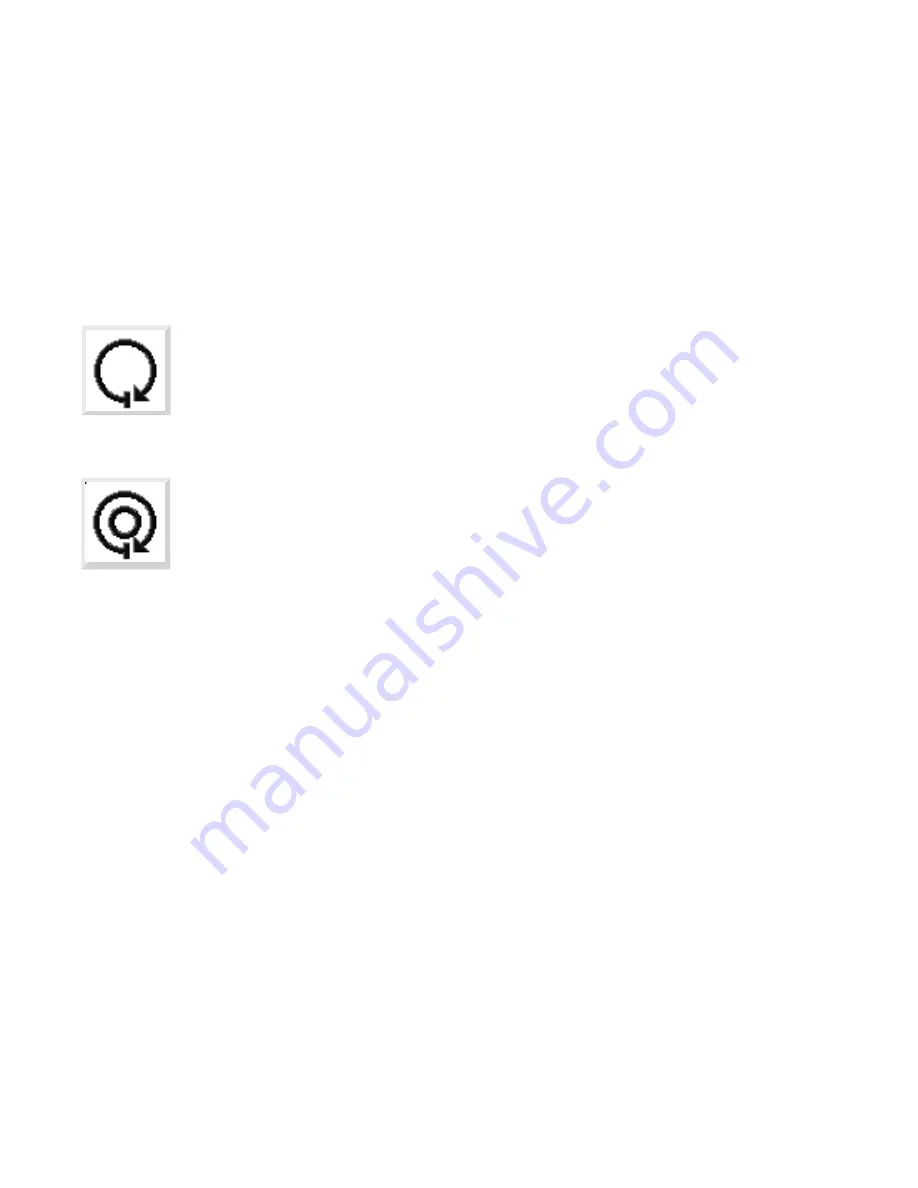
To begin the test, select the Test object.

The Loop Test object, when selected, allows the memory to be tested in a
continuous loop. The test can be stopped by pressing the S key.

If a problem is detected during testing, an error code similar to the one below will be
displayed under the object for the failing device.

00020000


If an error code appears, make a written record of the error code.

5-6

Service Guide 


Содержание RS/6000 7024 E Series

Страница 1: ...RS 6000 7024 E Series IBM Service Guide SA38 0502 03...

Страница 2: ...nd or the program s described in this publication at any time without notice It is possible that this publication may contain reference to or information about products machines and programs programmi...

Страница 3: ...ent xii United Kingdom Telecommunications Safety Requirements xii Avis de conformit aux normes du minist re des Communications du Canada xii Canadian Department of Communications Compliance Statement...

Страница 4: ...ities 5 19 Chapter 6 Firmware 6 1 Boot Block 6 1 Firmware Core 6 2 Virtual Disk 6 2 Password Design Description 6 6 Firmware Flash Update Design 6 7 Power On Self Test POST 6 9 Post Indicators 6 11 Ch...

Страница 5: ...Power Cables 8 5 Appendix A Firmware Checkpoint Three Digit Codes A 1 Index X 1 Preface v...

Страница 6: ...vi Service Guide...

Страница 7: ...be determined by turning the equipment off and on the user is encouraged to try to correct the interference by one or more of the following measures Reorient or relocate the receiving antenna Increase...

Страница 8: ...ces International Electrotechnical Commission IEC Statement This product has been designed and built to comply with IEC Standard 950 United Kingdom Telecommunications Safety Requirements This equipmen...

Страница 9: ...VCCI Statement The following is a summary of the VCCI Japanese statement in the box above This equipment is in the Class 2 category information equipment to be used in a residential area or an adjacen...

Страница 10: ...ist berechtigt in bereinstimmung mit dem deutschen EMVG vom 9 Nov 92 das EG Konformit tszeichen zu f hren Der Aussteller der Konformit tserkl rung ist die IBM Germany Dieses Ger t erf llt die Bedingun...

Страница 11: ...connectors or by unauthorized changes or modifications to this equipment Unauthorized changes or modifications could void the user s authority to operate the equipment This device complies with Part 1...

Страница 12: ...rface adapters supplied by the manufacturer do not use or contain excessive voltages An excessive voltage is one which exceeds 70 7 V peak ac or 120 V dc They interface with this equipment using Safe...

Страница 13: ...ms to the standards set by the Voluntary Control Council For Interference by Data Processing Equipment and Electronic Office Machines aimed at preventing radio interference in commercial and or indust...

Страница 14: ...nde Bestimmung nach dem EMVG Ger te d rfen an Orten f r die sie nicht ausreichend entst rt sind nur mit besonderer Genehmigung des Bundesministers f r Post und Telekommunikation oder des Bundesamtes f...

Страница 15: ...Before installing or removing signal cables ensure that the power cables for the system unit and all attached devices are unplugged When adding or removing any additional devices to or from the syste...

Страница 16: ...DANGER To prevent electrical shock hazard disconnect the power cable from the electrical outlet before relocating the system xvi Service Guide...

Страница 17: ...to the requirements of the International Electrotechnical Commission IEC 825 1st edition 1984 and CENELEC EN 60 825 1991 for Class 1 laser products CAUTION A class 3 laser is contained in the device D...

Страница 18: ...xviii Service Guide...

Страница 19: ...roduct Related Publications The following publications are available for purchase The IBM RS 6000 7024 E Series User s Guide contains information to help users set up install options configure modify...

Страница 20: ...xx Service Guide...

Страница 21: ...Chapter 1 Reference Information System Unit Locations Front View with Door Open Chapter 1 Reference Information 1 1...

Страница 22: ...Rear View 1 2 Service Guide...

Страница 23: ...Side View with Covers Removed Chapter 1 Reference Information 1 3...

Страница 24: ...Recommended SCSI IDs 1 4 Service Guide...

Страница 25: ...y P1 and P2 J12 Power Supply J13 Parallel Port Connector J14 16 bit SCSI Connector 16 bit and 8 Bit SCSI connectors are mutally exclusive J15 8 bit SCSI Connector 8 bit and 16 Bit SCSI connectors are...

Страница 26: ...PCI Adapter Connectors J28 through J30 ISA Adapter Connectors J31 Disk Drive LED Connector J32 Power LED Connector J33 Speaker Connector J34 Fan Connector J38 Power Supply J44 Hardware Service Proces...

Страница 27: ...es Width 315 mm 12 4 inches Weight Configuration dependent Operating Environment Class B Temperature 16 to 32 C 60 to 90 F Humidity 8 to 80 noncondensing Maximum Altitude 2135 m 7000 feet Power Source...

Страница 28: ...tandby Power is on even though the system unit is not powered on or running When the system unit is turned on by pressing the power switch the power LED lights steadily If the operating system is load...

Страница 29: ...the hard disk drives within the server are being used The disk drive LED also provides basic system diagnostic information If no memory can be found as the system boots the disk drive LED lights and t...

Страница 30: ...125 V For 230 V operation in the United States use a UL listed cable set consisting of a minimum 18 AWG Type SVT or SJT three conductor cable a maximum of 15 feet in length and a tandem blade groundi...

Страница 31: ...t 2 Check the covers for proper fit to the system unit They should be in place and secure 3 Gently rock the system unit from side to side to determine if it is steady 4 Set the power switch of the sys...

Страница 32: ...ed power cable c With the external power cable connected to the device check for 0 1 ohm or less resistance between the ground lug on the external power cable the metal frame of the device 13 Install...

Страница 33: ...he Fast Path MAP in the IBM RS 6000 Diagnostic Information for Multiple Bus Systems You do not have a symptom Go to MAP 0020 in the IBM RS 6000 Diagnostic Information for Multiple Bus Systems You have...

Страница 34: ...t Error Codes 2 3 System Stops With an 8 Digit Number Displayed 2 3 There Appears to be a Display Problem Distortion Blurring Etc 2 3 Power and Cooling Problems 2 3 Intermittent Memory Problems 2 4 Ot...

Страница 35: ...Number Displayed The system stops with an 8 Digit Error Code displayed when booting 1 Record the 8 Digit Error Code 2 Look up 8 Digit Error in Chapter 3 Error Code to FRU Index and do the listed actio...

Страница 36: ...be found 1 If there is only one memory module installed replace it 2 If there is more than one memory module installed go to MAP 1540 Minimum Configuration on page 2 18 The system stops after issuing...

Страница 37: ...password being entered or the system login prompt is displayed when booting in service mode The keyboard or it s controller may be faulty 1 If entering the password from the keyboard which is attached...

Страница 38: ...nd Cable Information for Multiple Bus Systems Flashing 888 Flashing 888 in Operator Panel Display Go to the Fast Path MAP in the IBM RS 6000 Diagnostic Information for Multiple Bus Systems You Cannot...

Страница 39: ...ing a problem Go to Step 1020 1 Step 1020 1 The following steps analyze a failure to load the diagnostic programs Note You will be asked questions regarding whether the system produced a beep or beeps...

Страница 40: ...error code s then go to Step 1020 3 on page 2 10 The system login prompt is displayed You may not have pressed the correct key or you may not have pressed the key soon enough when you were to indicate...

Страница 41: ...Go to MAP 1540 Minimum Configuration on page 2 18 The diagnostics are loaded and there was no beep heard from the system unit during the IPL sequence Record error code M0SPK001 then go to Step 1020 3...

Страница 42: ...nformation The Service Hints service aid The CEREADME file by using the Service Hints service aid 2 Perform the action listed Keyboard Type Action Type 101 keyboard U S Identify by the size of the Ent...

Страница 43: ...r is logged check the time stamp If the error was logged during the current boot attempt record it Look up the error in the Error Code to FRU Index and do the listed action If no recent error is logge...

Страница 44: ...power cables for the system unit and all attached devices are unplugged When adding or removing any additional devices to or from the system ensure that the power cables for those devices are unplugge...

Страница 45: ...LED does not stay on Go to Step 1520 3 on page 2 14 Step 1520 2 1 Turn the power off 2 Check that the external power cable to the system unit has continuity 3 Check that the power outlet has been wire...

Страница 46: ...lar tool short the two pins together for a few seconds Does the system power up while you short the pins You will hear the fan and see the power good LED turn on When you release the short the system...

Страница 47: ...ctor J37 Go to Step 1520 6 YES Go to Map 0410 Repair Checkout in the IBM RS 6000 Diagnostic Information for Multiple Bus Systems Step 1520 6 Turn the power on Does the fan in the power supply turn on...

Страница 48: ...5 Remove the CPU card 6 Unplug the power cables from all the SCSI devices 7 Unplug all the fans except the fan in the power supply 8 Connect the system unit power cable to the wall outlet 9 Turn the...

Страница 49: ...Install or connect one of the parts in the list 4 Connect the system unit power cable to the wall outlet 5 Turn the power on Does the fan in the power supply turn on and the power good LED come on and...

Страница 50: ...instruct you to reduce the system to one or more of the following configurations System board CPU card 1 memory module If no failure is detected the green power LED will be on and the system will bee...

Страница 51: ...POST indicators are displayed and before the long beep press the F5 key Graphics or number 5 key ASCII terminal 6 Wait until the Please define the system console screen is displayed or the system appe...

Страница 52: ...he SCSI connector on the system board 6 Disconnect the diskette drive cable from the diskette drive connector on the system board 7 Disconnect the serial and parallel port cables from the rear of the...

Страница 53: ...you determined above 3 Turn the power on Did the system beep twice NO Reinstall the original FRU Repeat the FRU replacement steps until the defective FRU is identified or all the FRUs have been excha...

Страница 54: ...he memory modules are installed and tested After all the memory modules are installed and tested turn the power to off Go to Step 1540 7 on page 2 24 Step 1540 5 The failure may be caused by the last...

Страница 55: ...ice NO Reinstall the original FRU Repeat this step until the defective FRU is identified or all the FRUs have been exchanged If the symptom did not change and all the FRUs have been exchanged call you...

Страница 56: ...vice processor in Step 1540 2 on page 2 20 go to Step 1540 8 on page 2 25 1 Turn the power off 2 Install the service processor 3 Turn the power on 4 Wait until the system beeps twice or the system app...

Страница 57: ...that have not been exchanged 1 Go to the Problem Determination Procedures test procedures for the device attached to the SIO serial port or the display attached to the graphics adapter and test those...

Страница 58: ...the FRUs remaining in the system unit is defective In the following order exchange the FRUs that have not been exchanged 1 System board 2 CPU card 3 Last SCSI device connected CD ROM drive tape drive...

Страница 59: ...em appears to stop Is the Please define the System Console screen displayed NO One of the FRUs remaining in the system is defective In the following order exchange the FRUs that have not been exchange...

Страница 60: ...and before the long beep press the F5 key on a direct attached keyboard or the number 5 key on a ASCII terminal keyboard 6 Wait until the Please define the System Console screen is displayed or the sy...

Страница 61: ...have been disconnected If all the devices and cables have been removed then one of the FRUs remaining in the system unit is defective To test each FRU exchange the FRUs in the following order 1 Adapt...

Страница 62: ...ll be the system console do not disconnect the keyboard 4 Turn the power on 5 Insert the diagnostic CD ROM disc into the CD ROM drive 6 After the POST indicators are displayed and before the long beep...

Страница 63: ...item on the list and test all the adapters and devices Did you get an SRN NO Go to Step 1540 16 on page 2 32 YES Go to Step 1540 15 Step 1540 15 Look at the FRU part numbers associated with the SRN H...

Страница 64: ...or device you are installing ISA or PCI will not configure or causes the system to stop replace the adapter or device Test each adapter or device after installing it Repeat this step until all the ada...

Страница 65: ...digit Fxx code is not in the following table and an action is still required go to MAP 1540 Minimum Configuration on page 2 18 See Appendix A Firmware Checkpoint Three Digit Codes on page A 1 for the...

Страница 66: ...ew system board F4F Environmental condition 40200031 40200041 system board memory over temprature EPOW register could not be cleared System board swap old VPD module to new system board F51 Environmen...

Страница 67: ...ould not be cleared 1 CPU card 2 Power supply 3 System board swap old VPD module to new system board 4 Service processor if present 00016010 System VPD access failure 1 System board swap old VPD modul...

Страница 68: ...gement Services to test the memory 000210y0 An error occurred during the memory test y represents memory module slot number Memory module slot number y y 1 to 8 is bad or unsupported 00031100 The keyb...

Страница 69: ...ental condition 40200021 CPU card over temperature EPOW register successfully cleared 1 Check for cool air flow obstructions to the system 2 Replace CPU card if the problem persists 3 System board swa...

Страница 70: ...14 Bad service processor firmware Use service processor firmware diskette to re program firmware 00070015 Bad service processor VPD 1 Service processor if present 2 System board swap old VPD module on...

Страница 71: ...ller ID 0 1st SCSI controller card in slot 3 ID 1 yy See Table 3 4 on page 3 16 i SCSI ID 0 to 9 or A through F F normally indicates the controller 1 Ensure that the controller and each device on the...

Страница 72: ...sure SCSI bus terminator is installed properly 3 Ensure SCSI cable connector are securely connected and not damaged 4 SCSI device as identified by i If the device is not the CD ROM drive remove the de...

Страница 73: ...SCSI cable connector are securely connected and not damaged 4 SCSI Disk Device connected to SCSI adapter c and assigned SCSI ID i 0211cyyi SCSI tape error c SCSI Controller ID assigned by search order...

Страница 74: ...nnected to SCSI adapter c and assigned SCSI ID i 0243025y The Graphics Controller DAC Frame Buffer Graphics Function test failed Graphic PCI card in slot y 40100005 A loss of system power detected Pos...

Страница 75: ...ling problem check system fans 40200021 A CPU temperature warning detected Over temperature on CPU card 40200023 A critical CPU temperature condition detected Critical temperature on CPU card 40200031...

Страница 76: ...e Processor SP Menus 2 Verify that the Operating System OS Heartbeat Utility is installed and has been activated 3 Check for errors or unusual conditions that might prevent the OS from reporting Heart...

Страница 77: ...id firmware update file could not be located on the current drive Firmware update cancelled 1 Specify the correct drive and path name for firmware file 2 Obtain new firmware file 3 Retry operation 800...

Страница 78: ...ufficient memory 1 Run memory test replace defective memory module 2 This system has insufficient memory for this operation 91001200 Remote IPL error Incorrect IP format for client IP address Change U...

Страница 79: ...spond to a keyboard entry Type 102 keyboard M0KBD003 The system did not respond to a keyboard entry Kanji type keyboard M0MC0001 A machine check occurred Go to MAP 1540 M0MEM000 No good memory could b...

Страница 80: ...7 Write protected 59 Media error 60 Hardware error 61 Unit attention 62 Blank check 63 Command abort 64 Busy 65 Media 66 Script error 67 Invalid address 68 Media changed 69 Device reset 70 Format in p...

Страница 81: ...device no reset 90 Time out error 91 SCSI no audio 92 SCSI incompatible media 93 Tape requested actual block size mismatch normally 94 Filemark or setmark read on tape device 95 Wide data transfer da...

Страница 82: ...3 18 Service Guide...

Страница 83: ...ting from the custom boot list by pressing the F6 key on a directly attached keyboard or the number 6 key on an ASCII terminal The procedure for booting from the devices listed in the custom boot list...

Страница 84: ...an ASCII terminal selects a service mode boot from the custom boot list which is the boot list defined using the System Management Services described in Chapter 5 System Management Services on page 5...

Страница 85: ...s described beginning in ASCII Terminal System Management Services Programs on page 5 16 To start the programs 1 Turn on or shutdown and restart the system 2 When the first screen appears press the F1...

Страница 86: ...ppears The System Management Services screen contains the following objects Start Up This function allows you to define a custom boot list which defines the sequence in which devices are searched by t...

Страница 87: ...formation about your system and update system programs Exit Returns you to the previous screen To select an object use the arrow keys to highlight an object and then press Enter or the Spacebar To lea...

Страница 88: ...es you to define a custom boot list or reset default list which determines the order in which devices are searched by the firmware for a bootable image The screen may show the following objects Disket...

Страница 89: ...ive CD ROM drive Hard disk drive Tape drive Network if installed If your system has more devices than shown in the list their objects will be displayed after those in the default sequence Attention If...

Страница 90: ...ested in a continuous loop The test can be stopped by pressing the S key If a problem is detected during testing an error code similar to the one below will be displayed under the object for the faili...

Страница 91: ...to perform various tasks and view additional information about your system The following screen appears with objects presented for your selection The following describes the objects on this screen Ch...

Страница 92: ...r on password and wanted to remove it select the following object Note If you forget your password you will have to remove the battery for at least 30 seconds to disable the password See Battery on pa...

Страница 93: ...s needed A Firmware Update diskette will be made available to you when such an update is needed Firmware updates take several minutes and you need a DOS formatted 1 44MB diskette The procedure for upd...

Страница 94: ...ecover from system problems 3 When the backup is complete insert the Service Processor Firmware Update diskette The service processor firmware will be updated and the system will automatically restart...

Страница 95: ...rs The System Management Services screen appears System Management Services Select one 1 Select Boot Devices 2 Test the Computer 3 Utilities 4 Select Language Enter Esc Quit F1 Help F3 Reboot F9 Start...

Страница 96: ...quence in which devices are read at startup time You also can set or change a particular startup device or specify the device the system is to start from Boot Sequence Selection 1 Display Current Sett...

Страница 97: ...1 Help Test Memory Spacebar Choose Test Memory F4 Parm Setup F6 Execute F9 Display Error Log When you have selected the devices you want to test press F4 to set the test requirements such as the numbe...

Страница 98: ...sword 2 Set Privileged Access Password 3 Enable Unattended Start Mode 4 Disable Unattended Start Mode 5 Remove Power On Password 6 Remove Privileged Access Password 7 Update System Firmware 8 Display...

Страница 99: ...have been recorded in previous tests Remote Initial Program Load Setup allows you to view parameters Update Service Processor Firmware enables you to make changes to the service processor firmware of...

Страница 100: ...ement Services screen appears System Management Services Select one 1 Select Boot Devices 2 Test the Computer 3 Utilities 4 Select Language Enter q Quit h Help r Reboot s Start OS p prev item n next i...

Страница 101: ...ence in which devices are read at startup time You also can set or change a particular startup device or specify the device the system is to start from Boot Sequence Selection 1 Display Current Settin...

Страница 102: ...t follows Select Device to Test q Quit h Help Test Memory Spacebar Choose p Parm Setup E Execute 1 Test Memory d Display Error Log When you have selected the devices you want to test press p to set th...

Страница 103: ...Access Password 3 Enable Unattended Start Mode 4 Disable Unattended Start Mode 5 Remove Power On Password 6 Remove Privileged Access Password 7 Update System Firmware 8 Display Error Log 9 Remote Ini...

Страница 104: ...what problems have been recorded in previous tests Remote Initial Program Load Setup allows you to view parameters Update Service Processor Firmware enables you to make these changes to the system pro...

Страница 105: ...on is executed which is data A program check interrupt occurs where another branch is encountered followed by a program check The system has essentially come to a STOP with no signs of life no beep no...

Страница 106: ...flow see Load the Virtual Disk item 3g on page 6 3 If a ASCII terminal is present there is a window with the error code 5 Copy the compressed firmware code into the larger amount of good RAM and unco...

Страница 107: ...evious icons will get re displayed until the next boot of the system j One Long Beep on the Speaker k If the Power On Password POP or the Privileged Access Password PAP option s are in effect then the...

Страница 108: ...esent AND there is an active device in Serial Port 1 the active device will be assumed ASCII terminal and the user interface will be text The user interface will be either the graphics system or the A...

Страница 109: ...an ASCII terminal PF5 Key The default boot list located in firmware will be used The key switch will be set to Service mode Numerical 5 key will be the equivalent key on an ASCII terminal This mode wi...

Страница 110: ...PAP The user must supply the PAP The third category is unattended start mode In unattended start mode the system will boot from a defined boot device but the keyboard will be locked until the user ent...

Страница 111: ...ng any input from the user The keyboard controller will be programmed to lock up until the Power On password is entered Firmware Flash Update Design The firmware flash update can be performed in norma...

Страница 112: ...s merged from the flash ROM to the image The VPD information is duplicated in the recovery block and composite image which ensures that there is a protected copy of the VPD in case the composite image...

Страница 113: ...its The L2 cache is tested if it fails there will be a momentary indication when the display becomes available the error is also put in the SMS error log During system initialization when icons are be...

Страница 114: ...s several test scripts which check and exercise the various functions related to the chips on the SCSI adapter such as DMA and simulate mailbox commands If an error is detected an 8 digit error code i...

Страница 115: ...Post Indicators When the POST is finished the following screen displays Chapter 6 Firmware 6 11...

Страница 116: ...the adapter Memory Module Test all memory greater than 3 Meg SCSI Adapters are being initialized Network is also initialized if present Boot Disk System is attempting to boot from the default boot li...

Страница 117: ...removing any additional devices to or from the system ensure that the power cables for those devices are unplugged before the signal cables are connected If possible disconnect all power cables from...

Страница 118: ...nd boards by the edges Hold drives by the frame Avoid touching the solder joints or pins If you need to lay the device down while it is out of the antistatic bag lay it on the antistatic bag Before pi...

Страница 119: ...he shutdown procedure for your operating system refer to your operating system documentation b After you shut down the operating system set the power switches of the attached devices to Off c Turn off...

Страница 120: ...g Note the locations of the following then disconnect them from the back of the server Power cord Display cable Keyboard cable Any other cables and cords 7 4 Service Guide...

Страница 121: ...remove them 2 Grasp the sides of the cover pull it back slightly then tilt it back a few inches 3 Grasp the cover at the top front edge with one hand and just above the I O slots with the other hand 4...

Страница 122: ...Replacement To replace the cover perform the removal steps in reverse order 7 6 Service Guide...

Страница 123: ...covers as described in Covers on page 7 3 2 Disconnect all leads from the power supply to the drives in bays 1 through 8 3 Disconnect all leads from the power supply to the system planar 4 While supp...

Страница 124: ...wer supply perform the removal steps in reverse order Note Make sure that the voltage switch setting on the new power supply matches the voltage provided by the electrical outlets 115 115 Voltage Swit...

Страница 125: ...get bay if installed a Insert a small flat blade screwdriver under the side of the cover plate b Lift the cover plate and remove it from the server s front panel Save the cover plate for future use 3...

Страница 126: ...nstalling a replacement drive reinstall the cover plate a Locate the original blank cover plate that was shipped with your server b Insert the tabs on the right end of the cover plate into the target...

Страница 127: ...e a media drive perform the removal steps in reverse order Note Be sure to set the SCSI address jumpers of the new drive to match those of the drive that was just removed Chapter 7 Removal and Replace...

Страница 128: ...ribed in Covers on page 7 3 2 Remove the three screws that secure the airflow baffle to the system chassis slide the airflow baffle to the front of the system unit and remove the airflow baffle 3 Remo...

Страница 129: ...Three screws are shown near the screwdriver in the following illustration The fourth screw is located under the housing on the left hand side 5 Gently pull the housing away from the bracket that hold...

Страница 130: ...in the housing d Slide the drive out of the bay 7 If you are replacing a disk drive from bay 1 note the SCSI address of the disk drive you just removed Replacement To replace a diskette or lower hard...

Страница 131: ...escribed in Covers on page 7 3 2 Note the slot number of the adapter you are removing 3 Loosen and remove the screw on top of the adapter s bracket 4 If there are any internal cables attached to the a...

Страница 132: ...slot follow the instructions given under Replacement 7 If you are not installing another adapter in this expansion slot replace the expansion slot cover a Slide the cover over the open expansion slot...

Страница 133: ...the covers as described in Covers on page 7 3 2 Remove the three screws that secure the airflow baffle to the system chassis slide the airflow baffle to the front of the system unit and remove the ai...

Страница 134: ...3 Locate the memory module connectors and determine which memory module you want to remove 7 18 Service Guide...

Страница 135: ...the memory module 5 Store any memory modules you are no longer using in a static protective package Make a note of the kit size and speed for future reference Chapter 7 Removal and Replacement Procedu...

Страница 136: ...lled in connector A due to space limitations 1 The memory modules are keyed so that they can only be inserted one way Align the memory module notches with the keys in the memory connectors 2 Insert th...

Страница 137: ...le a Insert the airflow baffle toward the front of the system unit b Slide the airflow baffle toward the rear of the system unit being careful not to disturb already installed memory modules c Insert...

Страница 138: ...nplugged the power cord and the standby power Power LED is Off before removing the CPU card 2 Remove the two screws that secure the top and bottom CPU brackets to the system chassis then remove the CP...

Страница 139: ...ibed in Covers on page 7 3 2 Remove the screw that secures the retainer to the service processor bracket Attention Make sure you have unplugged the power cord and the standby power Power LED is Off be...

Страница 140: ...3 Remove the service processor Replacement To replace the service processor perform the removal steps in the reverse order 7 24 Service Guide...

Страница 141: ...her battery may present a risk of fire or explosion Removal 1 If you have not already done so remove the covers as described in Covers on page 7 3 2 Locate the battery on the system board Battery 3 Us...

Страница 142: ...ou slide the battery toward the front of the server push it down into the socket Notes 1 Be sure to tell the customer that the time and date need to be reset 2 Ensure that the battery polarity is corr...

Страница 143: ...rewdriver push upward on the lower set of plastic tabs that protrude through the front of the system unit chassis 4 Swing the bottom of the speaker and fan assembly away from the front of the system u...

Страница 144: ...dy done so remove the front covers as described in Covers on page 7 3 2 Remove the three screws that secure the airflow baffle to the system chassis slide the airflow baffle to the front of the system...

Страница 145: ...3 Remove the screws that secure the operator panel display assembly to the system chasis Chapter 7 Removal and Replacement Procedures 7 29...

Страница 146: ...e door 5 Pull the display panel from the front of the system unit and unplug the operator panel display cable from the rear of the operator panel display Replacement Replace in reverse order 7 30 Serv...

Страница 147: ...s from the rear of the hard drive in bay 0 9 Remove the two screws that secure the mounting cage for the diskette drive and hard drive in bay 0 Remove the mounting cage and set it aside 10 Unplug the...

Страница 148: ...7 32 Service Guide...

Страница 149: ...Chapter 8 Parts Information Chapter 8 Parts Information 8 1...

Страница 150: ...8 2 Service Guide...

Страница 151: ...crew air baffle 21 40H6672 1 Top CPU bracket 22 0322550 2 Screw CPU card bracket 23 73H3254 1 Bottom CPU bracket 24 40H6616 1 CPU card Model E20 100 Mhz 40H5381 1 CPU card Model E30 133 Mhz 12H1702 1...

Страница 152: ...Danish 1399583 1 Keyboard Bulgarian 1395881 1 Keyboard Swiss French 1385882 2 Keyboard Swiss German 1391409 1 Keyboard Norwegian 1391511 1 Keyboard Dutch 1391410 1 Keyboard Portuguese 1399046 1 Keybo...

Страница 153: ...u Philippines Puerto Rico Saudi Arabia Suriname Trinidad Taiwan U S A except Chicago Venezuela 2 62X1045 Chicago U S A 3 6952311 Argentina Australia New Zealand 4 13F9979 Abu Dhabi Austria Belgium Bul...

Страница 154: ...Index Part Number Country 8 14F0051 Liechtenstein Switzerland 9 14F0069 Chile Ethiopia Italy 10 14F0087 Israel 11 6952291 Paraguay Colombia Uruguay 8 6 Service Guide...

Страница 155: ...0B Flush cache F0C Jump to CRC verification code in RAM F0D Compute composite image CRC F0E Jump back to ROM F0F Turn off cache F10 Check if composite image CRC is valid F11 GOOD CRC jump to composite...

Страница 156: ...isplay function F4D Bit map file read into memory start processing F4E End bit map display function F4F IO MEM over temperature or bad System Board F50 Initialize CMOS RTC periodic interrupt F51 Syste...

Страница 157: ...ASCII terminal initialization exit FA9 p9 driver initialization FAA p9 driver exit FAB Keyboard driver initialization FAC Keyboard driver exit FAD Mouse driver initialization FAE Mouse driver exit FB0...

Страница 158: ...ump to composite image FF0 Manufacturing Check for Parallel Port hook FF4 Manufacturing Start flag not received FF5 Manufacturing Invalid Start flag received FF6 Manufacturing Receive character timeou...

Страница 159: ...ics standalone 4 1 diskette drive and lower hard disk drive removal and replacement 7 12 E Enable Unattended Start Mode program 5 14 5 19 error code to FRU index 3 1 error codes POST 3 1 F fan and spe...

Страница 160: ...leged access password 5 14 5 19 problem determination MAP 2 7 programs ASCII Terminal System Management Services 5 16 Q quick entry MAP 2 2 R related publications xix removal and replacement adapters...

Страница 161: ...t program graphical System Management Services 5 5 Test the computer Text Based System Management Services programs 5 13 Test the Computer program ASCII Terminal System Management Services programs 5...

Страница 162: ...IBM Part Number 93H4991 Printed in the United States of America on recycled paper containing 10 recovered post consumer fiber April 1997 SA38 5 2 3 93H4991...

Отзывы: