Start your system
Starting your system without an HMC attached
Starting your system with an HMC attached
18
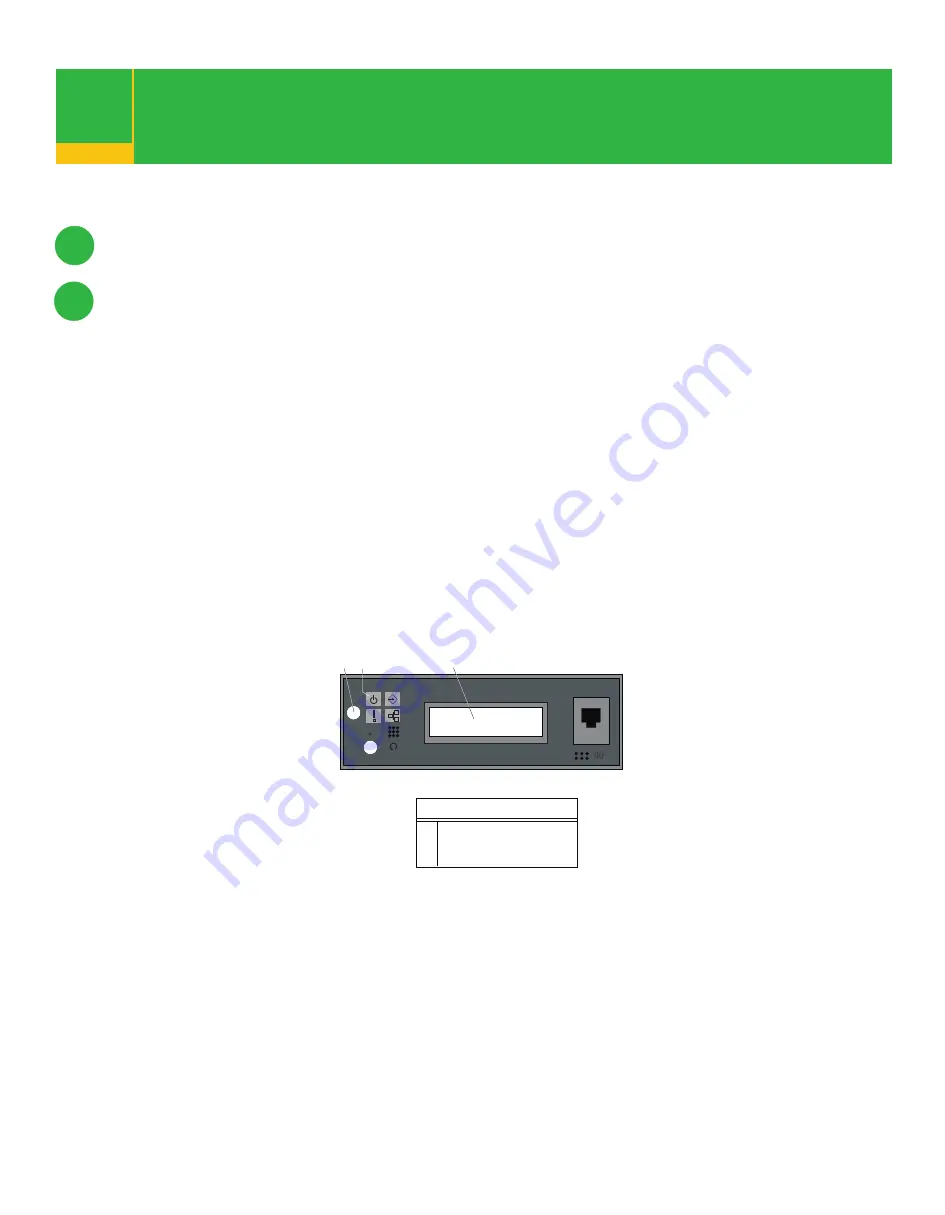
Press the power-on button on the operator panel.
After you press the power-on button located on the operator panel,
observe the following:
1) The power LED begins to blink visibly faster.
2) The system cooling fans are activated and can be heard accelerating to
operating speed.
Note:
There is approximately a 30-second transition period between the time that the
power-on button is pressed and the power LED remains on solid (no longer blinking).
3) The power LED stays on solid. Progress indicators, also referred to as
checkpoints
,
are visible on the operator panel display.
If you just completed installing, or are not going to install an I/O drawer, run system
verification. Go to “Step 19 “Run System Verification”.
If you are installing an I/O drawer, go to “Cabling the 7028 Model 6C4 to a 7311 Model D20
I/O Drawer”, located in the
eServer pSeries 630 Model 6C4 and Model 6E4 Installation Guide,
order number SA38-0605.
18.1
18.2
After the required cables are installed and the power cables are connected, the HMC user interface
provides a power-on function to turn on the power to the system. The power-on button on the operator
panel can be pushed to initialize the system, but the preferred method is to use the HMC if you are starting
logical partitions. Progress indicators, also referred to as
checkpoints
, are visible on the operator panel
display as the system power is turned on. The power LED on the base system stops blinking and stays
on, indicating that the system power is on.
The base system and I/O subsystems are powered on through the system power control network
(SPCN). When power is applied, the power LEDs on the base system go from blinking to continuous,
and the power LEDs on the I/O subsystems come on and stay on. This situation indicates that power
levels are satisfactory in the subsystems.
2
1
3
R
E010
1
Power-On Button
2
Power LED
3
Operator Panel Display
Illustration Key


